Showing posts with label maps and adventures. Show all posts

Saturday, July 11, 2026

An Abandoned Magician's Lair

Wizards are a fickle bunch - coming and going, going and coming: and on occasion disappearing entirely - either in pursuit of some goal known only to them, or on occasion, through some misfortune during magical experimentation or having communed with entirely the wrong abyssal entity. Herein is provided the lair of one such departed magician - whether he (she?) will return or not? Only time will tell - and only the Fates know the answer. 

Chateau Ultime; William Thomas Horton

Regarding doors:

A door marked with the letter S is Secret.
A door marked with the letter L is Locked.
A door marked with the letter J is Jammed (stuck) and must be forced open.
A door marked with the letter J is Ajar (slightly open): the party can get a glimpse of what is on the other side without opening it (and what is on the other side will be able to glimpse the party, as well!)

Some doors may have special properties unique to them. These doors will be marked with an asterisk (*) and the nature of the special door will be noted in the description of the room into which the door leads. 

For a PDF version of this adventure - click HERE

Map scale is 10 ft. 

A - Ground Level


A1 - Entrance

The floor and walls of the large space are stone - once white, but grown dingy with time. Above, a wooden platform, 15 feet above the floor, rings the room: open in the center, accessible via two flanking stairwells on the north east and north west corners. Dim light pours down from the opening and the smell of oil lamps belies the source.

In the center, under the opening, the floor is tiled - black and white. The black tiles are trapped - any character unknowingly walking across the open space in the center has a chance to trigger the trap: wherein several streams of oil - alight - pour down from the ceiling: save vs Dragon's Breath for 2d6 damage.

Of note of the doors exiting this room - on the north wall are two doors; the one on the left (or, to the west) has no handle nor knob. It cannot be opened from A1: only from A3.

A2 - Votive Hall

Against the west wall is a small shrine - sized for a Halfling. On it can be found several votive statues - indistinct in their character - all facing a central figure which looks like a column of slime. The votive statues can be removed - they are free-standing - but if a character does so, the statue will rapidly melt: any character exposed to the effluvium into which the object melts must save vs Death against its poisonous emission. 

Demon Pursuer, Charles Keen

A3 - Skeleton Chamber

Standing at attention in this room are 9 Skeletons (B42) who will attack on sight. On the floor are various bones and torn articles: including - if the party takes the time to gather it up - 300 silver pieces and 60 gold pieces.

The door to the right - or, east - has no handle nor knob from the inside. It cannot be opened from this side once closed. 

The door to the left - or, west - can be opened: but is stuck and must be forced.

A4 - Lounge

In the northern half of this space are luxurious furnishings: a smoking chair, an ottoman, and a wide divan. They are in derelict state - age and wear causing tears and filling to spill out from them. Sniffing about the ruin is a lone Giant Shrew (B42).

A5 - Library

Lining the west and east walls are book cases; a wide, circular wooden table is on its side, as if cast towards the north wall. About one third of the book cases have books in them - the majority of which are ruined with time and mold.

Characters who rummage through the books on the west wall have a chance of activating a poison gas trap: save vs Death for all characters in the room, however any character more than 10 feet from the wall (such as, perhaps, rummaging through the shelves on the east wall or guarding the doors), may re-roll if they fail the first time.

Sufficient rummaging will produce two workable spell-books: one on the east, which contains Detect Magic and Floating Disc; the other on the west, containing Magic Missile, Protection from Evil, and Detect Invisible.

A6 - Trapped Hallway

This hallway is nondescript - with sconces for torches, empty, affixed to the walls at interval. However, 10 feet west of the curve in the hall is a pit trap, 10 feet deep. At the bottom of the pit trap - if triggered - is a desiccated corpse carrying a sword, a satchel, and wearing a mundane horned helmet. In the satchel can be found a set of lock picks, 140 silver pieces, 60 gold pieces, 2 sapphires valued at 50 gp each, and a large emerald valued at 100 gp.

A7 - Foyer Down

A nondescript wooden railing rings the room - bound to the wall with iron hooks at waist height. In the south-west corner, several woven baskets contain cobwebs and dust. In the south-east corner, a stairwell down leads to room B1.

Waiting on the railing near the stairwell is a Spitting Cobra (B42). It is partially concealed by the railing, as it rests on the hooks - so it will surprise the party on 4-in-6; 3-in-6 for a party with at least one Elf. If the cobra is dispatched in a loud manner, or if otherwise a suitable ruckus is raised, the inhabitants of room B1 may hear and send up 1d6 members of their party (re-rolling 6s) to investigate.

B - Lower Level


B1 - Ghoul Crypt

The stone of the floor of this level is darker than on the upper levels - a granite, roughly hewn, by the feel of it. Several defaced statues recessed into alcoves in the wall depict saints. Five Ghouls (B35) occupy the room. A set of stairs descends from room A7 at the northern side.

Wedged in the door on the western wall to B2 is a corpse on which the Ghouls have been feeding. The corpse has nothing of particular value on it.

The door to the south-east, leading to room B5, is sentient: see B5 for details.

B2 - Holding Crypt

Several modest sarcophagi align perpendicular to the room, unopened. There is evidence of human habitation - but in a bare sense. The room is otherwise empty. 

Chandelier, Florence Huston

B3 - West Sanctuary

Recessed statuary can be seen in the south and west walls. In the center of the room, a mosaic pattern has been inlaid in the floor to correspond to a hanging decorative candelabra. In the place of candles, six oval-cut diamonds (100 gold piece value each) are inlaid. 

A contact poison has been applied to the settings - so if they are removed, there is a chance the removing character will come into contact with the poison - save vs Death.

B4 - Hidden Connection

Cobwebs have accrued thick in the corners of this small space. Otherwise, the corridor is empty.

B5 - East Sanctuary

Masonry supplies are stored in this space. Trowels, blocks, and so on - tools in the north section, raw material in the south-east corner. A character which investigates the tool section will find, among mundane objects, a case that contains a single Potion of Healing. A table with stools and a lantern - unlit, empty of oil - sits in the south-west corner.

In the detritus to the south-east, 3 Robber Flies (B41) are waiting. Hidden among the building materials is a chest containing 400 silver pieces.

The door to the north is sentient and will typically (4-in-6 chance) speak with a party that takes the time to examine it. Listening at the door - for example - may prompt it to ask what they are listening for; or checking for traps may prompt it to giggle and claim it tickles. When speaking - the silhouette of a face comes across the door, bouncing about depending on whom it is speaking to, a shadow in reverse: the wood grain being lighter, almost illuminated, where the face is present.

The door appreciates polite company. If the party is courteous, it will tell them about the inhabitants of the dungeon who come and go - perhaps of the people who built it in times long to remember. It may tell them about secrets and hazards on level A or B. Its knowledge of level B is complete; its knowledge of level A is only 60% accurate. It has no knowledge of level C. If a party is discourteous, it may lock itself, or become willfully stuck. It is particularly fond of knock-knock jokes (as all doors surely must be) - a referee is advised to have a few on hand for role play purposes.

C - Upper Level


C1 - Upper Atrium

In this space only, the floor is wooden - and with minor effort, a character can hear what's going on in room A1 below. The center of the space is open to A1 - with a railing to prevent an accidental fall. The ceiling is 15 feet above the floor - except in the center above the opening: where a perceptive adventurer will note a protrusion: on which several oil spouts are burning, as lamps, and from which will proceed the burning streams, per the trap in A1.

Two stairwells in the northern corners lead down to A1.

C2 - Whispering Hall

The west wall of the room houses four recessed alcoves. Of the four, three contain busts: each in various states of defacement. Inside one of the busts - accessible if smashed - can be found 2 sapphires, 50 gold piece value each; inside another, 3 rubies, 100 gold piece value each. On the east wall,  north of the hall leading into the room, is an alcove set up to contain candles. There are a dozen or so candles - unlit - present: with room for a dozen or so more.

While in the room, characters will hear whispers - barely distinct: not loud enough to truly understand what they communicate.

C3 - Former Trove

Some wooden furniture appears to have been smashed in this room - and a chest has been uncovered. The lock on the chest appears to have been broken open, and all contents of whatever had been in it before have been removed. 

C4 - False Walk

This room appears to be longer than it is - leading northward. However, after 10 feet or so of walking, the floor gives way as an illusion: dropping whomever is walking on it into room A3: a fall of 15 feet.

C5 - Drafty Hall

The long potions of the halls marked here have a draft to them as the party walks through. When the party first enters this hall, roll 1d4 - and once per hour thereafter, roll 1d6. The draft goes silent for a round when the roll is made. 

Prison Jail Rustic Pennsylvania; Martin Dubreuil

On a 1 through 4, one of the four normal doors in the hall becomes a secret door from the perspective of characters in C5 only: fading into the wall. To pass through, the party must search and find the door again - after which, it seems obvious as to where it was. In subsequent checks, doors made secret in this manner are made mundane (that is, not secret) if a different door is rolled. 

On a roll of 5, the existing secret door is not made mundane - remaining secret - and a follow up 1d4 is rolled to determine which additional door is made secret in addition. If the follow up roll would indicate a pre-existing secret door (such as if multiple 5s had been rolled in sequence), the target door becomes mundane instead.

On a roll of 6, no changes are made to the existing secret door - but the door to room C9 will change: becoming mundane if it is secret; or becoming secret if it is mundane.

C6 - Study

The walls of the room have tapestries hung from them - appearing to depict a cloudy night sky. For furnishings, the party will note a writing desk, a cot with no mattress, and a set of three amphora urns.

In the desk can be found antique inks and pens, valued at 80 gold pieces to a collector or magician. In one of the amphora can be found a spell scroll stuffed in: with spells Infravision and Detect Magic written to it.

C7 - Hall of Experimentation

Manacles dangle from chains hanging from the walls. Three tables with hooks and other restraints adorn the space - each with dark stains on and around it. The room is otherwise empty.

C8 - Freezer Room

Meat hooks hang from the ceiling and crates line the walls, containing various decayed materials. The room is cold - inexplicably so - and there are stains ingested.

C9 - Treasure Chamber

The floor is covered by three large, heavy rugs. About them can be found 3,000 silver pieces, 1,200 gold pieces, and a spell scroll containing Protection from Normal Missiles, Dispel Magic, and Polymorph Self.

  • When a character first steps onto one of the rugs, however, a timer starts:- After 1d6 Turns, 2d4 Skeletons (B42) appear in room B1: crawling up from anonymous graves.

  • After an additional 1d3 Turns, the Skeletons from B1 will have moved to A1 and an additional 2d4 Skeletons will replace them in B1.

  • After an additional 1d3 Turns, the initial Skeletons will move to C1; the second Skeletons will move to A1, and a Bone Golem (X33) will appear in B1.

  • After a final 1d3 Turns, the Bone Golem will move to A1, the initial Skeletons will walk through C5 to C9, and the secondary Skeletons will move to C1.

The goal of these guardians is to prevent the interlopers from leaving. If a party member falls, two Skeletons will drag the corpse down to B3 via the shortest route. If left there, the character's corpse will join the Skeletons' number by the next new moon.

Skull Skeleton Monochrome Dead; Peter Dargatz


Public domain artwork retrieved from OldBookIllustrations.com and the National Gallery of Art. Open license artwork retrieved from Pixabay. All artwork has been adapted for theme. Attribution to the piece and artist is provided in alt-text.

Saturday, April 19, 2025

Secluded Cloister

For a PDF version of this adventure, click HERE

Regarding doors:

A door marked with the letter S is Secret.
A door marked with the letter L is Locked.
A door marked with the letter J is Jammed (stuck) and must be forced open.

Suitable for inclusion as a side-level in dungeons of 1st level.


A – Entrance

The ceiling is high in this room – vaulted, such that the contour matches the odd pointedness of the space’s North and South extent. The floor is stone and has a stickiness to it – odorless.

The door to the South-East corner is trapped. It opens inwards, towards a character, and when opened, a grey, viscous material burbles out – bubbling and popping – prompting a Save vs Dragon’s Breath for any character within 20 feet. If the save fails – the failing character must then make item saves for any metallic articles they carry – excluding coins or precious metals – lest it rapidly oxidize and fall to the floor, useless.

A generous referee may allow items lost in such a manner to be repaired in town – costing half the value of a replacement.

Dreadful it Was; John Tenniel

B – Chapel

Four Acolytes (B30) chant in the company of an evil Village Priest (Cleric Lvl 3). Against the north wall, there is an angular shrine, in which can be found a dead bird. The priest is reading its entrails.

Along the East and West walls are engraved alcoves in a similar pattern to the shrine, albeit apparently for ornamentation rather than function – and against the South wall can be found a table with reagents and incense. The incense is worth 30 gold pieces, if collected, 500 silver pieces is contained in a lockbox under the table, and 1 ruby gemstone (valued at 100 gold pieces), is set atop the table beside.

C – Mosaic

An ornamental mosaic floor depicting a circle inlaid by many angular shapes is laid in the floor. In torchlight, the floor has an odd green-ish glow to it: harmless, and also of no particular use.

At interval are four alcoves, in which four skeletons stand at attention, spear in hand. The skeletons are long dead – not animate – and behind one of them, hidden with a false brick, is a pouch containing 100 silver pieces and an emerald worth 50 gold.

D – Pit and Bypass

A pit trap – which will always open if one or more characters is at least halfway across its 20’ length – is flanked by two secret doors. The pit is 30’ deep, causing 3d6 in falling damage to any character caught on it when it opens.

There is a 3-in-10 chance of a Crab Spider (B43) having taken residence at the base of the pit.

The hallway hidden by the secret doors has a deep burgundy rug along its length and smells vaguely pleasant. From within the non-trapped hall, the secret doors are obvious and easy to open.

E – Skull Shrine

A deep groove is cut in the floor at an angle, such that it is difficult to stand in the space. This comes to a T near the East edge of the room, where a human skull sits in the center. Along the walls are abstractly painted shapes depicting irregular, sharp edges.

If the skull is disturbed, a choking and burning gas emits from a nozzle underneath it: any characters caught in the room must Save vs Poison or die – although a generous referee may allow a bonus to the roll for characters closer to the door than to the trap. 

Combination, Use Dental Mirror (Unknown) and Jewelry Ornament (Theodore de Bry)

F – Bunk

Bunk beds capable of sleeping six are crammed into the Southern part of the room. On the Northern side is a desk – no chair – and supplies for writing. Three spell scrolls can be found: between which the Cleric spells Detect Magic, Protection from Evil (x2), and Cause Light Wounds can be read.

G – One Way Stair

A set of stairs leads upwards – atop which is a trapdoor. The trapdoor will, if climbed through, deposit the climber into the pit in section D, but will not re-open once the character is on the other side: the seam of the door being supernaturally flush and undetectable if viewed from section D.

H – Unfortunate Traveler

The body of a less fortunate adventurer is slumped in the corner – stinking with decay: unrecognizable. On its person, the corpse has some rudimentary equipment – a sword, leather armor, a helmet – and a backpack containing 1 potion of Water Breathing and 50 gold pieces.

Within 20 feet of the corpse – due to the smell – the chance of wandering monsters is doubled at each check. Whether this is twice as often or twice as likely when checked is at the discretion of the referee. 

Clockwork (1), unknown artist

I – Pendulum Trap

Hidden in the ceiling at this junction is a bladed pendulum which may trigger as characters walk beneath it. If triggered, the blade swings down, automatically resetting itself if not prevented from recessing into an opposite groove: rolling to hit with a THAC0 of 17 for 1d8 points of damage on hit. 


Public domain images retrieved from OldBookIllustrations.com and the National Gallery of Art and adapted for thematic use. Attribution in alt text.

Saturday, January 18, 2025

Domicile Beyond the Caves

Archway in the Balkan Mountains, Thomas Allom
For a PDF version of this adventure, click HERE.

Regarding doors:

A door marked with the letter S is Secret.
A door marked with the likeness of a keyhole is Locked.
A door marked with the letter J is Jammed (stuck) and must be forced open.

Grid scale is 10 feet. Suitable for 1st or 2nd Level. 

A - Ground Level


A1 – Cave Entrance

Hidden away just beyond the light in a natural cavern, two oak doors hang firmly against a hewn section of cavern wall. One side of the door has a huge bee hive attached to it – holding it closed. Inside the hive can be found 1 Killer Bee Queen and 12 normal Killer Bees (B37).

A2 – Antechamber

Central to the following chamber is a circular pool of water beneath a vaulted ceiling – ten feet at the walls, 14 feet in the center of the vault – the pool, long stagnant, being suspiciously clear. About the walls are sculpted arches, ringing the room. Any item dipped in the water will emit a mysterious glow – half as effective as a torch for the purposes of illumination, but lasting twice as long.

In addition, on the four corners of the southern section of the space are four columns. The columns reach the top of the wall, but are flat on the tops – meaning they jut out a bit from the wall as it rises. A character checking the north-east column-top will find a hidden sack containing 200 silver and 10 gold pieces.

A3 – Guard Chamber

The walls of this room are ringed by sculpted decorative arches akin to those in A2 – Antechamber. Standing at attention in a circle are five Skeletons (B42) – as if themselves the vertices on a pentagram.

A4 – Smoking Amphora

Filling the room are a number of tall amphora – three to four feet, positioned along the floor at random. From these pour a strange smelling smoke – partial opacity, but made worse by torchlight – which seems to hover in a layer, two feet from the floor on the bottom up to seven feet (or, three feet from the ceiling) at the top. The smoke is harmless.

To the west is a stairwell leading down to C1 – Grand Foyer – trapped. The fourth step down is on a spring-plate: chancing to trigger a scythe-like blade coming on the triggering stepper: THAC0 17, 1d10 damage. The trap resets itself after 1d3 turns.

A5 – Ceiling Mirror

Mounted at this point in the corridor is a large mirror – easily three feet by six – embedded in the ceiling. It reflects the ground below it, but is slightly dim: as though the backing has lost its luster. In reality, the mirror is a magical surface which can be climbed through as though diving into viscous liquid, exiting in C2 – Treasure Chamber.

A6 – Forgotten Store

To the north and south, heavy stone shelving – wide, as though to hold great volume or heavy cargo – sit empty of anything but dust. Two Giant Shrew (B42) rummage about the far side of the room; a skeleton wearing tattered but once colorful clothing sits on the far side of the north shelf as if dead in hiding from the door. On its person can be found 200 silver pieces.

A7 – Going Up

A spiral stair leads upward to B1 – Lookouts in the north-west portion of the space. On the east wall can be seen stone pegs, now empty, but once used to hold up weapons, armor, curtains or other hangings, hats – who knows? The room is otherwise empty.

A8 – Unknown Lair

Straw litters the floor – stale – but a strange, mildly unpleasant odor emanates from it, as though used for bedding for a wild thing. But whatever the thing is (or was), the room is empty.

A9 – Snake Den

Along the north portion of the room are lacquered wicker crates – atop which can be found dried flowers, slowly graying. Three barrels are stowed in the south-east corner. Among the foliage are repining four Spitting Cobra (B42): fat and happy from a recent meal.

B - Upper Rooms


B1 – Lookouts

Two Kobolds (B37) are keeping watch here. If they detect a party coming up the stairs from A7 – Going Up, they will alert the other Kobolds in B3 – Kobold Warren.

B2 – Dressing Room

Aging armoires can be found in the room, a rack for shoes and hats, as well as a mannequin of surprising longevity. While any of the clothing or adornments in the room have fallen into disrepair – the mannequin is semi-sentient: and while it cannot walk or otherwise depart the room, it will give fashion advice and feedback in a high, but slow and grinding voice emanating from nowhere: its face a blank, featureless oval.

B3 – Kobold Warren

Nesting material and other domestic folderol litter the room, a group of Kobolds (B37) having taken refuge here. One Chieftain is accompanied by 4 Bodyguards, alongside 6 standard Kobolds. They are on the run from somewhere else – their destination not yet determined – having been ousted by Hobgoblins from their normal home.

Among them, they have 600 silver, 40 gold, and two gemstones that the Chieftain uses as ear ornamentation – worth 15 gold pieces each.

C - Lower Chambers


C1 – Grand Foyer

About the north and south walls is a belt of mosaic tiles, depicting a city of many buildings. On the floor, a thick carpet – moth eaten, but still functional and appealing – stretches towards the door on the east wall from the foot of a stairwell leading to A4 – Smoking Amphora.

Before the door float two glowing, floating scimitars – behind them, two glowing floating spears. The scimitars fight as HD2 constructs creatures, AC 6; the spears: HD1, AC 8 – they will not engage unless the party attempts to press past them to the door, signaling their intention by the spears crossing, blocking the door, if the party approaches within 15 feet.

C2 – Treasure Chamber

A horde has been placed in this room – in the north, a locked chest contains 700 silver, 200 gold, 3 fine-cut diamonds worth 100 gold pieces each, and five emeralds, 50 gold pieces each. In the south, several rugs and carpets (worth 20 to 80 gold pieces each, but weighting 120 coin weight) are bound and stacked beside a bowl brimming with incense (25 gold piece value). 

On the east wall, a large mirror – six feet by three – hangs: the reflection strangely dim: not tarnished, but not entirely right. The mirror is magical in nature and can be stepped through, as if diving into pudding: it will deposit the passer-through out the matching mirror in the ceiling of A5 – Ceiling Mirror.

Mirror, Nicholas Gorid

Public domain images retrieved from OldBookIllustrations.com and the National Gallery of Art and adapted for thematic use. Attribution in alt text.

Saturday, May 25, 2024

Red Tree Hollow

Bryce Canyon Hoodos USA Tree; Anemone123
Click HERE for a PDF version of this adventure!

Suitable for 1st Level

C - Traders & Tree

A winding, narrow trail ascends a sheer mountainside: leveling off and proceeding into what at first appears to be a nook in the wall, carved out by eons and eons of runoff. However: after a short distance, the walled valley opens up into almost a caldera: with several caves visible descending into the rock.

Scale: 10 ft

In the center of the clearing is a scraggly but large tree - its gnarled boughs wreathed by crimson plumage - red leaves budding like so many flowers from the rough, knotted wood. Beneath the tree rest three Traders (B43), sheltering for a while alongside their mule: presently unladen.

W - West

The ceilings are vaulted, supported by arched stone throughout. Roots and other intrusions have made their way through, leaving debris haphazardly strewn across the floor: to be kicked into piles by repetitious passage of feet.

W1 - Atrium

Columns rise to support a vaulted ceiling, the bases thereof resting atop carvings of figures in archaic armor. They are shorter than men, but taller than dwarves - their features, otherwise, have been obscured: as roots and cracks have taken a toll.

W2 - Crushing Corridor

Arches continue to line this corridor - however, concealed halfway through is a tripwire which - if activated - will cause the upward part of one of the central supports to fall: striking anyone in the same marching rank as the character triggering the trap.

An attack is made against any eligible target - THAC0 18 - for 1d10 damage. The falling block is supported by a chain which, a few moments after falling, will retract itself: re-tightening the tripwire and resetting the trap.

W3 - Treasury

In the south wall, three recessed spaces house two aged wooden boxes. One box contains specie amounting to 10 gold and 500 silver pieces. Four Giant Shrew (B42) are nosing about in the northern half of the space.

W4 - Refuse Chute

The walls of this chamber are lined with six stone cubes - 3 by 3 feet each. They will open - either up or down - along the top: which may surprise a character sitting or standing on one. If the character is surprised and falls through, they will fall a short distance, slide along a scree mound, and find themselves deposited near the base of the path leading to section C.

W5 - Beetle Chamber

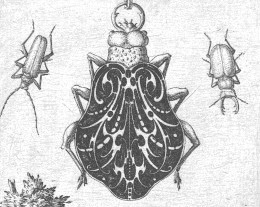
Plate 43, Animalia Rationalia et Insecta; Joris Hoefnagel
Blank walls face inward - remnants of thread can be found by the discerning eye about the floor. The room is ringed by a narrow ridge - just barely too small to be seating, but of appropriate height from the floor - above which, near where the arches vault into the ceiling, a wooden rod rings all walls except south: broken in places, but still hanging.

The room is occupied by 8 Fire Beetles (B31).

N - North

The walls are cut stone and the ceiling is arched: supported at interval by columns, appearing to likewise be decoratively cut from the rock. Cracks are forming with age - and in places, roots can be seen dangling through them.

N1 - Dry Fountain

Semi-circular fonts - long dry, but bowled and with a thin pipe leading into the walls above each of them - adorn the corners of this space. A mosaic is inlaid in the floor - but it has been scratched and damaged: the image has been lost.

N2 - Idol's Barracks

Wooden bunks line the north and south sides of the room. They are fragile with age. In the center of the west wall is a female statue, hands held in opposition: one up, one out and down. The is carved to be wearing a diadem, an amulet, and a ring on both fingers. Inlaid in the diadem is an opal worth 50 gold pieces; inlaid in the amulet is a single pearl - 10 gold piece value - and what appear to be sockets where others might have been. On each of the ring fingers is a diamond: small, but flawlessly cut - each worth 500 gold pieces.

Beneath one of the bunks on the north side is a foot locker containing 200 silver pieces. It is locked, but it is also decrepit and can be opened somewhat easily with a bladed weapon or sufficient force.

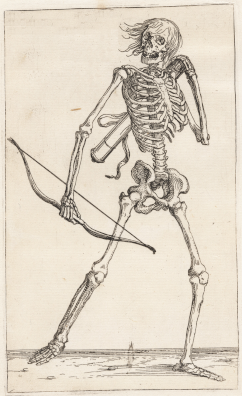
Skeleton of a Man with a Bow; Teodoro Filippo di Liagno

N3 - Skeleton Guard Room

Arrayed against the walls in silent vigil are 10 Skeletons (B42). They will attack on sight - and if a party opens the door to N2, they will, after 1d4 turns, walk down to investigate. One of the skeletons wears a medallion and helmet. The medallion is of electrum, worth 10 gold pieces.

In the room, itself, slumped against the south-west corner is a knapsack in which 40 gold pieces, 30 feet of rope, and 4 unspent torches can be found.

N4 - Dry Pool

An ellipsoid space, shallow and concave with a drain clogged by dust and rock at the bottom occupies the northern portion of this space. An elaborate face is carved into the wall with pouting lips: almost as though it was designed to spout water into the basin.

N5 - Illusionary Stairs

In the center of the room is a spiral stair leading upwards. It seems to continue up and up - but doesn't truly ascend anywhere. In general, 1d4 turns will pass expiring before a party will suspect foul play: but no matter how long they spent on the stair, only one turn is required to return to the chamber.

Four thin, tall structures hold four silver figurines in the non-cardinal corners of the central square: an owl, a frog, a fox, and a bison. These are worth 5 gold pieces each.

N6 - Treasure Hive

Broken wooden furniture is piled in parallel lines, north to south, in the center of the room. On the south-west side, there is a hive of Killer Bees (B37). In addition to the queen, 9 bees float around the space.

In addition to the healing honey, 20 gold pieces, 6 platinum pieces, and a ring with a mood stone worth 20 gold pieces can be found if a party disassembles the hive.

N7 - Sword Sanctuary

Against the far wall from the door, a stone pedestal - shaped like the plateau in which the crag is situated - holds a flamberge stuck into it. The blade will come loose to any Lawful character and is as a +2 one-handed sword: dealing an extra 1d6 damage against Chaotic magic users on successful hit.

In addition, 900 silver pieces net have been arranged about the floor in stacks 9 high. Inlaid in the wall behind the sword are red ruby gemstones arranged to reflect light as to compliment the flamberge with a canopy of autumn. There are six gems in total, worth 100 gold pieces each, that a deft hand might pry from their sockets. 

E - East

These caves are square - no vaulting - and the carvings are more utilitarian: square lintels holding up the ceilings, very little adornment on the walls. However the walls are in good shape - with very little debris and no obvious cracking.

E1 - Den

Five Wolves (B44) are resting in the space. Beneath their mess, the floor is tiled, with a mosaic resemblant of the tree outside - albeit in a much larger, fuller state. Among the folderol in the space is a pouch containing 100 silver pieces.

E2 - Dwarfish Watcher

In the two south corners sit two braziers - unlit, but not dirty either. In the center of the north wall, a carving in the likeness of a dwarf guards the way. If a party passes, it will address them, speaking slowly and in a low tone. The statue is lonely - but cannot be removed: its purpose being to guard this place and its magic bound to it. For Lawful parties, or for parties with Dwarves in them, a +2 bonus to the Reaction Roll should be applied. For positive results, the statue will be friendly and helpful; for negative ones, it may be flippant or sarcastic with them - perhaps to their detriment.

It is not aware of the secret doors - but has seen the gnomes in room E3 moving out from behind the south-east brazier inexplicably. It and they do not see eye to eye.

Gnome Petting Cat; Robert Anning Bell

E3 - Gnome Zone

Relatively new wooden chairs and a small table have been set in this space. Sitting at these tables are 4 Gnomes (B35) of stout character. They have 100 silver pieces between them and are of gruff, unfriendly - albeit not expressly combative - demeanor.

E4 - Inner Foyer

This chamber is nondescript - however the north door, when opened, has a 2-in-6 chance to jam: preventing any from passing east-west along the narrow corridor.

E5 - North Gem Chamber

The floor of the room is obscured entirely and the view into the room is milky as a strange, acrid-smelling fog cloaks the space. It is clammy, with a brief thrill to the touch - but is otherwise harmless.

Along both walls are what appear to be stone sarcophagus - six in total, arranged north to south - with the westernmost two being smaller than the others. If the north-west sarcophagus is pried open, inside can be found 200 silver pieces, two cat's eyes worth 20 gp each, and three small emeralds with 60 gp total.

E6 - South Gem Chamber

Like E5, a faux fog mysteriously hangs in this room. Also like E5, the fog is largely harmless.

In the nook to the south-west are three amphora - in one, ashes; in one, 30 gold pieces; in one, a pouch of several small aquamarine: worth 200 gp together.

Gold Crystal Jewelry Jewler; multanka


Public domain and open licensed artwork retrieved from Pixabay, OldBookIllustrations.com, and from the National Gallery of Art and adapted for thematic use. Attribution in alt text.

Saturday, April 13, 2024

Maze of Moaning

Scale: 10 ft.
For a PDF version of this adventure, click HERE.

Regarding doors:

A door marked with the letter S is Secret.
A door marked with the letter L is Locked.
A door marked with the letter J is Jammed (stuck) and must be forced open.
Swing direction is indicated for some doors. Doors without swing direction slide upward, as a portcullis, but are still solid - blocking line of sight and missile fire when closed - unless expressly indicated.

Suitable for 2nd level characters.

Head of Minos; John Trivett Nettleship

1. Entry

A stairway terminates in an open space - the statue of a faceless man, arms crossed across his chest, stands in the center of the room. If the characters pass it by, a groaning can be heard - a mourning - almost as though the statue is lonely and enjoys their company. It is otherwise non-sentient.

2. Embalmer's Room

On the north wall are two wooden shelves sparsely populated by funerary tools - including picks for the removal of organs and preservative chemicals: bottled and caustic to smell. Some metal tools, rusted, lie on the floor.

3. Guardian Dead

Torn paper and cloth litter the floor. Seven Zombies (B44) stand aimlessly in the room. On the south wall, past the Zombies, a preserved corpse hangs chained to the wall, its feet off the ground, with a heavy chest affixed to it via the same chains. The chest has a padlock on it, but contains 1,000 silver pieces if opened.

4. Equality in the Grave 

Two concrete slabs interrupt the stonework in the floor - parallel to one another, running north to south, like grave-covers. A torn purple banner hangs half-way on the north wall. The room is otherwise empty.

5. Four Pillars

Four columns - ionic in style - hold up the ceiling: equidistant from one another and from the outer walls of the room. Torch sconces - empty - are mounted to the east and west walls. The room is otherwise empty.

6. Tilting Coffin

The east and west walls of the space have a slow-rising ring about them: about one foot in depth, it starts at ground level at the door to the north and terminates at the secret door in the south, having reached the ceiling. Two braziers stand with ashes at this culmination.

In the center of the room is a metal coffin, upright and open - propped up by a stone pyramid, on a dark red-brown octagonal dais. If a character approaches, there is a chance the trap will trigger: the dais tilts aggressively backwards, prompting a Save vs Paralysis: on failure, the character falls into the coffin - which snaps shut and crushes the character for 2d8 damage.

If the character dies, the trap resets, spilling the pulp onto the floor. If the character survives, the trap does not reset, trapping the character inside until the others can find a way to retrieve their comrade.

7. Oratory

Stone benches - three to the west and three to the east, face northward towards a similar stone platform, 8 feet wide and elevated by 8 inches from the floor. A decorative chain rings the platform - valued at 90 gold pieces, if retrieved, but weighing 450 coin weight.

8. Robber's Corridor

Brass lamp stands line this hall - three each to the east and west - and aging evening blue valance slowly molders along the ceiling line. A Robber Fly (B41) is hidden among its drapings.

Treasure Chest Chain Castle Brown; Pixabay User HOerwin56
9. Lost Treasure

Two skeletons sprawl on the floor. 

Against the south wall are several amphora - inside which can be found coins - 1,200 silver and 100 gold - in addition to some residues, implying liquids that once might have been valuable as well.

10. A Ladder Down

A dim blue light illuminates this room. In the center of the space, a circular platform slowly rotates - oddly, however, its foundations show no seam on the floor. Looking down into the platform, there are lines criss-crossing: the source of the illumination - and a ladder leading down. Room 16 is visible through the orifice - and that is where the ladder will lead if climbed.

The moaning of the statue in room 1 is still audible in this space.

11. Honorarium

Six plaster statues stand - supported at a slight angle by wooden sheets stuck into grooves in the floor - in formation, facing each other, east and west. On the south wall, an oval embossing decorates and frames a center image which has faded to time. The plaster figures appear unpainted - but if chipped away - actually house the bodies of forgotten, embalmed humanoids.

12. Junction

The moaning of the statue in room 1 is still audible in this space. Beyond it, however, it becomes too faint.

13. Snake & Saint

Two altars, north and south, funnel the eye to the far side of the room - where, in the west nook, a statue of a kneeling man rests. A Pit Viper (B42) is curled around the statue; at its feet and along the altars can be found 600 silver pieces, strewn about.


14. Zombie Pass-Way

A metal lattice runs across the ceiling - from which chains dangle, affixed beneath the lattice to allow movement, but not to exit the space. Eight Zombies (B44) are collared to the chains, having freedom of movement within room 14, but not outside of it. In the north-east and south-west corners of the room are stone constructs almost akin to hearths. In the north-east, ashes cover a box - in which 300 silver coins can be found; in the south-west, five gold-lined porcelain figurines: value 100 gold pieces each.

15. Tribute Room

The north and south walls house man-sized cubbies in which the skeletons of long dead and desiccated men at arms still stand. On the west wall is a mosaic depicting a kneeling figure in midnight blue armor; although the details and some of the color have worn off.

16. A Ladder Up

An oblong, hexagonal structure is divided asymmetrically in the center of the room - parts filled with water, parts dry. The water emits a thin blue light, illuminating the space. 

A ladder extends - slowly rotating - upwards. If climbed, this ladder leads to room 10.

If placed in a jar, the water will continue to emit light for 2d4 turns before becoming mundane (albeit pure) water. Mundane water poured into the hexagonal retainer does not, itself, illuminate: instead visibly sinking to the bottom, where it forms a bubble - distinct in itself.

Design for a Beetle Shaped Pendant; Jean Toutin
17. Beetle Sanctuary

A dead adventurer has been skeletonized by eight Oil Beetles (B31) who linger in the room. On the dead adventurer's person - among some largely useless mundane gear, can be found 200 silver pieces and a pearl worth 100 gold.

18. Undead Storage

Scraps of material - small and broken, largely unidentifiable - litter the floor. Eight Zombies (B44) occupy the room among the folderol.

19. A Gray Trick

A door in the south wall appears identical to other portcullis style doors in the complex - however hides a small sloped compartment behind it rather than a true room. Confined to the compartment is a Gray Ooze (B36), sliding out of the compartment as soon as the door is opened. The Gray Ooze will be entitled to a surprise round, if thus liberated.


Public domain or open license artwork retrieved from the National Gallery of Art, Pixabay, and OldBookIllustrations.com. All artwork has been adapted for thematic use. Attributions in alt text.

Frieren: Beyond Journey's End

N-Spiration - Frieren: Beyond Journey's End About Frieren The saga that is Frieren  started (and continues) as a serialized ...