Showing posts with label watchtower on the indigo river. Show all posts

Saturday, May 15, 2021

02.03 - Black Hammock Town

Ancient City; Gustave Dore

Black Hammock Town is a trading post and port town of 6,000 souls. Sitting along the banks of the Indigo River, it is situated approximately 9 miles from the ocean – as far inland as the winding river is navigable before becoming too shallow or unpredictable for ocean-going craft. To the East, the great ocean; the gateway to civilization – in every other direction, the new world – unclaimed territory fraught with hazards and potential fame.

Built on the ashes of an older settlement, the ill-fated ransomed colony based at the rumored Watchtower on the coast, Black Hammock Town, itself, sprung up in the last few years as rumors of war spur industrialists to seek out new sources of raw materials to ship home. Its population consists primarily of hopeful would-be explorers: trappers, foresters, and sailors looking to strike it rich on either the coming tide of trade or - preferably - a surprise windfall pilfered from forgotten troves.

Comprised of ten boroughs - Black Hammock Town provides a wide gamut of experiences, services, and encounters: more so than would be implied by its small population. From the north, trappers and trackers from the inland woods bring a consistent stream of trade from outer settlers: from its bustling docks, a link between the outer world and the inner wilds sees constant movement, constant new faces, and constant trade. And across the river - nestled into the tip of the sandy island protecting the harbor - Far Bank: where ne'er-do-wells congregate in abundance.

Districts of Black Hammock Town

Circling the town is a wooden palisade - twelve feet high with no parapet, but with stone watch stands flanking each of three gates and arrow loops (functional, where not obscured by buildings outside the perimeter) at interval along the palisade's length. Inside the gate, construction is mixed, with larger, more opulent buildings having been bricked with coquina but smaller or more economical buildings constructed of timber. Outside the gate, the architecture is much more rustic - thatch, timber, and questionable building standards.

Far Bank

Accessible only by water, the Far Bank is quiet, commonly, during the day, and raucous at night. Presumably, the daylight serenity is benefited by hangovers, interest paid on the evenings prior. There are rarely guards and the perimeter is said to have several sneak-holes where one might slip into and out of the encampment: avoiding the main gates and oversight of the guards on a return trip.

Governance District 

Dominated by the Governor's Mansion - a part residence, mostly governmental function building - the Governance District is where those who want to have a say in the movement of the colony and to ride the wave of interest pouring into the region make their home. Buildings in this part of town are more adorned, more extravagant - and often ostensibly more guarded.

Market District 

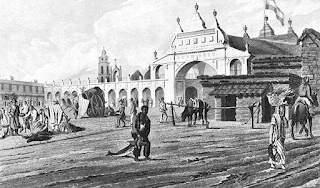
The Marketplace of Buenos Aires; Emeric Essex Vidal

The Market District - central to the town - is commonly congested, the scene of both traveling merchants, street food vendors, and outdoor performing artists. Likewise, many who work in the peripheral supply industry supporting the maritime interests of the town make their home in the Market District, livelier than other parts of town - and more affordable than the Governance District.

On a given day, 3d4 merchants selling various wares - some acquired in Trappers'  Market and brought in, others acquired from inbound ships, can be found about the bazaar.

North Gate

The poor district, North Gate is a primarily residential area, housing the working class - longshoremen, shipwrights and trades-folk, and similar - continuing to grease the cogs of the local Black Hammock economy. There is some crime in this area and the sanitation is par for the course: it is usually safe to walk the streets alone at night.

North Wharf 

Of the three piers at Black Hammock Town, the North Wharf caters to bulk goods and raw materials. The environment is brusk and businesslike. A couple languages are spoken - as settlers have come from several backgrounds - but there are too few people to truly build natural animosity. It is mostly vacant at night - excepting scant security around varied warehouses. It is the place a body will be found if a body "happens" to wash up.

La Rixe (The Brawl); Charles-Melchior Descourtis
Smugglers' Wharf

Its piers officially designed for recreational use and its small buildings officially decontamination or quarantine structures, Smuggler's Wharf is known to be an avenue to move goods into and out of town quickly: often via connections in the Far Bank. With the commonness of this knowledge, it's often a point of talking around an ale as to speculate why Smugglers' Wharf is allowed to persist. 

To an adventurer, it's easy to find a boat here - and after trust has been earned, potentially other things as well.

South Gate 

The South Gate, just outside the palisade beyond the wealthy Governance District and Egg, is home to anyone who, having not yet gained entry to the town (or unable to gain entry to the town!) but who desires to gain standing with the leadership. Likewise, it is where most of the mercenary presence of the community resides - both those contracted in the defense of the township and also those who are not, seeking an opportunity to sell their swords - congregating in a small camp along the wall.

South Wharf 

The port of the South Wharf caters more to finer goods - wrought things, tinkered things, luxury items: clocks, glassware, the like. The buildings are cleaner than the North Wharf and usually guarded due to their contents. The atmosphere is likewise somewhat more light than other port areas of town - despite many of the workmen living in the North Wharf.

Arm and Escort; Eugene Delacroix
The South Wharf, due to its proximity to the Governance District, is a preferred living place - with many buildings serving two functions to accommodate housing merchants who prefer their privacy or newcomers hoping to focus on making a good impression with the local elite.

The Egg 

Named for its conspicuous shape on a bird's eye map, the Egg is the clerical district: serving to house the temples of Black Hammock Town and those who maintain them. There are 150 odd clergy in the district - only about half of which can be found within the Egg at a time, the others moving about the township in day to day business: chief among them, a Vicar (Cleric 4) named Bendis the White. Acolytes make up the vast bulk of the group; though some other leveled Clerics move about within the ranks.

Trappers' Market

The governor has decreed a quarantine on many goods and some services acquired from the exterior of the township, originating in the wild lands of the inland continent, in anticipation of potential contamination from a new unknown. North of the perimeter, a market has thus sprung up. Most of what is available in town is likewise available out of town - with the exception that coinage is less common, a barter economy being more valuable to a colonist or trapper living outside the reach of the civilization's footprint.

Goods and Services

There are four blacksmiths operating between three smithies in Black Hammock Town:

  1. Yaromir the Dwarf - a lean sort, commonly wearing pelts and furs on cool days and going shirtless on others. His most common fare is nails, agricultural equipment, snares, and other metal needs as presented by trappers or settlers living out of town.
    Yaromir can be found in the Trappers' Market.
  2. Seloue the Jeweler - being an artist in a past life, Seloue is known for her penchant to detail and design in her work. She is capable of bog standard work, however might be intrigued by a challenge, or a more intricate and thus interesting, assignment.
    Seloue can be found in the Market District.
  3. Ageric the Board and Dora of the West Hills - Ageric, a wiry former soldier in his middle years, has a history with and an affinity for the mercenary presence in Black Hammock. Dora - his wife - is less talkative, Ageric being the face of the business, but is oft talked about, in reference to her Dwarfish heritage. They have no children, Men and Dwarves being genetically incompatible.
    Ageric and Dora can be found in the South Gate.

Characters looking for accommodation can find lodging in one of three Inns:

  1. Hagan's Rest, a mid-budget establishment, is run by an Elf named (unsurprisingly) Hagan. It is staffed to provide lodging as well as dinner (or lunch, if the staff likes you). Hagan is level 3 and an interested practitioner of the esoteric arts: capable of casting Charm Person, Floating Disc, and ESP. The clientele of Hagan's Rest tends to lean towards traders and travelers.
    Hagan's Rest can be found in the Market District.
  2. Black Welcome - a smaller facility - is run by a smooth-talking human named Erluf. Erluf is quick to make friends and always has a wry smile on his stubbled face. The clientele of the Black Welcome leans towards profiteers - including adventurers and mercenaries.
    Black Welcome can be found at the South Gate.
  3. The Blow Hole, its patrons primarily comprised of sailors, is an "inn" and tavern run by a former merchantman named Gunder. Gunder is tall and sports a pot-belly: something developed in the time between now and when he once plied the waves.
    The Blow Hole can be found in the North Wharf.
Shady Inn; Alphonse Louis Pierre Trimolet

Optionally, three physicians ply their trade in Black Hammock Town. Though the effect of having a doctor around is at the discretion of the referee, it is suggested that a character under the care of a physician will recover 3 hit points daily rather than rolling and may, with treatment, re-roll a failed Saving Throw to shake a disease or injury.

  • Jaromir, a former soldier (Fighting Man, level 1) who trained as a medic: subsequently attending a formal physician's academy before transporting himself and his family to the new reaches of Black Hammock Town, resides in the Governance District.
  • Red Vuldret, a female human with shocking red hair which she wears loose, was formally schooled by a convent. She practices in the Governance District and takes a keen interest in the politics of Black Hammock Town, finding herself at odds with The Egg on routine occasion.
  • Terric the Fast, a surgeon, known for his ability to move quickly, but who is gruff and can come off as abrasive to sensitive patients, operates out of the South Wharf. He is very industrious, more productive and more quick than his contemporaries: working longer and more frequent hours.

Unlicensed or untrained physicians - folk healers and the like - can typically be found as well. Their effectiveness should be half that of a trained physician, but they are cheaper and more abundant. On a given day:

  • 1d8 unlicensed healers can be found in the Trappers' Market.
  • 1d6 unlicensed healers can be found in the North Gate.
  • 1d6 unlicensed healers can be found in the Far Bank (occasionally carrying lotus or its like, as well)
  • 15, less the sum of the other districts (to a minimum of 0) can then be found in the Market District.

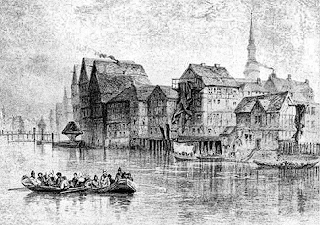
Hamburg Before the Fire; Auguste Etinne Francois Mayer
In the Far Bank, a witch named Faileuba sells reagents, unguents, and trinkets said to bring health or luck in the wildlands, bought from the Bullywugs, stolen from Toad Magi.

In the Trappers' Market, a traveling salesman can usually be found - 60% chance on a given day - selling alchemical supplies, reagents, and similar. What he doesn't have, he tends to know where to get - and may offer a bounty for someone to go get it in sufficient quantity to supply his own inventory.

Three taverns operate in Black Hammock Town, as follows:

  • The Blue Heron is an upscale establishment run by an Elf (4) named Gable. He will on occasion see parishioners from The Egg in his establishment - and the selection he offers is finer, more expensive, than the mean. Gable can cast Light, Shield, Detect Invisible, and Web.
    The Blue Heron is located in the Governance District.
  • The Pony's Porter is a low-brow establishment: selling basic (and arguably watered down) wares at prices affordable to the working class of the North Gate neighborhoods. It is a decent respite for adventurers and mercenaries not looking for trouble and is owned by a female Magic User (2) named Rothtrude. She tends not to come out, instead deferring most operations to her staff, allowing her more time to her studies. Rothtrude tends to know Hold Portal and Ventriloquism, but carries with her a scroll of Sleep.
    The Pony's Porter is found on the northern edge of the North Wharf.
    A character drinking at the Pony's Porter must Save vs Poison or, on the following day, suffer an acute hangover that day, imposing a -1 penalty on all d20 rolls.
  • The Black Eye, named in the honor of its pugilist proprietor, a Fighting Man (3) named Froi, operates out of a mobile cart - moving to a new locale roughly twice a week. Froi is a former seaman and fond of both a fight and a bottle: of which he has a wide, changing variety available.
    The Black Eye can be found on the Far Bank.

Characters seeking laborers - such as treasure-haulers or torch-bearers - can typically find them hanging out in the Market District or Trappers' Market: 18 in total, typically, split between the two locations. Characters seeking men at arms can typically find them - around 8 on a given day looking for work - commonly congregating at the South Gate.

Dramatis Personae

Stunned; Herbert Cole
The following individuals make up the upper crust of Black Hammock Town - the movers and shakers, so to speak - whose favor (or disfavor!) can have immense impact on an adventuring group.

  • The governor of Black Hammock Town is a Human woman named Gueva. She is married - according to posterity - though her husband has not come to Black Hammock, instead continuing to work (temporarily or who knows?) in the northern kingdoms. Some controversy follows her, as she is consistently accompanied by a male Elfish consort, Aodhan.
  • Halfling Milton, son of Adonimen, and spouse Chrysanthe (Halfling 2), is an envoy from afield, representing a mercantile union. They have two young children and are accompanied by Xandri (Halfling 3), sister to Chrysanthe, who is very protective of the two younglings.
  • Dwarfish venture explorer Bromil, accompanied by his siblings: brother, Tikomir; sister Stetsia (Dwarf 2); Bromslava, wife to Tikomir; and Nikola, his grown (but still relatively young) son. Bromil and company are seeking mineral rights, secretly believing that Mithril might be found as a sand, able to be smelted, in the beaches to the south.
  • A crone, Onisimova (Dwarf 1), serves as advisor to the governor. Her motives are her own and she lives alone - leading to some degree of speculation as to what might have motivated her to sojourn to this remote place in her twilight years.
  • Human Bero, member to a mercantilist family, is accompanied by business partners Hammen and Gipp, seeking to gain traction with the shipping market - with some barely-concealed preference to the activities going on in the Far Bank. Hammen in particular is fond of vice: always accompanied by an "understudy," Engeram (FM 1).
  • Savaric of Lis, a former adventurer (Thief 2), is the unofficial guide of Far Bank. He knows the ins and outs and has relationships with dozens of small time operations. He is more bluster than ability, but has a lot of friends - if needed. Among his friends are two adventuring companions: a Hylos (Halfling 1) and Milla (MU 2). Milla tends to keep Sleep and Magic Missile in her arsenal.
  • A former adventuring party - the Hardwood Hammerers - is using the gains from their recent findings to establish themselves in the elite: working out of the South Wharf and risking other people's lives instead of their own. The brains behind the act is a female Conjuror (MU 3) named Ellin. Ellin can cast Hold Portal, Light, and Mirror Image. Other members of the troupe include Moisent, female fighter (FM 2); two Halflings, Haemon the Quick (level 2) and Ynta the Quicker (level 3); and two Elves Caitir (level 1) and Boisil (level 2). Caitir can cast Read Magic; Boisil, Read Magic and Darkness. They will, to a trusted contractor, give information about the Fette Tante in exchange for an agreed cut.
  • The oldest family to the colony, among the founders and with relatives in the original, ill-fated colony, is led by Engilbert (FM 3) and his grown son Sichar (FM 1). The matriarch of the family having passed, Engilbert prioritizes security and cohesion of the colony, fearing what lies outside the walls - arguably being the source of the quarantine on exterior goods. Engilbert has two young children - Okter and Sigeric - who are guarded by a Dwarfish tutor, Milogost. Likewise, Engilbert has a teen-aged daughter, Liutgarde, whom he guards zealously - but who, unknown to him, is a frequent (albeit anonymous) visitor to the far bank (Thief 3).
The Port of Monaco; Adolphe Appian


Public domain artwork retrieved from OldBookIllustrations.com or the National Gallery of Art and adapted for thematic use. Attribution in alt text.

Saturday, April 10, 2021

08.02 - Watchtower Compound Standalone PDF!

Leper's Tower near Aosta; Karl Giradet and Rodolphe Topffer
Watchtower on the Indigo River:
The Watchtower Compound


At long last, the PDF version of the Watchtower dungeon promised three times now! Though the announcement post is shorter than the usual post - the PDF linked sure isn't: 143 stocked & keyed rooms, interconnected by a central theme, with several "new" monsters and with special care to try to make the PDF more usable: both in print or at your computer - as part of the larger Indigo River series or stand-alone, as with the Floundered Cog last year.

One step closer to completing a full-formed hex adventure along the cursed shallows of the Indigo River flood plain.

Delve on, readers!

Saturday, March 13, 2021

08.02 - Progress Point: The Watchtower Under-Dungeon

The Under-Dungeon at the Watchtower Compound

Scale: 10 ft.
PDF... still... forthcoming...

This section of the map - unless otherwise specified - is only accessible at night. It is one level, but there are three points of entry: two from the compound grounds (the guardhouse and the well) and one from the Watchtower, itself, in the courtyard. The exact nature of these entrances are detailed in their relative entries.

During the day - the entire space (with a couple noted exceptions) is totally filled with sand, the walls dispersed into clay and fulgurite. If a party is caught underground in one of these filled spaces when the dawn breaks, they are inundated as the semi-extra-dimensional construct falls apart: their orifices and organs filled with silt and earth. A character consumed in this way will suffocate - but must roll for System Shock on the following moon-rise when the under-dungeon reconstitutes: at which point, if they succeed, they will rise again as an undead: bound to the dungeon, itself.

Wandering Monsters

While underground, the referee should continue to use the wandering monster table provided last August, however in lieu of rolling a D6/6, they should instead roll D3/6 - thus limiting the potential encounters underground to exclusively the "Angry Dead" or "Corruption of Nature" nested tables.

Entry

The walls of this section are made of coquina; the floor, earthen - packed clay.

 E1 - The Sandy Stair

A stairwell leads downward from the courtyard (1W31) - each stair made of firm sand, eight inches thick, suspended in the air by an unseen force. The walls are coquina. Lurking beneath the stairs is a hostile Needler Golem (as Needleman, FF 67) - scratching at the wall as though looking for the secret door, which is a two-foot square set four feet off the ground, able to be pushed back and outward, as a window, if detected.

E2 - Skull Octagon

In the center of the space, a primitive skull has been etched into the floor. The way to E3 is not obscured - but there are post-holes in the floor and ceiling at the dots indicated.

  • If the door to E4 is discovered and pulled open, the left eye of the skull rises as a touch-plate. 
  • If the door to E5 is discovered and pulled open, the right eye of the skull rises as a touch-plate.
  • If the iron bars to E3 fall, the nasal openings rise as a touch-plate.

If any the touch-plates are depressed, the corresponding egress reverts to its initial state: closed for E4 and E5, open for E3. The nasal openings cannot be depressed unless a sword or equivalent mass is set in the its dais.

E3 - Sword Room

The entrance to this space is open, though there are post-holes in the floor and ceiling. At the rear of the room is a mosaic, blackened, that appears to depict a man in armor with a sword. In the center is a stone dais in which a rusty sword is set. The sword obviously does not fit in the hole. If removed, thick metal bars will drop into the post-holes, trapping any north of them inside. The current sword is mundane, belonging to a Thoul residing in E4.

E4 - West Horn

Five Thoul (B 43) occupy this space, mulling over one Potion of Speed and 2,000 electrum pieces. One of the Thoul is trying to figure out a +1 Sentient sword, profiled as follows: 

  • Intelligence: 11, Ego: 7
  • Communication Mode: Speech (Lawful Tongue)
  • Powers: See Invisible Objects, Detect Shifting Architecture, Detect Evil or Good
  • Alignment: Lawful

Due to his undead nature and its affiliation to Chaos, the Thoul cannot use it.

E5 - East Horn

Several chains lie broken on the floor and some undefinable staining can be seen on the walls. Two Lemure demons (MM 23) occupy the space.

E6 - Hidden Atrium

The doors to the south are heavy, but not locked. The secret door to the north is stuck, if discovered. There are two black-purple curtains hanging, floor to ceiling, on the south-east and south-west walls. One Lemure demon (MM 23) occupies the space, sniffing against the door to E1 - which is hidden, approaching from either end.

Skull; Hans Wechlin
E7 - Skull Altar

Starting ten feet from the door to E6, the floor in this space is gray tile. To the south, an altar stands as an island in a small recessed "moat." The recess is filled with silver - 5,000 pieces of it. Atop the altar is an obsidian skull and a stand for it, though it appears the skull has been shattered into multiple razor-sharp pieces. The obsidian, itself, is worth 400 gold pieces. The secret door to E8 is closed and hidden, but loose.

E8 - Escape Corridor

The doors to E6 and E7 are obvious from this space. There is a bar against the wall which would allow easy blocking of the door to E7. Along the narrow hallway are six alcoves in the walls, alternating left then right, in 5 of which can be found a silver idol: each worth 500 gold pieces. In the northern part of the chamber can be found a skeleton stuck to the ceiling in roots. The skeleton is wearing rags, antiquated style, and has a pouch in which can be found some personal odds and ends - but more interestingly to the players - 600 gold pieces.

In the ceiling is embedded a Grasping Vines entity. Disturbing the skeleton will alert it; lingering in the room has a 2-in-6 chance to alert it per turn spent. The vines will attack, attempting to strangle characters beneath them.

Sunken Maze

The floors of this section are tiled in dark stone not native to the region; the walls appear to be likewise bricked. Ceilings of hallways and corridors are arched.

M1 - Maze Foyer

The octagonal space is cooler than E1, the air heavy. Neither the door to E1 nor to the north-west is locked, though the door to M6 is.

M2 - Holding Cells

This space is girded by iron bars, rusting but sturdy. Each door has a 2-in-6 chance of being locked, randomly determined at the start of each night cycle. In one of the six enclosed spaces - also determined randomly - is waiting some Grasping Roots. These roots function normally against enemies within the same room, but will also attempt to grasp enemies in adjacent rooms: if successful, they will deal 1d6 damage per round instead of their normal damage as they attempt to pull a grappled character through the bars.

The exit leading to M9 is open and obvious, 3 feet in diameter.

M3 - South Cell

The heavy wooden door to this room is locked. There are chains on the walls and a shallow tin on the floor. Two Shadows (B41) are lurking in the space.

M4 - Crumbling Room

The ceiling of this space drips and the north wall appears to be crumbling: the black stone seeming to be transforming slowly into wet sand. For each turn in the room, there is a 1-in-6 chance for the decay to progress, causing the ceiling to collapse and fill the space with earth.

M5 - North Cell

This room, like M4, is wet; however it is not crumbling. The walls buzz with unseen energy, but will radiate magic if a detect type ability or spell is used on them. There are chains, as in M3, but they will turn to sand if they are touched.

M6 - Angled Hall

The doors to M8 and M7 are stuck; other doors are not. Seven Manes (MM 17) are roving through this room.

M7 - Sinking Space

This floor to this room is differently colored than the walls, a gray-white swirl - but still tiled. The exit to section C is not visible at first - but if at least two characters enter the room, their weight will cause the floor to sink downward up to four feet, exposing the exit.

The Dagger Dropped; Harry Clarke
M8 - Ghoul Horde

Five Ghouls (B35) inhabit this space. Between them can be found 4,000 electrum. In addition, eight copper ingots (80 gp value each) are embedded in the north and west walls.

M9 - Escape Diamond

The tile floor in this room is loose, shifting as the characters step on it. Two short tables - suitable for a foyer hall - adorn the walls: one on the north east, one on the north west walls. In the west corner, the loose tiles will collapse, if stepped on: revealing the passage to M2.

M10 - Broken Diamond

The door to this room is stuck. Chains hang between the walls, but the links are square. Characters entering this space appear to shear sideways, much like looking at something half submerged in clear water - to no detrimental effect; they appear normal upon leaving the room.

M11 - Corner Crypt

The door to this space is locked. Two short end tables, suitable for a foyer hallway, sit against the north-east and north-west walls. In the south corner is a recess in the floor - two feet deep - large enough for a body.

M12 - Disorienting Cache

The door to this space is locked. When a thief attempts to pick the lock, it will always succeed: however, when the door is opened, a character will find themselves looking into M13, instead. Characters walking through the door will be deposited in M13 (with the door curiously closed behind them) - upon exit, they will exit facing the correct direction: potentially disorienting the mapper.

Inside the true M12 is a cache: several period suits of clothing, somewhat aged but very formal and elaborate, valued at 300 gold total. Between them also can be found 600 pieces of gold specie and a pendant inset with Imperial Topaz: the pendant is worth 700 gold pieces.

The exit into section C is not affected by this hex.

M13 - Trick Diamond

A broken table lies against the north-west wall. Otherwise, the room is empty.

M14 - Hound Junction

A pile of straw lies on the floor to the west. Three Hellhounds (X33) are proceeding through the area - each wears a collar with a jeweled buckle: the buckle being an effigy in representation of the entity with which the dungeon's necromancer originally made pacts. These collars are worth 400 gp each. Hanging from the ceiling in chains is a skeleton, facing north - with a diamond (100 gp value) in its mouth and a chest (locked and trapped; it will spout a small flame gout at someone opening it without disarming the mechanism, Save vs Breath against 1d8 damage) containing 4,000 pieces of silver.

M15 - West Desecration

The door to this space is stuck. Inside, 11 Manes (MM 17) are tearing up what appears to have before been a plush study, comprised of a divan, a writing desk, a writing chair, and a book case. Each Manes is wearing a silver chain worth 100 gold pieces. In a locked drawer on the writing desk can be found 1000 gold pieces. In a vase on top of the book case - 2-in-6 chance that it will have been knocked to the floor - is a small sack containing six gemstones: one tourmaline worth 10 gp, three black pearls worth 50 gp, one royal sapphire worth 100 gp, and a large diamond worth 500 gold pieces.

M16 - South Desecration

The door to this space is broken. Inside is a shredded carpet and splinters: an article of furniture must have been here once, but it has been intentionally damaged beyond recognition.

M17 - East Desecration

The south and east walls are lined with crates containing rusted chains and implements. On the door, on the inside, is a desiccated corpse, nailed to the wood. Its eyes have been removed and the sockets, as well as the mouth and ears, are full of sand. If the head is turned, the sand will pour out and the floor. It will empty after 1d4 rounds, if allowed, after which point in the south-east corner will collapse, opening the way to section C.

Fantasy of an Antique Tomb with Fragments of Architecture and Sculpture; Carl Schutz
M18 - Rooftop Trove

The door to this space is locked. Within, several chests and sacks of loot are visible... on the ceiling. Within a locked chest is 1,000 gold pieces and 2,000 silver pieces. Further, within a sack are 2,000 silver pieces. A glass case is on an end-table (likewise, ceiling), containing two gemstones; a dark and a light stone. The dark stone is a peridot, worth 100 gold pieces; the light is a semi-precious facsimile, worth 10 gp.

The space is a hazard. While it may appear that the room is reversed in gravity, entering the room will not cause the characters to fall up. Instead, the floor is undermined by a tunnel in section C: entering the room has an X-in-6 chance to cause a collapse: where X is the number of characters in the room.

If the floor collapses, characters therein take 1d6 damage as they roll into section C.

M19 - Skeleton Guard Storage

The door to this space is locked. Within, six Skeletons (B 42) stand guard. The tunnel to section C is open and obvious.

M20 - Sleeping Diamond

Chains made from glass hang from the ceiling in loose arcs. Moving through the space has a chance to trip a container above, to which the chains are affixed. If tripped, all characters in the room and any within ten feet of the door must Save vs Poison, those outside the room may re-roll one failure, or fall unconscious, as though affected by the Sleep spell.

M21 - Treasure Room

The door to this room is locked. Inside is a horde of electrum, loose on the floor - 7,000 pieces. In the center of the room is a golden pelvis - if melted, worth 1,000 gp - which houses a large pendant with a ruby inlay: the chain long and thick, as though intended to be worn as a sash or belt. The pendant is worth 1,400 gp.

M22 - Grasping Roots

The door to this room is locked. Two skeleton-shaped engravings are present on the east wall: they are eerily lifelike to bones. The egress to section C is obvious - the wall having fallen away in that corner; however a section of Grasping Roots is lurking just on the other side, hanging from the ceiling.

Chancel of Lost Souls

The floors of this section are tiled in dark stone not native to the region; the walls appear to be likewise bricked. Ceilings of hallways and corridors are arched.

L1 - Lair Foyer

The ceiling to this space is domed. The floor is inlaid with a red-colored stone, paralleling the octagonal shape of the room. Exits to the west are covered by iron grates, but a door-less opening allows free passage on both sides.

L2 - Junction

The walls, at the fork, stop being bricked with stone and start being bricked with skulls of the same color. The floor is collapsed in the north-west, opening into a passage of section C, leading either north to L7 or south to C3.

L3 - Screaming Skull Phylactery of the Necromancer

The entrances to this space are guarded by green glowing bars of force. They cannot be bent, but can be dispelled. A chaotic Cleric who succeeds a Save vs Spells may pass.

On the floor is a wide red circle, with glowing green inlays in a Chaotic script. In the center of the circle is a pedestal - jet black - above which hovers a helmet which appears to be made from a human skull, but the eye sockets are widely distorted - double the size and too high - with ridges running down the temples and along the cranium.

The helmet is infused with Chaotic magic:

  • The wearer may enter and exit the under-dungeon compound regardless of day or night.
  • The wearer is granted control over the green bars to L3, L4, and L5.
  • The wearer will no longer be targeted by "corruption" entities from the random encounter table.
  • The wearer may expend a charge of the helmet to cast Lightning Bolt, Continual Darkness (2 charges for Continual Light), Invisibility (2 charges for Detect Invisible), Knock, or Charm Person.
  • The wearer gains additional spell slots, based on the net number of charges therein:
    • 0 Charges: No additional spell slots.
    • 4 Charges or more: +1 first level spell
    • 8 Charges or more: +2 first level spells, +1 second level spell
    • 16 Charges or more: +3 first level spells, +2 second level spell
    • 24 Charges or more: +3 first level spells, +2 second level spell, +1 third level spell

The helmet has 24 charges. It will regenerate 1d12 charges per evening, if exposed to the moonlight.

The helmet, also, is imprinted with the persona of the necromancer who built the under-dungeon: it will attempt to take control of anyone wearing it. At first donning the helmet, and subsequently at each new moon while in its possession, a Control Check must be made as an intelligent sword: the helmet has an ego of 6 plus half its current charges and is, as mentioned, Chaotic.

L4 - Horde of the Helmet

The entry to this space is guarded by a second set of glowing bars. Similar to L3, a Cleric who passed the save to enter must pass a second time to enter here and the bars may not be bent, but may be dispelled.

Two skeletons hang from the ceiling - one more north east, one more south west - both have golden spikes with topaz lined rings at the base jammed into their eye sockets. The spikes are worth 150 gold pieces each. An porcelain, gold-engraved idol hovers in the south-east alcove: it is worth 100 gold pieces. Four chests line the walls; each is locked, but each contains 4,000 silver pieces.

The Skeletons (B 42) are animate. They will attack with a +2 bonus, swinging themselves on their restraints, on the first round any character that does not first deal with them before interacting with any of the four chests.

L5 - North Skull Hall

At the curve, the wall stops being bricked with stone and starts being bricked with skulls of the same color. The door to L6 is stuck; the doors to L7 and L10 are locked. The entry to L8 and L9 are closed off by green glowing phantasmal bars - they cannot be bent, but can be dispelled. A chaotic Cleric who Saves vs Spells may pass.

Between the two doors to L8 and L9 is a trap - a large tile in the floor may depress if stepped on, which releases a gout of flame. Any characters caught in the trap takes 2d6 damage - a Save vs Breath is allowed to half the effect.

A character listening at the doors to L6 will automatically hear the soul walls.

Rolands Descent; Gustave Dore

 L6 - Wall of Mourning

The angled walls defining the northern border of this room, as well as the alcoves in the south, house howling souls - a writhing mass of living spirits, bound to the place, trapped and long since insane from their captivity. They cannot reach further than a yard or so from the wall - being bound to it - but their moaning is incessant and maddening.

In the center-most alcove on the northern wall is a single sword, driven into an ever-bleeding flesh pedestal. The sword is a +1 Sentient sword with the following profile:

  • Intelligence 9, Ego 1
  • Communication mode: Empathy
  • Powers: Detect Magic, Locate Secret Doors, See Invisible Objects
  • Alignment: Chaotic

Although the souls will not touch the blade, a character coming close enough to physically remove it will be close enough for the souls to grasp.

Any character coming within five feet of a soul-wall - including the funnel-like alcoves granting entry to the space - must Save vs Petrification or be grasped and grappled to the wall. The souls have a vampiric quality - draining 100-600 XP per round until the victim is wrenched from their grasp. A character reduced to 0 or fewer XP is absorbed into the wall, becoming one more soul trapped in the wall.

Turn Undead will cause a five foot section of wall per HD turned to shy away. Thus, a character grappled by the souls, if a turn is aimed at them, will be released immediately.

L7 - Far West Angle

The door to this space is locked. The egress to section C is loosely covered by brick, which will fall away if touched. The walls seem to slowly shift, as though faces are brushing across them: but if a character examines them directly, the faces vanish as though illusions and the wall is clean brick... only to return in the character's peripheral vision when the investigation ceases.

L8 - Near West Angle

Naturally mummified corpses have been laid on the floor at angles, parallel to the east and west walls - one each. The door to L11 is locked.

L9 - Near East Angle

Naturally mummified corpses, four of them, have been piled in the rear of the space. Five Thoul (B 43) appear to be trapped inside. They are half mad - having been turned to sand and returned over and over, but regenerating due to their undeath - and there is a chance they will negotiate, trying to leave the room.

The door to L11 is locked.

L10 - Far East Angle

In the southernmost section of this space, there are three naturally mummified corpses - all three damaged and gnawed upon. One appears to have been on a slab in the center of the south wall, the other two, stood up as metaphorical guardians. The guardian corpses are each wearing an electrum helmet - worth 200 gold pieces each. The slab corpse has a gold tooth - worth 10 gold pieces - and has 900 silver pieces in specie piled around them. Behind the slab, having been discarded or knocked to the ground, is a magical Shield +1.

The door to L5 is locked; the egress to section C is an open hole in the wall.

L11 - Angled Crypt

Bones line this chamber, piled on the floor. The bones show signs of breaking and gnawing. The doors to this space are locked; the egress to section C is an open hole in the wall.

Fulgurite Halls 

The caves have a shifting floor with walls of vitrified sand.

C1 - Well Chamber

The floor here is wet. In the south-east quadrant, there is a sinkhole - which a party may trigger if navigating that section. A character stuck by the sinkhole must Save vs Paralysis or sink - becoming stuck; the remaining party may try to rescue them, or the stuck character may attempt to exit, but each round thereafter until removed from the sinkhole, affected characters must Save vs Paralysis again or go under, suffocating.

There are no exits to this space during the day, excepting the north loop to C3. All other exits during the day are blocked by a solid wall of fulgurite. Attempts to dig through the space result in frustration, as the rest of the map is filled with loose sand in lieu of the listed contents.

C2 - Wish Receiver

Three skeletons are laid over a chest and satchel. Inside the satchel is 200 gold pieces and three gems - one worth 100 gp and two worth 50 gp each. Inside the chest is a single pearl, 10 gold pieces value, and 6,000 silver pieces.

C3 - Lair Passage

Scene in a Cave; George Cumberland
During the day, this chamber is filled with sand, blocking progress north. During the evening, there is no sand - but there are several ghostly streams of sand pouring down and piling, as though in an hour glass, where the sand never accumulates below. A character cannot touch this ghost sand - it will bounce off of a material component, rolling out and over as water over a hydrophobic surface: however so doing roughly one inch above the surface. Sand that is coerced into a bag will not touch the bag, maintaining this one inch difference within it, and weighing nothing to carry. However, if removed from the caves, the sand will turn to mundane sand at the following dawn.

C4 - Tiger Beetle Nest

Three stalagnates of fulgurite hold up the ceiling in this space. Four Tiger Beetles (B31) occupy the alcove to the south, hidden between the pillars. 65 gold pieces are scattered on the floor.

C5 - Shifting Space

During the day, this junction smells like fresh cut grass. At night, there is an odd glow, as though the moonlight is shining down through the sandy ceiling. A character which exits through the north-east exit at night must Save vs Spells or emerge from the closet, 2B3, in the Barn on the compound grounds. The transition is mono-directional.

C6 - Three Pillars

Two stalagmites flank a stalagnate holding the ceiling in this space. The smell of marsh emanates from the south and west passages - but there is no marsh to produce it. Some chitinous material resembling a Tiger Beetle can be found spread on the floor.

C7 - The Glow Worm's Hole

The floor in this space becomes softer and a slight glow radiates from the ceiling. Worm-like creatures have taken habitation there, occasionally leaving droppings that rain down. Characters spending a turn or greater in this space will be splattered: the glowing material will provide as much light as a candle (depending on how much is gathered/splattered) - its radiance lasting for 2 hours.

C8 - Dressing Cave

A structured dress, no one to wear it, is propped in the corner of this space. A locket - rusted through such that no picture can be seen - lies nearby.

C9 - Bone Hollow

Along the walls of this space, as it proceeds south to north, are ridges. These become more and more defined, resembling human skeletons: but if they are touched, they crumble - nothing more than sand.

C10 - Corpse Hollow

Two corpses - rotted and old - are sprawled on the ground. They are fellows to the Ghouls in C18: a character interacting with these corpses will potentially paralyze themselves: but are allowed to re-roll a failed Save vs Paralysis, representing the decay of the strange paralytic force exuded thereby.

The Under-Sand

C11 - Tiger Cranny

A Tiger Beetle (B31) is rooting through an empty wooden chest in this space. The iron bands have rusted and largely come loose. 

C12 - Reading Chamber 

The hallway to the south-west opens into a carpeted room. There is a velvet divan, a comfortable chair, and an end-table with candelabra, lit - it is surprisingly clean. In the space is a Poltergeist (FF 73), endlessly reading a long-faded manuscript.

The carpet can be rolled and removed. It is worth 1,000 gold pieces, but weighs 1,500 worth. The candelabra is worth 200 gold pieces. Under the carpet is loosely buried a solid oak chest - in which can be found 7,000 silver.

C13 - Failure of Egress

Five skeletons - two in the kit of a fighter, one with a holy symbol, one in robes, and one in leathers - lie on the floor, their cavities filled with sand. Sitting behind them, as though dragged, are two sacks with 5,000 silver pieces each, two tourmaline worth 50 gold pieces each, and satchel full of pearls worth 200 gold pieces, net.

A Long Fusiform Object Floated on the Surface of the Water; Jules Ferat
C14 - Pillar Narrows

This space is accessible during the day. Several pillars, all stone, hold up this narrow space. The exits - however: south and east - are walled off by solid fulgurite. As with C1, attempts to break through are frustrated, as the space is filled with sand unless under the moonlight.

C15 - Guardhouse Basement

A ladder leading up to a trap door provides an egress to P1. 50 feet of rope, a hammer, and 24 iron spikes - partly rusted, but still perfectly usable - lie in one corner, alongside a lone tooth.

C16 - Artesian Pool

The floor of this space is wet and murky. The depth of said murk ranges from three to eight inches - but is otherwise safe to pass and does not impede movement. Consequences of rapid movement through water on equipment are at the discretion of the referee.

Eastern Narrows

C17 - Hanging Silver, Hidden Gold

Suspended from the ceiling in the southern reaches of this space in heavy iron chains are three locked chests - 2,000 silver pieces each. Buried against the wall, somewhat non-descriptly, on the northern bend is a crate - nailed shut - in which can be found a further 1,000 gold pieces.

C18 - Ghoul Burrow

Three Ghouls (B35) are digging at the wall on the north-west quarter of this space. They look confused, almost dazed. They are hostile and hungry.

Still Life with a Skull and a Vase of Roses; Jean Morin


Public domain artwork downloaded from the National Gallery of Art and OldBookIllustrations.com. Attributions in alt text.
Saturday, February 20, 2021

08.02 - Progress Point: The Watchtower Compound

Scale: 10 ft.
PDF version forthcoming!

Tropical House Gecko; Unknown Artist

Wandering Monsters

During the day, no wandering monster checks should be made within the Watchtower Compound.

At night, on the other hand, there is a 2-in-6 chance of an encounter every hour, rolled on the same table as presented in the previous progress point.

The Watchtower

Level 1

1W1 - Foyer

The double door on the south wall is stuck due to a pile of broken barrels and furniture piled against it. Doors leading north are not locked; the door to the north-west is slightly ajar. The floor creaks as the party walks.

1W2 - Infirmary

Tables are strewn about - several cabinets with broken vials line the walls. The ceiling has hangers on it - stained brown - that look to have originally been used for mosquito netting.

Nothing of value remains.

1W3 - Smoking Lounge

Moldy divans and arm chairs line this space: several on their sides, several upright. Along the west wall are several storm-shuddered windows - two of which are closed, one of which unlatched and hanging partially open.

In the standing furniture, seat cushions disguise spines made of bone. If a character sits in one of these chairs, they must Save vs Poison or be infected with a withering disease which will kill them in 1d4 hours. A character wearing armor should get some form of advantage to this save proportional to the armor worn - as the bone may crush or fail to puncture the protective material. How this is arbitrated is at the discretion of the GM.

1W4 - Surgery

This room has a number of surgical implements strewn about the floor. There is a mild staining to the floor with a rectangular patch in the center of the room that appears clean.

A character entering into this space will feel a sudden, inexplicable chill. If the character entering the room has a light, there is a 5-in-6 chance the light will go out. Lamps can be re-lit; torches appear to be spent.

Instruments Required for Resections; J. Fouche

1W5-9 - Children's Ward

This space, an extension of the infirmary and hospital, was utilized commonly for young patients as a byproduct of its open, well-lit hallway to the north: which seemed to encourage them at the time. Each of the rooms is much the same - a cot, a stool, and an end-table: all aged and gathering cobwebs.

1W5) This room contains a doll sitting on the bunk; a window to the outside is shut and barred. The doll is surrounded by a network of strings and pulleys attached to four buckets suspended in the upper corners of the room. If the lines are tripped, the buckets will tip over, dumping a stale yellow powder. Any character exposed to the powder must Save vs Poison or be knocked unconscious until the following midnight. A character so unconscious cannot be wakened by most means - slapping or splashing, for example, do not help.

The doll, during the day, is a normal doll; at night, its eyes will move - staring at a random secret or hidden thing. If it is taken out of the Watchtower Compound, the magic will fade in 1d4 days. If it is taken into the under-dungeon, it will burst into flames.

1W6) The end table in this room is on its side; the stool is missing.

1W7) Three Coffer Corpses (FF 19) - one half the size of the others - occupy this room. The smallest one has embedded in its rib cage a silver spike, festooned with elaborate detailing. The spike is worth 100 gold pieces.

1W8) Beneath the cot in this room is a locked chest containing 700 silver pieces and three clear diamonds worth 200 gold pieces each. Under the chest is a concealed compartment in which 3 pit vipers are hidden (1 HP, AC 7, THAC0 20: on successful bite, 1 damage and Save vs Poison or die).

1W9) There is only a cot for furniture in this room - and it is oddly clean. Hanging from the ceiling are hundreds of threads, each with silver pieces, a hole punched in the center, through them. 400 silver pieces total. While the silver remains undisturbed - that is, allowed to hang and not cut down as treasure - any character that sleeps in the bed will heal at twice the normal rate, but will be plagued with horrible visions in their dreams.


1W10-14 - North Ward

The North Ward once housed recovering but stable medical patients. Each room contains, unless otherwise specified, a cot - broken or otherwise in disuse - an end table, and a stool.

1W10) Three stools surround the cot in this room - no end table is present and all that remains of the cot is its frame.

1W11) The slowly rotting floor creaks in the warm wet of the ambient air.

1W12) A window on the north-west corner has been boarded shut. The cot is on its side on the west wall.

1W13) Opening the door, the furnishings in this room are perched on the south wall, as though gravity is perpendicular for them. Party members stick to the floor, as normal. Unless forcibly held open, the door will shut behind the party, as they enter - upon re-opening, it will lead instead to a random other room in the Watchtower, determined by rolling 1d3-10: 1d3 for the "tens" and 1d10 for the "ones". A roll of 1 to 34 will result in the door opening into that numbered room on the first level of the Watchtower: a roll of 35 or above instead will open as follows:

  1. Room 2W13
  2. Room 2W9
  3. Room 2W22
  1. Room 2W4
  2. Room 3W1
  3. Room 4W1
For results 39 and 40, the door will open to the stairwells leading to these spaces - and will dissipate as smoke when closed behind someone walking through it. For all other locations, it is as a one-way teleport to the new location.

1W14) There is no end table nor stool in this room and the cot has no legs. At the head of the cot is a skull made of quartz: eyes and teeth, mother-of-pearl. The skull is worth 70 gold pieces, but the cot is trapped. If the skull is disturbed, the cot falls away and the floor around it collapses, requiring any characters within 5 feet to Save vs Paralysis or fall into a damp, spongy pit. They will take 1d4 points of damage from the fall, but they will also disturb a colony of mushrooms at the bottom. These mushrooms release spores - immediately exposing any characters in the pit and exposing any characters in the room one round later. An exposed character must Save vs Poison or suffer from lung damage - a further 1d4 damage and bouts of coughing: doubling the chance of attracting a wandering monster until the damage has healed.

Death Pangs of the Artist; Theophile-Alexandre Steinlen

 1W15-20 - South Ward

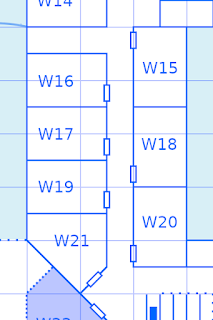
The South Ward was used to house more ill patients, in that it was better exposed to the sunlight: hoping that fresh, warm air would help them in recovery. Each room has a cot, stool, and end table - each in disrepair or disuse - unless otherwise specified.

1W15) During the day, this room is empty - a former storage closet, now occupied by only broken crates. During the night, a spiral stairwell down emerges. The stairwell is a trick - it does not lead anywhere and anyone who goes into it beyond the first loop will find, upon retreating, upwards, that they are climbing infinitely and the stairwell cannot be exited by normal means. Fortunately, however, the end-point of this magic has been sealed - so no harm will come to the party: when morning comes, anyone trapped in this manner will awaken in a randomly determined bedroom somewhere on the compound - as though the stairwell had been the end of a strange dream. The mechanism for determining which building and which room is at the discretion of the GM.

1W16) Fungus hangs from the ceiling in this room - which is more moist in feel than the others - and the floor has a sticky purple glaze to it. If a character makes any sound in this room, the fungus will shudder, releasing a proportional amount of spores: in small doses, it has audio-visual effects: blurring sounds and sights and imposing a -1 penalty on attack rolls, chances to detect or disarm elements, etc. - large doses knock a character unconscious 1-4 hours. Save vs Poison, Elves are immune. The room has an end table, but no other furniture.

1W17) More of the fungus from 1W16. The room has a cot and stool, but no end table.

1W18) Two Thoul (B 43) occupy this space.

1W19) A figurine of a dancer is standing on the end table. It is worth 10 gold pieces.

1W20) There is no cot in this room - only an end table and stool in opposing corners, south-east and south-west. The floorboards are zebra-ed: that is, alternating in color tone between boards. In the center, there is a board that runs north-to-south, perpendicular to the others. Characters walking from the entrance to the south wall in this room have a chance to trigger a trap: when triggered, the lighter boards curve upwards around the perpendicular board, forming a rib cage and trapping anyone in its vicinity unless they Save vs Paralysis. Characters in the will be trapped: their weight triggering the mechanism - if more than 4 are trapped together, all involved suffer 1d4 damage as the constricting space crushes them together.

1W21 - Hall

Three rows of long tables with bench seating, oriented north to south, occupy this space. Beneath the easternmost table, a section of Grasping Roots has broken through the floorboards and is in the process of entangling the table's legs. There is still some silver cutlery strewn about the table tops: in total, 70 gold pieces worth.

1W22 - Small Vault

The door to this room is locked. Inside, the walls and ceiling are lined with rope. There is no furniture.

1W23 - Outlook

A single chair sits in the center of this room. A window to the north and a window to the west are both open.

1W24 - West Barrack

This space appears to had bedding in it for up to six individuals at a time. The floorboards, however, are decaying and moist - in the northern side of the room specifically, the wall and ceiling show definitive sag as the swamp has crept into the foundation. In the southern 10 feet of the room, this is simply unnerving to walk on - in the northern 10 feet of the room, a character moving at combat speed must test to see if they slip.

In the north-west corner, a Shifting Muck encounter is lurking - able to move along the floorboards, but unable to transition out the threshold of the door.

1W25 - North West Armory

The door to this room is locked. Weapon racks line the walls, empty, and several barrels with fetid liquid are housed in the north west corner.

1W26 - North West Defense

This curving hallway has multiple firing slits cut into the wall, allowing an archer to shoot out, but making it very difficult to shoot in. The floorboards in the south-west portion have rotted through, leaving ankle-deep water and muck (difficult terrain) in that quarter of the space. The ceiling sags in this place - as though the rafters have likewise begun to rot.

Concealed in the murk are a set of Grasping Roots. In the corner, by the roots, is a mostly-decayed victim thereof: an unrecognizable adventurer, face down. The adventurer wears chainmail, carries a short sword and ruined torch, and has 700 silver pieces in a purse on its person.

1W27 -Reception

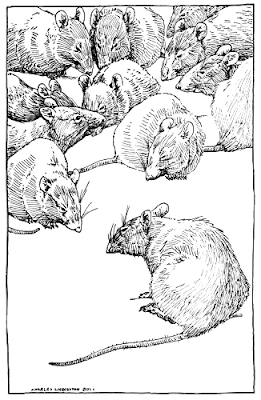
This space was the reception hall for the chapel built in to the compound, itself. There are unused braziers - now with some degree of topsoil accruing in them - in the corners of the room - and a statue, the head and one arm of which have been broken off, stands in the space between the two southern wall doors. On the floor is a carpet - red, once, but now dingy and mold-eaten - leading from both southern doors into the east door. The east door is stuck. Five Infected Rats gnaw on the edges of the carpet.

Drawing of Rats; Charles Livingston Bull

1W28 - Reflection

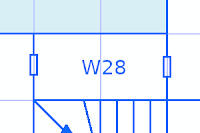
A relatively narrow hallway with no windows, but pictures of saints on the north and south walls. Inside, a group of 10 Manes (MM 17) are hovering around the open door in the west wall - noticeably distraught by the iconography.

1W29 - Hall of Fellowship

In this space are sizeable windows, shuttered, and half of the party of Manes from 1W28. There is a threadbare carpet in the room, as well as what appears to have once been furniture, smashed and thrown against the walls. The double door to the south is barred from this side.

1W30 - Chapel

The central temple area, this room has an altar and pulpit on the concave southern side - with seating (surprisingly well preserved) in the center of the room. The walls have hangings on them - renditions of saints and religious iconography - but the faces, specifically, in each of the images has faded to blank.

On the altar are a set of candles, silver, worth 50 gold pieces.

1W31 - Courtyard

The courtyard is largely scrub grass - but taller dog weed grows in the north-west and south-west corners. Concealed in the north-west grass are two Coffer Corpses (FF 19) who are lying down. On the wall next to them is painted crudely on the wall, "THE WAY IS BOUND TO THE MOON," letters somewhat flaking.

During the day, the area marked with a circle is an eerily perfect ring of sandy soil where grass does not grow. During the evening, the soil in the ring dissipates into a stairwell leading downward into the Under-Dungeon, room 1E1.

Of the doors to the south, the one to the west is ajar; the one to the east, unlocked. The double door to the west is locked. The door to the north is stuck.

1W32 - Reflection Chamber

In the north-west corner are piled gardening tools and implements. Along the south wall are crates - they are full of dirt: though it is uncertain as to what was in them before.

On the walls are large mirrors - two on the north and south walls, respectively, and three on the west wall. In the center of the room is a two-person loveseat, wrought-iron.

1W33 - West Watch

Along the west wall are arrow slits, allowing one to shoot out, but that would make it difficult to shoot in. Along the east wall are weapon racks - empty. Six Zombies (B 44) mill aimlessly about. The door to this room is barred from the outside.

1W34 - Shed

The door to this outbuilding is locked and swollen - requiring a strength check to open, as though stuck. The northern half of the floor has given way, rotted through. The southern half contains several crates - broken. There is a peg-board on the wall, as well as some tool handles. Only one rusted hand-drill remains hanging.

Six Infected Rats occupy the crates.

Level 2

2W1 - South Foyer
A decrepit hand rail guards against a sheer fall to 1W1. Along the south wall, east of the railing, are barrels. They have some vinegar solution in them - an unidentifiable organic mass having been preserved, but long since gone to mush. Along the north wall is a series of closets; some open, some closed. Inside is mostly dust and cobwebs - coupled with the occasional moth-eaten overcoat.

2W2  - Southeast Den
A carpet, molded and slowly blackening, runs from the south-west to north-east side.

The door to W3 is locked.
The doors to W4 are stuck.
2W3  - Long Closet
This room is lined with cleaning supplies. As the party enters, natural light sources flicker, but do not go out. If the party enters at night, any light sources passing the threshold into this space will turn white - casting a "ghost light" around them: broken or decrepit furnishings will have a sheer visual overlay of how they appeared when maintained, when the compound was occupied. Likewise, containers that are missing their contents will appear - in the ghost light - to have those contents in spectral form.

The visions are just that - visions: shades of the past - and the party cannot interact with them directly.

2W4  - Southeast Watch Station
This portico - a walking space above room 1W2: Infirmary - is open to the elements above, but has palisade walls with some arrow slits along its perimeter. The shaded section, including the doors, is open to the external walk, but covered with a sloping roof. The roof line slopes - but the ceiling under it does not.

This section is trapped. If both doors to W2 are open at the same time, iron bars extend downward from the eaves of the gables at an angle, having been hidden in the roof, wedging themselves into the floorboards. Likewise, bars close off W2. Upon closing, 2d8 Pit Vipers (B42) are dumped out of a trapdoor and will attack anyone inside in panic.

Potential tells for the trap may include holes in the lintel for the door frames, noticing that there is no apparent way up - detecting secret doors may find the trapdoors that will loose the Pit Vipers - into the space that is necessarily created by a slanting roof without a slanting ceiling, or stab marks along the perimeter of the roof line.

2W5  - Parishioner's Atrium
This atrium is open to the elements: the western overhang windows having been blown onto the floor inside. Characters standing on the overhang feel a chill: if the party props up or re-hangs the windows so as to look through them, the sandy circle in 1W31 will appear to glow. A ruined divan graces the north wall; scrap-wood which might have been a chair and end table, the south. A circular carpet - moist, decayed, and mold-blackened - lies on the floor. The door to 2W6 is locked - but will open on its own at night if the window is re-hung.

2W6  - Governor's Quarters
In this room is an old, king-sized four-post bed with canopy. The canopy has long since decayed. Along the north wall is a sitting area; the south, a writing desk. Any supplies remaining in the desk have been waterlogged - useless.

During the daylight, the bed appears to be a standard wooden bed, decaying with age and dereliction; at night, it appears to be made of iron, a mirror in the canopy ceiling lined with mean-looking barbs. In both cases, it is trapped.

A character which enters the bed may (during the day) or will (at night) trigger a collapse. Save versus Paralysis or take 1d6 damage (daylight) or 2d4 damage, plus Save vs Poison or contract a necrosis as a result, preventing natural healing of the damage (night).

2W7  - Prime Advisor's Quarters
Several bookcases line the walls: largely empty - what does remain being consumed by time and mold. A cot with no mattress can be seen in one corner, an end table with chemical burns and antique alchemical equipment in another. Three Coffer Corpses (FF 19) wait in the room: staring at the bookshelves or equipment as though missing something. The alchemical equipment, if recovered, is worth 100 gold pieces.

2W8  - Treasury Closet
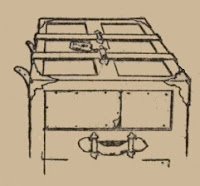
A door frame, but no door, opens into a thin closet. Against the east wall, a drape has fallen over a chest; the north and south walls are slick and heavily molded. The chest is locked, containing 700 silver pieces, 500 gold pieces, and two garnets worth 50 gold pieces each: but if a character enters the room, there is a chance they will step through the rotting floorboards, disturbing a colony of fungus. When this occurs, a cloud of spores is released - all characters in the space must Save (any characters within ten feet of the door must also, but may re-roll if they fail) vs Death or choke.

Vintage Trunk Drawing; Carl B. Williams

2W9  - Northeast Watch Station
The doors to this space are stuck. The perimeter is open to the outside behind a wooden palisade with arrow slits. The shaded space is covered by a gable roof; there is no ceiling - a character beneath it can see the rafters.

On the wall is a short bow that seems somehow untarnished by its exposure to the elements. A character retrieving it will note there are silver finishings on it which, if wiped or polished, reveal a symbology of Law. Hirelings of neutral or Lawful disposition, if witnessing the event, are inspired and will be at +1 to Morale for the duration of the expedition to the Watchtower Compound. It is otherwise as a normal short bow - but the inlays increase its value to 40 gold pieces.

2W10 - North Foyer
In the center of the space is a stairwell leading down to the circuitous hall of 1W. To the southwest, what appears to be a cabinet is built into the wall - five feet deep by ten feet wide, running from floor almost to ceiling - but there are no doors.

2W11 - Statuary
Torn paper litters the floor of this room. To the south is a stone statue - a sitting humanoid, pudgy in appearance: pudgy in a way that it doesn't quite mesh with how weight would normally be distributed on a human of similar stature. The head is missing - two windows are shuttered on the north wall.

2W12 - West Common
To the south, a cabinet - five feet wide by ten feet long, reaching almost to the ceiling - but with no discernible doors is built into the wall. Atop the "cabinet" - if a character looks - can be found a cobwebbed scroll, level 2, which will summon 1d4 Skeletons to fight for the spell-caster, lasting one turn per spell caster level before crumbling to dust. A stairwell leads up to 3W.

2W13 - Northwest Watch Station
The perimeter of the square facings of this space is lined by a wooden palisade; the south-west corner has collapsed and the floor tapers down towards the marsh. The slits in the palisade are oddly lit - and if a character looks through them, they will see the exterior as it will be 2d4 hours in the future. Upon re-entering the compound, the time difference will have passed: no resources will be expended - for example, no torches go out - however the time will have passed, potentially moving the characters into the evening from the daylight. Any hirelings, etc, outside the area will expend resources as normal waiting (assuming they choose to wait).

2W14 - Belching Idol
The floor of this room is covered with dark pumice gravel. Against the west wall is a carving of a head - also pumice, long and angular - with two citrines as eyes. The gemstones are worth 35 gold pieces each: however if either one is removed without preventive magic, the mouth of the statue opens, making a single deep ululation: any character who hears it must Save vs. Spells or be cursed: rolling all further Saves at disadvantage - that is, rolling twice and taking the lower result - until such time as 3 consecutive such disadvantaged saves have saved and the curse is broken.

2W15 - The Shifting Room
This room contains a crushed cot. Velvet curtains - aged - are hanging on the north and south walls. If the door closes behind the party as they enter, upon attempting to leave, they will find themselves into 1W28, as though traveling westward from 1W29 instead of stepping back into the hallway from which they came.


2W16 - North Rot
Bunk beds occupy the north west corner. There are no mattresses. A small table is in the north east corner. In the south west corner, the floor is rotted and may collapse - as a trap - dumping any character affected out of the building and onto the grounds: inflicting 1d6 falling damage. If this dump occurs, the same section in 2W17 falls through - effectively disarming the sister effect.


2W17 - South Rot
In the north west corner, the floor is rotted and may collapse - as a trap - dumping any character affected out of the building and onto the grounds: inflicting 1d6 falling damage. If this dump occurs, the same section in 2W16 falls through - effectively disarming the sister effect.


2W18 - Thoul Bunk
A bunk bed has been broken into two - such that two separate bunks are propped against the north and south walls, respectively. Lingering in the room are two listless Thoul (B43): no pupils in their eyes.


2W19 - Accounting Room
An empty barrel sits in the north east corner. Against the window on the west wall is a writing desk. Spread across the top of the desk are 100 silver pieces. Inside the desk are mold-eaten, illegible papers.


2W20 - Unused Treasury
Several open, empty chests lie against the west wall. An empty crate is in the north east corner. The ceiling is loose - there is a chance, when the door opens, that a rafter will break loose and swing down, impaling the opener. THAC0 15, 2d8 damage.

2W21 - The Infernal Garden
In the center of the room is an indentation, square, full of soil. Along the walls are, spaced equidistant, seven thin electrum figurines. The figurines portray unnatural creatures - devils - and are worth 10 gold pieces each. Inside the soil square, Grasping Roots are hidden just beneath the dirt.


2W22 - Southwest Watch Station
The door to this space is stuck. It is open to the air - though the perimeter is lined with a wooden palisade with slits for arrows. The shaded area is covered by an angled roof.

Level 3


3W1 - Inner Tower
The stairs up to this space are covered in webs. Along walls and across the floors appear to be crates and barrels - containing soil, ash, and rust: the contents having been looted or rotted long since. Hidden in the space are three Black Widow spiders (B43).


La Mort; Odilon Redon

Level 4


4W1 - Upper Tower - Special Empty
This covered space has several openings facing cardinal directions, allowing a character to see for X hexes around if looking out of the windows, a result of the elevation. The floorboards are dry and the air has a saline, coastal quality. The space is otherwise surprisingly empty.

If a character looks inward during the day, they will see semi-corporeal creatures in the courtyard, acting out day to day activities. One draped in black will, in short order, walk out from a door to 1W1, over to the salt ring, and then look up at the party. At that point, the illusion stops and the looker must Save vs Spells or be shunted forward in time to the following midnight.

If a character looks inward during the night, a breeze will start - originating from the Under-Dungeon Stair - pick up strength, and spray the party with salty air. Light bearers within 15 feet of the south wall must Save vs Paralysis or have their lights extinguished: at which point, the wind stops.


Public domain artwork downloaded from ReusableArt.com, the National Gallery of Art, and OldBookIllustrations.com and adapted or cropped for thematic use. Attributions in alt text.

Secluded Cloister

For a PDF version of this adventure, click HERE Regardi...