Saturday, June 26, 2021

Glowshock Cavern

Rock Formation Cave Geology; Dimitris Vetsikas

Visible just below the clear waters yawns the mouth of a cavern, cut into the dark stone by ancient vulcanism and the relentless pounding of the salt. Quiet except for the waves during the day, at night, it's said that lights flash deep in the cavern's gullet and percussive shocks can be felt through the walls or seen atop the water in the lulls between the crash and flow. And at low tide, the entrance is even tall enough for a rower's boat to enter...

Glowshock Cavern - another location on my home hex map of the Caanish Archipelago and another risk for future players in posting it - herein presented (or as a PDF here) for your eager exploration. Delve on, readers! 

Scale: 10 ft.

A Watery Grotto

Glowshock Cavern is - for most of the day - entirely submerged in water. Only at the lower tides does it become accessible via boat: and as such, any adventurer going inside without a spare source of breath is on a timer as soon as they row through the cavern mouth. This is reflected in the map via three shades of the accessible portion of the cave: 

  • Dark blue shading indicates deeps.
  • Light blue shading indicates shallows.
  • Absence of shading - white floor - indicates sand.

Portions so shaded on the map are affected by the tides as follows:

Depth Low Tide Transition High Tide
Sand Areas noted as sand are dry ground - or, dry in that the water line does not rise above. A character will have ability to breathe and move.
Water ankle deep. Visibility and movement not impacted.
Shallows Water knee deep. Visibility underwater is good; movement not impacted.
Water waist deep. Visibility still decent; walking movement reduced by 30'.
Water neck deep. Areas surrounded by deeps are reduced to air pockets.
Deeps Water neck deep. Movement reduced to 30' unless swimming.
Water line flush with the ceiling in all places not surrounded by Shallows. Characters will have to swim and either hold their breath or find an alternative source.

Note, tides operate on an approximately 12 hour cycle - low tide being 12 hours distant from the next low tide, high tide being 12 hours distant from the next high tide - and as such, the day can be divided into four segments of 6 hours each: with low tide proceeding to transition, transition to high tide, high tide back to transition, and transition into low tide again. Thus, a referee should mark a counter as to which point in the cycle the adventurers arrive at the cavern and keep a strict account of turns passing - as 36 turns will pass quite rapidly as the waves slowly lap up the remaining air at the cave mouth.

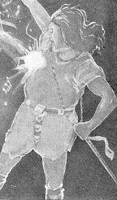
The Stranger Came; Charles Livingston Bull
A sadistic referee may opt to make the true high and low tidal periods shorter - perhaps three hours - with the net time as 9 hour segments of transition.

Wandering Monsters in Glowshock Cavern

The water in Glowshock Cavern is of briny salinity - with water flowing into it from the inland aquifer mixing with the press of the ocean - making it a popular hide for oceanic creatures and a haven for lost river and delta-dwelling creatures with tolerance enough to make it this far. Wandering Monsters encountered while in Glowshock Cavern are generated with 2d6 on the following table:

Roll Result
2 1d2 Catfish (X31)
3 2d6 Lesser Sea Serpents (X39)
4 1d6 Saltwater Termites (X40)
5 2d4 Piranhas (X31)
6 1d3 Freshwater Termites (X40)
7 2d8 Bomber Worms (see below)
8 1d2 Giant Crabs (X29)
9 2d4 Rockfish (X31)
10 1d4 Giant Leeches (X34)
11 1d4 Giant Squid (x39)
12 1d2 Giant Octopus (X37)

To reinforce the theme, a referee is encouraged to roll for encounters normally - once every other turn, with a wandering monster occurring on a 1, as normal. However: in addition - if the referee rolls a 6 on the check, an encounter with 1+1d6 Bomber Worms should occur.

Bomber Worms

Bomber Worm
Armor Class: 6 No. Appearing: 2-16
Hit Dice: 2+1 Save As: Ftr. 2
Move: crawl: 90' (30')
swim: 120' (40')
Morale: 8
Attacks: 1 Shock Bomb
Treasure Type: nil
Damage: 1d4 + Special
Alignment: Neutral
Frequency: Uncommon
Chance In Lair: ~

Bomber Worms are tubular creatures - between eighteen and thirty inches in length and averaging three to four inches in diameter - with thick, rubbery yellow skin and a dozen or more pairs of small black legs sticking out along their length.

Bomber Worms are characterized by their lack of smoothness. Along the length of their bodies are lumps - almost like tennis balls stuffed into a sock. These lumps are, in truth, lymph sacks which are used to carry the creature's trademark shock bombs: which glow dimly within the creature's body, glow visibly when regurgitated, and flash brightly when they impact a hard surface, fracturing an interior membrane and causing a chemical explosion.

Climbers: The feet of a Bomber Worm is a glorified claw, which it oscillates in opposite rhythm to its other legs in order to elicit forward motion. Because of this, a Bomber Worm moves across floors, up walls, and across ceilings with equal facility - treating all surfaces eligible for traversal the same.

Balls of Fire; Peter Newell

Shock Bomb: A Bomber Worm's primary means of defense - and its namesake - is the series of combustible, volatile mucus orbs that it produces and stores in its body. These bombs are launched either in melee or at range - 30' short, 60' medium, 90' long when above water; half as far when submerged - and deal 1d4 damage on hit. In addition - because of the flash of light and concussive force associated with the bursting glob, a character which takes damage from a Bomber Worm must Save vs Paralysis or be addled for the following round.

Balls of Fire; Peter Newell

A character which is addled may - in combat - either move or attack: not both. Further, a moving character which is addled moves at half speed and an attacking character which is addled suffers a -1 penalty to their roll to hit.

Bomber Worms have between 6 and 8 shock bombs available to them at a time - regenerating them at approximately one every three hours. they tend to use their shock bombs defensively: peppering an area with three or four at a time before retreating.

Swimmers: Bomber Worms are primarily aquatic creatures, their tube-like bodies and multiple legs making for a quick swimmer. Bomber Worms can breathe underwater and move at a rate of 120' (40') when swimming.

F - Murky Foyer

F1 - The Wreck

Wedged into the shallows is a single-hull coastal vessel, with a single deck and cargo hold below. Several gaping holes punched by impact with the rocks allow water freely to enter and exit the vessel.

Inside the wreck's hold can be found three skeletons - one of which has a pair of earrings worth 1,300 gold pieces; one of which has a broach worth a further 1,300 gp. A lockbox can be found secured up top near the tiller - inside which can be found 600 gp; and inside sealed amphora near the front of the cargo hold that appear to have survived the wreck can be found 900 gp worth of burial oils.

Also inside the hold are 3 nesting Bomber Worms.

F2 - Underground Island

A bean shaped mound of sand and shells brought in by the tides pokes through the water line for the majority of the day. Wood, cloth, and other detritus can typically be found - but will be in different array each time as the shifting water floats it about the chamber.

E - East Cave

E1 - Pirate Hide

Of the three berms supporting shallow water in this cave, two of them have articles on them.

In the shallows to the west, there is a wooden structure - barnacled and decaying - atop which can be seen a red flag and a chest. The chest is locked and protected with a poison needle trap: the interior is empty.

On the shallows to the east, near the south wall, a stone case is submerged just below the water line. The lid is heavy - counts as stuck - and inside it is a sealed and water-tight pouch, in which can be found cutlery worth 1,600 gold pieces, as well as a second chest - locked - which contains 8,000 sp and 400 gp, specie.

E2 - The Crumbling

Part of the ceiling of the tunnel here has collapsed. The resulting rubble pile allows standing - creating the shallows - and providing easy access to an air pocket in the ceiling from where the rubble fell.

E3 - The Hydra's Lair

A Sea Hydra (X34) with six heads has made its home in the deeper portion of this tunnel. In the south wall - it has decorated the walls with jewelry, as a bower bird might - among its collection can be found:

  • A gaudy crown bedecked with zircon worth 900 gp
  • A chain necklace with lattice worth 1,000 gp
  • Matched gold bracers (two bracers) with emerald inlay worth 1,200 gp each
  • A thick electrum amulet with a jade design embossed into the center worth 1,700 gp
  • 7,000 silver pieces spread carelessly about the tunnel bottom, below the water line
  • 1,200 gold pieces, contained in 10 mesh sacks hanging from the ceiling 

A Spluttering and a Splashing; John Dickson Batten

W - West Cave

W1 - The Late Boater

A rowboat with two inches of water pooled in its hull and tethered to a spike driven into the wall floats in the shallows. Inside, a skeleton crouches over a rusty iron chest. The skeleton wears a bracelet with a skull on it - worth 1,500 gp.

The chest is locked and trapped. If opened, a poisonous gas escapes, exposing anyone within 30 feet. Exposed characters must Save vs Poison - characters farther than 15 feet may re-roll the first failure - or suffer 2d8 damage to their Constitution as they are overcome by coughing fits.

Inside the chest is 1,600 gp, three diamonds of a combined value of 1,000 gp, a second skull bracelet, as on the skeleton (1,500 gp value).

A second chest has been cast into the water and sits in the shallows to the east. It is not locked - but is rusted shut and will have to be forced. Inside can be found 3,000 sp.

W2 - Solar Icon

A golden disc engraved as a stylized sun is hanging on the south wall of this alcove, casting a spotlight below. A character which touches the light will glow slightly for a few seconds before returning to normal. Any character irradiated in this manner suffers no ill consequences: in addition, for the next 1d4 hours, Bomber Worms will regard that character and those around them neutrally - neither attacking nor hindering as they might normally.

If removed, the disc casts light as a lantern with no flame, but will stops glowing after 1d4 turns. It is worth 1,400 gp.

W3 - Calamari

Two Giant Squid (X40) have gotten themselves trapped by the tide and are patrolling the narrows north of this shallow space. At high tide, they can escape through W1 out of the main cave; at other tidal levels, they are only able to attempt to grasp any unwary prey items standing in or about these shallows.

W4 - Treasure Pantry

Several hardened and sealed clay tubes - appearing as jars - rest in the shallows. Two of them are broken - in which can be found 2,000 silver pieces. Among eight other jars can be found 8,000 silver pieces further. One jar, elevated above the water line, is sealed with a silver idol in the shape of a wolf with noticeably human features. The idol can be dislodged - it is worth 400 gold pieces - and inside can be found a map: the map leads to the location of a magical sword, +1, which grants +2 vs Lycanthropes.

W5 - Forgotten Camp

On the sand of this section can be found several small platforms, all near to one another, along with some derelict bedding supplies and broken or worn tools. The supplies and tools are Halfling sized and have a musky scent to them, akin to rodents.

N - North Cave

N1 - Serpent Lair

Two lesser Sea Serpents (X39) have taken residence in the deeps here - escaping at night to hunt and taking refuge during the day. They are territorial of section N, but are unlikely to pursue (unless hungry) into section F. A plethora of fish and cetacean skeletons can be found littering the walls, having been washed there by the churn of the serpents' activity.

N2 - Lost Passenger

Half of a humanoid figure - waterlogged and rotted to being unrecognizable - is lodged onto the wall of the eastern shallows. It bears a locket - platinum - with an image inside. The first character to open the locket will see an expansive, detailed thing - far too large in scale to be in the limited confines of the locket as canvas - but it will implant in them the idea of a place. Any other character examining the locket will find a snip of waterlogged parchment - damaged and unreadable.

The locket is worth 700 gp on its own to a neutral buyer.

However, if the character who saw the detailed location travels to it, they will find the next of kin to the deceased humanoid. That next of kin will - on a neutral reaction - offer twice that price, or 1,400 gp; or, on a positive reaction, offer that the finder should keep it in the spirit of its original bearer. A character who accepts this gift going forward, whenever the locket is on their person, will receive a +2 bonus on any Saving Throws they are required to make.

N3 - Shark Shallows

Three Bill Sharks (X39) patrol the shallows of N3. They are aware of and will retreat from the serpents in room N1. A metal cage the size of a man lies on its side in the sand portion of this space. The cage is empty. 


Diving Beach Mar Stone Nature; Eduardo Dudu

Public domain or open license images retrieved from Old BookIllustrations.com and/or Pixabay and adapted for use. Attribution in alt text.

Saturday, June 19, 2021

The Zen of Chainmail

In a peripheral conversation I'd been having with some fellows on social media, a few ancient-school enthusiasts (that is, people who enjoy OD&D and and the LBB+Chainmail configuration), a newly baptized member expressed some confusion on the three modes of combat presented in Chainmail. That conversation being particularly edifying, I was asked to share it publicly as a resource for new ancient-schoolers going forward.

Baron Frederick Ran Me Down; Howard Pyle
Presented here, a cleaned up and annotated version of that conversation. I hope, readers involved in the conversation I reference, that it accurately reproduce the value you saw in it!

Combat as War (Game)

One key element to understand when looking at Chainmail combat - and something to help explain why Dungeons & Dragons moved away from Chainmail as rapidly in its history as it did compared to the Alternative Combat System - is the fact that Chainmail, at its core, is not a role-playing or fantasy adventure game: it's designed and was played as a table-top wargame.

In a fantasy adventure game, the focal point is on the adventuring party: not necessarily on the player characters, but on the player group, how it interacts with the dungeon or wilderness environment, and what story then emerges from those interactions. Combat is only one facet of the experience and is thus abstracted, reflecting as such.

In a wargame, the focal point of the game is the clash of armies. You can have - and I historically enjoy playing in - hex and chit over-maps to help guide your engagements: but the hobby extends primarily into the experience of the battles, themselves, and to events and tournaments of those battles. 

Knowing that, it becomes important to be able to constrain battles into a set time box. RPG combat is more dramatic - characters take several hits before going down, their special abilities do special things to change the dynamic of how they interact with the world. Wargame combat - and thus Chainmail combat - is far more lethal, far more quick: by design, it is less about the drama, less about the ebb and flow of individual duels, and more about quick resolution, allowing the turn to move on and empowering the players to focus on the drama, ebb, and flow the larger battle.

Chainmail Mass Combat

Standard combat in Chainmail - commonly called the Mass Combat system - is the core of the game. It represents a high-level interaction between grunts: front line, no-name soldiers. Using Mass Combat in a D&D game is most appropriate when encountering enemies in the wilderness: the 300 end of those 30 to 300 Orcs appearing. Hirelings and mercenaries clash with the enemy and the situation resolves quickly in a few rolls.

Battle Of The Foot Soldiers With Lances; Hans Burgkmair I

Notably, Chainmail is a historical battle game. Fantastic elements were included in the back as a supplement. Thus, looking for an analogy - recreating the Battle of Vienna might be a good use case for Chainmail. From a literary perspective, however - consider the Robert E. Howard story The Hour of the Dragon: a tale including several full-scale, sword-and-sandal military engagements. If Conan is the player character in this story, then the engagements represent Domain tier play: and Chainmail serves well to represent what happens in "play" of the narrative - be it either the role troop morale plays in the defeat Aquilonia suffers against the Nemedians or, later, the role troop type plays in defeating Tarascus, Amalric, and their allies in the engagement following Xaltotun's defeat.

Man to Man

Man to Man combat - originally, per the Chainmail booklet, devised as part of the siege warfare rules - is supplemental to the main game and is representative of a low-level, more granular interaction between special characters. Squad leaders squaring off within a ring of their men; two warriors meeting in honorable combat or a duel. It takes much more processing and time to run at the table - intentionally so: because it isn't intended to be the default. It is intended to be special, to come up infrequently at the table: it puts more on the table in terms of rules and involvement because more will be at stake in terms of how significant the loss of participants in the Man to Man will be.

Man to Man is far closer to the combat rules to which players of modern fantasy adventure games are accustomed and is far more involved than Mass Combat - which leads many to consider it as the default when using Chainmail to resolve D&D combats. 

And it may be. Your characters are sergeants, your characters are special (at least, compared to the torchbearer), are they not?

To refer to Game of Thrones, recall the culmination of the rebellion against the Mad King - the Battle of the Trident - wherein Robert Baratheon is said to confront Rhaegar Targaryen. They are equals in most respects - two leaders, two noble warriors, clashing on the field of battle:  

"The two knights fought valiantly upon their destriers, according to all accounts" 

The World of Ice & Fire - Martin, Antonsson, and Garcia: 2014

Where the latter, Rhaegar, wields a sword - the former on the other hand, Robert, bears the great spiked warhammer of Storm's End. Both of them clad in plate, Robert would need an 8 on 2d6 to hit Rhaegar ("spiked hammer" does not appear on the Man to Man table, but treating the hammer as "morning star", presuming Robert fighting with two hands or treating it as a "mace," allowing Robert to have a shield both result in the same hit probability) where Rhaegar - armed with a sword and shield - would need a 10 to hit Robert - an 11 if Robert was using a shield! Using Chainmail Man to Man to resolve the encounter - Rhaegar has between an 8% and 16% chance to score a hit - depending on whether Robert bears a shield: while Robert has a chance just in excess of 41% to score a hit on Rhaegar - it falls into place, based on the numbers, that presuming all else equal, the outcome - statistically - was in very little question.

Fantasy Combat

Lastly, Fantasy Combat. Fantasy Combat is frequently the cause of confusion for referees attempting to put Chainmail into an OD&D game because of how dramatically different it is from the other two combat modes - and it is irrevocably tied to OD&D because of the fantastic elements intrinsic to the fantasy adventure genre.

Why is Fantasy Combat so different? Because - unlike Mass and Man to Man combat - Fantasy Combat is intended expressly to represent a literary or a narrative encounter rather than to emulate verisimilitudinous or historical recreations. 

The Dragon From The Roche - Maurice Legend; Unknown

So, like the Battle of the Five Armies? Actually - no. The Fantasy Supplement which introduces Fantasy Combat does contain rules for Eagles, Men, Orcs, etc. - but it those entries utilize are statted to use the Mass Combat rules when engaging each other on the field. Fantasy Combat, or the 2d6-immediate-resolution rules similar to Man to Man but not considering equipment or armament - is instead aimed at the confrontation between the epic hero and the supernatural, fantastic enemy. 

Fantasy Combat is the showdown at the Bridge of Khazad Dum between Gandalf and the Balrog (Wizard vs. Balrog); Fantasy Combat is the moment that the Witch King of Angmar lands to confront Eowyn, the White Lady of Rohan, as she rides with Merry. (Wraith vs. Hero (Super-Hero?)) Fantasy Combat is not intended to provide mechanisms to make a situation exciting, an encounter dramatic or tense: Fantasy Combat, in line with the intent of the Chainmail wargame, was intended to provide a fast and simple resolution for what would be, in a film or book or in a home RPG session, an extended scene. It is an opportunity, Daniel Norton of Bandit's Keep argues, to introduce those dramatic or tense narrative elements with creative license: however it does so with the perfunctory brevity appropriate to a tabletop miniatures experience. To retain the Lord of the Rings analogy, the encounter at the Bridge of Khazad Dum might be represented by a single round of combat in which the Balrog rolled an 8 and Gandalf (a Wizard) rolled a 10: the Balrog would be defeated and Gandalf would be "pushed back," over the edge of the chasm.

But it doesn't matter what weapon I'm using? There is some weapon consideration - such as the Hero and Super Hero taking down a Dragon with an arrow - but the primacy of the Fantastic Combat is to tell the story of the combatants, not their equipment. Recall Three Hearts and Three Lions:

The troll's smashed head seethed and knit together. He clambered back on his feet and grinned at them. [...] Holger and Carahue rolled a thing as heavy as the world toward the furnace heart of the cave, while it fought them with snakes of guts. Afterward he could not remember clearly what had happened. But they burned it.

Three Hearts and Three Lions - Anderson: 1961

The purpose of the encounter in the story being to showcase the heroes and the monster, not to explore the specific mechanisms by which its metabolism can be overcome (something D&D would later fail to do in their Troll rules) - so also, under the Chainmail rules - so also does Fantasy Combat focus on the combatants' essence rather than their kit, footing, movement rates, etc. The rules don't dictate if the weapon being used is effective or not - or what mechanism, strictly by the roll, is employed to win the day: instead, its a higher level abstraction wherein the strength and cunning of the miniature are assumed and the literary tradition of their archetype is weighed in order to determine an outcome.

And Them's My Two Coppers

Hopefully, I'm steering you in the right direction - and hopefully, I'm steering you towards including Chainmail in one form or another into your home game!

Delve on, readers.


Public domain art retrieved from OldBookIllustrations.com or the National Gallery of Art and adapted for thematic use. Attributions in alt text.
Wednesday, June 16, 2021

I Made a Podcast!

I made a podcast! 

Anchor.fm/Clerics-Wear-Ringmail: Episode 1 - Rob Made Me Do It

Description

This is the inaugural episode, covering what it's about, how it'll come out, and a semi-blind unboxing of a prize package sent to me by Rob C. of the Down in a Heap podcast.

Theme Music by XTaKeRux, Free Music Archive: https://freemusicarchive.org/music/XTaKeRuX

Show Notes

  • 00:00 - Introduction
  • 00:14 - Theme
  • 00:41 - Coming At You Prerecorded!
  • 02:01 - Blind Unboxing from Amazon
  • 03:44 - Who am I, why am I podcasting, and what's this all about?
  • 05:54 - Semi-Blind Unboxing from Minneapolis
  • 20:34 - Outro and Disclaimer

Links

Rob C's Down in a Heap Podcast: https://anchor.fm/rob-c/

Monkey Blood Design: https://monkeyblooddesign.co.uk/

Jim Magnusson, Artist & Author: https://google.com/...

Saturday, June 12, 2021

The Guardian at the River

Bull Skull Totem Corners; Robert Kubicek

A totem, placed by the ancient Khiami, having fought the vicious hog men and banished them - pushing them back into the woodlands to cower - on the banks of the river: a reminder that beyond is the dominion of Man.

The Guardian at the River - a location on my home hex map of the Caanish Archipelago - sits silently waiting in my hex key document bearing only the above to mark its existence. So I may or may not be wise to post this online - knowing that one day, running a game, players may run across it. But c'est la vie! If you're ever running in my game and recognize the totem - pretend you didn't read it! 

Herein presented (or as a PDF here) and please enjoy, the Guardian at the River.

Scale: 10 ft.

A Totem on a Hill

A river bends gradually around a mound - a hillock in the plains, blocking the path of the water - making of itself a fat peninsula in the path of a lazy flow. Rising perhaps twenty feet from the water line, at the peak, it takes on a decidedly man-made appearance: with a large totem surrounded by four limestone slabs occupying the hilltop.

The totem, itself, is a ten foot cylinder rising 30 feet into the air, narrowing slightly as it rises. At its apex, it shapes itself into a blade like a spear's head - at the socket, where on a spear the head might be attached to the shaft, is carved the effigy of a boar's skull. Just shy of the spear's head - around 20, 25 feet off the ground - two large, curved spines like the tusks of a boar jut from the side, extending out from the main cylinder and pointing to the west.

The slabs are limestone - five feet wide by ten feet long: with the length extending away from the totem in cardinal directions. They are fitted snugly into the earth and will require effort to break through or excavate - except the slab to the south, which is slightly ajar - having been undermined and shifted by a force not obvious from the surface nor visible on the horizon.

The Shrine Beneath

Scale: 10 ft.

The North Shrine

N1 - North Entry

N2 and N4 are screened from this space by iron bars. Clay idols - sea spirits on the east; cloud spirits on the west - line the flanking walls. The room is dripping - a misting drip, just heavier than drizzle: but the drops seem to always fall and miss characters of Lawful or Unaligned alignment.

The doors to N2 and N4 are both locked.

N2 - West Chamber, North

A disheveled pile of linens lies against the eastern wall. A chest with a skeleton hanging over it sits propped against the north wall. Inside the chest are 300sp, an agate (10gp), and two fire-topaz (500gp). Hiding in the linens are 2 Spitting Cobra (B41) - a further Spitting Cobra (B41) is hiding in the skeleton.

In the north-east corner, there is a semi-circular grate in the floor where water, dribbling in from under the bars to N1, flows and discharges. A character who expressly looks into the grate will see a door leading to N5; a character who does not expressly look may yet find the door with a successful Hidden Doors check.

The door to N3 is stuck.

N3 - Treasure Hide

Two graves - in which ash has been arranged in the shape of a body - are aligned to the east and west walls of this room. There are amulets placed where the neck would be - inlaid with emerald and worth 800 gp each - and on the west, there is a platinum-bladed, electrum-hilted sickle worth 900gp. There is a clay pot at the feet of each grave - one of which has been smashed. Inside are specie - between them are 200 sp and 20 gp.

Light sources, if brought into proximity to the graves, burn brighter: casting 60' of light instead of 30' for the duration of their current context - that is, the torch will burn brighter for the duration of it's lit lifespan; Mosaic at the Alhambra; James Cavanah Murphy a lantern will burn brighter for the duration of its current supplied oil flask; and so on.

N4 - East Chamber, North

A mosaic of stone - that is, no bright colors; only natural rock to the area - is inlaid on the east wall. In the north-west corner, like N2, there is a semi-circular grate in the floor where water, dribbling in from under the bars to N1, flows and discharges. A character who expressly looks into the grate will see a door leading to N5; a character who does not expressly look may yet find the door with a successful Hidden Doors check.

N5 - Servitor's Access

The doors leading out of this narrow hall - to N3, N2, N4, E2, and E3 - are all obvious when viewed from N5. The northern stretch is lower than the rest, with slight inclines leading to the door to N3 and to the eastern portion of the hall. The floor of the depressed areas are moist; the floor of the elevated areas are mostly dry.

Spilled on the floor of the depressed stretch, near the door to N2 and N4, is 400 sp. In the west side, two gold sconces are embedded in the wall - worth 25 gp each.

The South Shrine

S1 - South Entry

Before each door - each of which are heavy stone (as stuck, +1 to the benefit of the player) - a pile of 10 gold pieces is stacked neatly into a small tower. If the gold is removed, the door beside it will not open. The door to S4 has been spiked ajar: open enough for a child to pass, but not an adult.

The far end of the hall is a circular fountain, in which 500 silver pieces appear to have been tossed. A character investigating the base of the fountain may note (and would note on a successful Hidden Doors check) that the base of the fountain rotates, revealing a ladder down into S7.

S2 - Empty Coffin

The head of a stone sarcophagus aligns to the west wall. Inside, there is residue of ash, but not enough to form a pile. A dirty ring - polishing it off will reveal its nature - worth 250 gold pieces can be found inside.

S3 - Blackened Burial

From the outside, a stone statue of a human is lying supine on the floor, framed by driftwood. Stepping inside, however, a character finds themselves immediately unable to see: light sources are not extinguished, but are also not effective. Leaving the area ends the effect; light sources work normally outside the room. Characters with infra-vision or other supernatural means of seeing will - upon entry - see instead a wooden boat, inside which is a pile of ash arranged in the shape of a body. Placed where its ears would be is a set of earrings worth 400 gp and at its waist is a bedecked dagger - non-magical, but counting as silver for the purposes of special resistances - worth 600 gp.

S4 - Rival Halflings

The door to this space is spiked ajar. Inside are eight Halflings (B36) searching the room. Between them, they are carrying 3,000 sp, 100 gp, two agates worth 50 gp each, and a ringed-style crown worth 200 gp. 

They have not yet found the secret door - which is a false wall activated by a pull cord beneath a loose stone in the floor nearby to it.

S5 - Idol Trap

The floor by the door to this room and within this room is gritty. A skeleton with no wounds leans against the door and will collapse outward when the door is opened. In the floor is inlaid a circular design; on the far wall is an altar - attached to the floor, as though the entire place had been carved from a single slab - on which sits an idol in the shape of a boar's head. It is worth 30 gold pieces. Circling the altar is a ring of silver pieces, stacked together painstakingly to form an interwoven wall. There are 1,700 in total.

On the south wall are two panels - one to the north, one to the south. The north panel is a mechanism to trap the room; the south panel, a secret entry to S6.

  • If a downward force is applied to the idol, the south panel will slide open.
  • If an upward force is applied to the idol - such as by lifting it off the altar - the trap activates.

When the trap activates, the north hatch opens and the room fills with sand. Any character in the room must Save vs Breath to evade: at which point, they are able to exit the space into S1. If the exit to S1 is blocked, all saves automatically fail. A character who fails this save is submerged in the sand and will suffocate.

Also when this trap activates, a plug pops open in the fountain at the south end of S1. The trap requires a manual reset - which is accomplished by pushing the plug down and refilling the fountain with at least one gallon of water: after which, a magic seam opens along where the floor meets the walls in S5, allowing the sand to pour out - back into the cistern holding it behind the north panel. 

S6 - Trove

In this space, earthen pottery and a wooden case are used to house tributes and offerings. These offerings are cataloged as follows:

  • 3,000 sp
  • 2,000 gp
  • 2 fire agates worth 100 gp each
  • 1 large ruby worth 1,000 gp
  • 1 electrum headdress worth 700 gp
  • 2 gold chain veils worth 1,000 gp each
  • 1 amulet with two emeralds flanking a sapphire worth 1,200 gp

Six Skeletons (B42) - their frame Orcish (at the referee's option, improve their armor class by 1 to reflect) - guard the treasure.

S7 - South Tunnel

The door to S4 is obvious from this side, as is the ladder up to S1. The rotational aspect of the door to S1 is not immediately obvious, but an enterprising character should figure it out. The exit to E4 is in the form of a loose block which would have to be knocked over to enter.

Near the center of the space is a thin stalagnate - at its center, the stalagtite and stalagmite are joined by a crystal skull. The skull, itself, is worth 400 gold pieces: but if it is removed, the junction will collapse: preventing movement through the tunnel in any direction. Characters in the junction must Save vs Breath or be crushed by falling stone.

The east portion of the tunnel appears to be filled with liquid. The liquid, however, isn't liquid to the touch. The shore is wispy - like a fog; not like an actual pool - and physically interacting with it reveals that it is of the same consistency of air - a character cannot swim in it, but can walk through it. A character of Lawful alignment can breath in it - unaligned or Chaotic characters cannot. It is turgid - visibility being limited to around five feet.

The East Shrine

E1 - East Entry

The stairs to this space land in a thin pool of standing water - 6 inches deep - carved into the floor to resemble a river. To the north and south of this "stream" (which is stagnant), the ground is dry. The pool runs eastwards and shallows out - a "beach entry" so to speak - just beyond the doors to the east.

The east wall of E1 is iron bars: the doors therein are iron gates. The south door is rusted over (stuck); though the north door will open fine. The door to E4 from the hallway just beyond the north door is locked.

The secret door to the west is not hidden, per se - but is concealed by the stairwell, which is hollow beneath. A character that looks under the stairs will naturally find the door: which is a faux wall, push inward to open. A latch on the far side allows re-opening.

E2 - Alcove Room

Chair-sized alcoves - flat on the bottom, half-domes on the top - are carved into the west wall. Two rugs rotted somewhat by time - parallel to each other - run east to west. The secret door to the north is hidden behind a small cabinet and has a slight drop in the floor level between E2 and N5.

E3 - As We Have Wrought

The north and east walls are decorated with a wrought iron design: embedded at interval into the stone walls. To the north, the design appears to abstractly depict hills; to the east, water - with an overlap of about three feet into the north wall. That overlap is a secret door - which hinges from the corner inward and activates via a latch along the seam of the two designs. Like E2, there is a slight drop in the floor level between E3 and N5.

E4 - River Sanctum

The east wall of this space, as well as the eastern portion of the north and south walls, appear to be sweating - as though they may be below the water table. The floor of this space gradually declines, such that near the east wall is a pool of water, appearing to move in the direction of the river outside. Three copper idols are placed along the shore, facing east. The idols can be removed and are worth 5 gold pieces each.

The liquid, however, isn't liquid to the touch. Physically interacting with it reveals that it is of the same consistency of air - a character cannot swim in it, but can walk through it. A character of Lawful alignment can breath in it - unaligned or Chaotic characters cannot. It is turgid - visibility being limited to around five feet.

In the south-east corner is sunken a heavy wooden chest. Inside can be found 2,000 gp and a silver statue of a dolphin, worth a further 1,000 gp. There is a small hole in the wall nearby, which can be tugged to open a large enough hole to get into S7, as demarcated by the hidden door.

The door to E1 is rusted over (stuck).

The door to the north is locked.

The West Shrine

W1 - West Entry

The entry at the top of this shrine is ajar. The floor bears signs of litter, as though animals have housed here. The ceiling beyond the first ten feet of the stairs, where the room opens, elevates - five feet taller than the initial room. Hanging in this space are eight Stirges (B43).

Like E1, the "secret" door is not particularly hidden, but is under the stairs: a character which intentionally looks under the stairs, which are hollow, will be able to find it - a push-panel of faux wall. 

W2 - Orc Vegas

Eight Orcs (B39) are playing cards in this space, waiting for the Stirges in W1 to leave at nightfall so that they can safely make their own exit. The captain of the group has 2 hit dice and one eye: his other having been replaced with a smooth ruby worth 100 gold pieces. The pot of their card game - orcish Rummy - is worth 4,000 silver.

W3 - North Tunnel

Where the room opens up from the short entry hall, the floor is a slight step down. It is soft earth, on which is growing patches of grass, three feet in height, covering about 70% of the floor. The grass is mundane - though albino - and the room is otherwise empty.

W4 - Silvered Amphora 

Four earthwork amphora - three feet in height - are in the south-east corner. A pile of mud bricks sits in disarray in the western portion of the room. A sack of 1,600 silver pieces can be found tucked into one of the amphora.

W5 - Tunnel

The entrances out of this space are hard to see, but not exactly hidden: searching for the door succeeds on 3-in-6, but a character having entered through one will know where their entry door is automatically. This tunnel resembles a burrow - perhaps a large subterranean animal. Inside, 7 Bandits (B30) are quietly resting: they look roughed up and may simply desire egress at this point in their adventure.


Public domain or open access artwork retried from Pixabay or OldBookIllustrations.com and adapted for thematic use. Attributions in alt text.
Saturday, June 5, 2021

Old Game, New Project: Introducing Weapons, Wits, and Wizardry

As a result of some external family factors, I'm not going to get out a new dungeon, innovation in house-ruling, or review this week - so instead, I figured I'd share a project I'd been collaborating with a few friends on, an attempt to integrate the Fantasy Supplement into a classless fantasy adventure experience, all the while maintaining mechanical OSR compatibility.

Weapons, Wits, and Wizardry

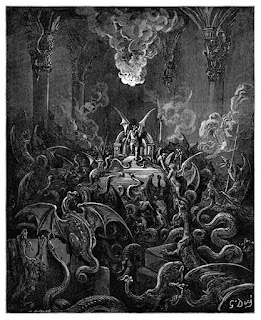
Corpse Candles; Gustave Dore
Weapons, Wits, and Wizardry
Rules for Dungeon Exploration,
the Hero's Journey,
and the Founding of Kingdoms

Dreadful Was the Din; Gustave Dore
The Referee's Enchiridion
Guides, Charts, and References for Running a Game

Weapons, Wits, and Wizardry is a booklet which contains rules for creating, playing, and advancing heroic fantasy characters. Using character races as a template and experience-buy as a mechanism into the eldritch arts of sorcery and the talents and minutia of the tunnel-crawling specialist, it aims to provide a framework by which characters are envisioned, adventure, and grow to participate in regional exploration and politics. It is not original Dungeons and Dragons, nor does it embrace several defining elements of original Dungeons and Dragons, however it is written to be compatible such that a table using the Weapons, Wits, and Wizardry ruleset can freely utilize material from the little brown books, their related supplements, and any other OSR-compatible product - or utilize material designed for Weapons, Wits, and Wizardry in a different OSR-compatible rule system - with minimal to nil adjustment.

The Referee's Enchiridion is a folio intended for use by the master of the game, the Referee, and provides resources to assist in the running of a game, editorials and explanations for decisions made within Weapons, Wits, and Wizardry to help guide a Referee in the customization and crafting of their home table's experience.

Linked above are the working PDFs for these two complimentary booklets.

As of this writing, both documents are in alpha: that is, the rules are still under active development, the editorials are still being edited, and many facets of the game are still subject to change, pending ongoing play-test and community review. Document versions and update dates will be provided to the best of my ability for the convenience of the reader, however the download links will remain unchanged.

Ringmail

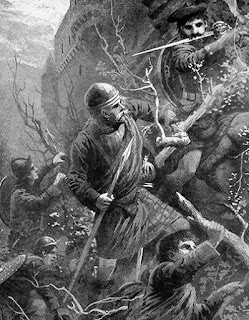
Scotch Soldiers; Lancelot Speed
Ringmail
Rules for Fantasy and Medieval Engagements

Ringmail provides the foundation on which Weapons, Wits, and Wizardry is built. It is a tabletop strategy wargame based on the spirit of 1974: intended for use in mass battles between armies in the Medieval period, alongside supplemental rules for the inclusion of fantastic elements - such as dragons and wizards - such that either historic battles, favorite fictional battles, or original competitive engagements of like theme can be played out using this sub-50 page document. It is not Chainmail, but it is intended to be compatible - such that players accustomed to Chainmail will be able to use the Ringmail rules with minimal to nil adjustment - and it is intended to be legible, re-worded and re-arranged, such that learning the game for new players and referencing the manual for experienced ones will be easier and more intuitive.

Linked above is the working PDF of the Ringmail rulebook.

Ringmail is, as of this posting, in beta: that is, the rules are largely set and initial play-testing, third party usability review, and draft editing are in progress - and I've got a dozen or so points I know I need to fix about it. Document versions and updates are provided to the best of my ability for the convenience of the reader - though as the document changes, the download link will remain unchanged.

Get Involved!

This part, I'm still working on. At some point, I will put up a public Discord, helping to coordinate conversation and facilitate running games using Weapons, Wits, and Wizardry, ironing out the kinks and helping move the document into the place it needs to be in order to fulfill the objective it sets out to accomplish and fill the niche it sets out to fill - but the elephant in the room, the update dates on some of those files is admittedly a long while back: at least, as of this writing.

But that's life sometimes. Gets in the way of more important things - like elf-gaming.

In the meantime - if you want to be involved in the Weapons, Wits, and Wizardry project - do! Play the game: try it out - a one or two shot with your home group - to see how it fits. Download the PDF and page through it - identify the pieces that make sense or don't make sense, and feed questions back to me so that in future iterations, the questions won't need to be asked. Let it inspire you - run the game your table wants to run, run the experience you and your players want to experience, and take from this tome the bits and pieces conducive to that end.

The fact that you're here on this blog means you know how to get into contact with me - using the provided contact mechanisms in my profile or just tagging me, pinging me wherever it was that we both were when I shilled the link out!

Most importantly - however - delve on!

He Roasted Him; Louis Rhead

Public domain art for this post was downloaded from OldBookIllustrations.com. Attributions in alt text.

Old Maps: Ehrn

In January, I found and posted some old, analog maps from a campaign I ran many, many years ago. A handful of folks expressed inte...