Saturday, July 30, 2022

3d6 Quest Hooks for Geas and Quest

lighthouse beach sand sea coast; Pixabay user Hamsterfreund

In the original edition of the game, among the wandering monsters and foes that might be encountered exploring the overland are high level Fighting Men, Clerics, and Magic Users - each posing a hazard. The Fighting Men - Lords of a domain - will challenge the party to a joust: there are rules for jousting in Chainmail - absent Chainmail, a referee has combat rules and can improvise. For Magic Users and for Clerics, the possibility of a Quest or Geas spell is present: a compulsion to do something for the respective NPC.

But... what do they want?

While the target of their intended chore will vary by campaign setting, provided below is a 3d6 method to inspire the referee on the spur of the moment to create the framework of a Quest or Geas - helping to prevent repetition and thus boredom.

1d6 Action
1 Travel To
2 Destroy
3 Retrieve
4 Repair
5 Observe
6 Deliver
1d6 Objective
1 Magic Artifact
2 Mundane Artifact
3 Another Character
4 City
5 Dungeon
6 Landmark
1d6 Constraint
1 Time
2 Equipment
3 Communications
4 Magic
5 Foes
6 Supplies

The Action

The Action is the verb. The Action is what the quest-giver desires (and thus compels) the party to do. For a "travel to" result, for example, the Cleric may be compelling the group to go on a pilgrimage: the site at a destination being important to their alignment or deity. For an "observe" result - this might be a Magic User looking to gain intelligence into an area warded against his seeing-spells. The Action column should inform or inspire the activity intended to satisfy the Quest or Geas' requirements.

The Objective

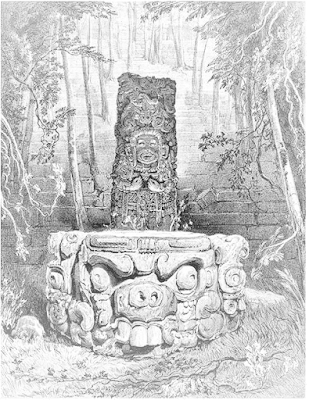
Idol and Altar at Copan; Fredereick Catherwood

The Objective is the target. The Objective might be the McGuffin - the princess in the tower - which will determine the success or failure of the action. The result of "another character" - perhaps a wayward acolyte of the Cleric's stronghold, Questing to return; the result of "dungeon" - an adventure site at which the Magic User knows something esoteric is marinating! The Objective column should inform or inspire the intended recipient or subject of the party's afore-determined Action.

The Constraint

The Constraint is a twist! Not all Magic Users are going to be cloistered in their tower; not all Clerics are going to be so busy with domain tasks that they can no longer adventure on their own. The Constraint represents the reason why they can't just do it themselves - and what the party is going to have to overcome in order to achieve their action on the Objective. "Time?" Perhaps the party is needed to interrupt a ritual - one which will complete at the next full moon. "Supplies?" Perhaps the Objective to be Actioned is within a saline zone: damaging and rusting iron weapons or equipment. The Constraint should inform or inspire a manner in which the Quest or Geas is made more challenging than (and more memorably distinct to) similar missions.

(Optional) The Assistance

Optionally - the Quest giver or Geas imposer will, to help ensure their success, offer a mechanism by which the party will have an easier time. In the event of a favorable reaction or other similar impulsion, roll a second time on the Constraint table. Based on that result - a special benefit is given speaking to the challenges that the party is likely to face. The result of a "gear" might indicate a key, an ancient and complex key which will open a secret doorway to the rear of a guardian keep. The result of "Communication" might grant the party a borrowed Ring of ESP - to be returned on completion of the Geas, of course. Alternatively - use it as a way to hint at a manner in which the Action can be executed that will result in better expose, better experience, based on your knowledge of the table: do the players like puzzles? Hand them a riddle! The optional Assistance is a gift to keep a party moving - and one which should be conducive to the challenges to be faced.

Let's Try it Out

Having in typical lack of foresight assigned no significance to color and position, let's read these vaguely left to right - producing 4, 5, 6. (Not every day that you roll a straight!) That produces a quest to repair a dungeon, constrained by supplies.

The first thing that comes to mind - the expansion into domain play! For a Magic User Geas - the roll might indicate the Magic User's former master's tower (a dungeon) has fallen into disrepair after his disappearance - and the byproducts of his eldritch experimentation have been leaking out into the countryside, poisoning the donator's own research! The tower must be rebuilt (repaired) - containing these evils within itself - but in order to do it, only special blocks (supplies), concrete aggregated with lead and starlight, may be used - as normal walls will have no effect. 

For a Cleric's Quest, similar would work: say, a temple to the Lord of the Air has been corrupted by monsters (the dungeon) and only by restoring the altar and bailey (repair) can the corruption be removed - but the temple is suspended from a cliff face and traversable surfaces are scant: meaning the party will need to procure and master supplies to climb and swing through a temple more suited to birds than to hominids.

Next - 6, 6, 5. (I wish I was rolling stats at this rate...) So, deliver, landmark, foes

To start with a Quest - the Cleric in question has in his stronghold a statue, adorned by a relic of the Saint, which is destined to be placed among others in a pantheon ring atop a plateau some miles distant. However, the statue is heavy and the way between is a river valley, infested by roving piscine servants of Chaos.

To continue with a Geas - the Magic User, cursed by his own hubris, had excavated a rune-stone from one among the deep places: intent to study it in conjunction with the ley lines of the land. However, it has brought nothing but ruin - and he needs the party to return it into the demon and spider infested hole out of which the previous party he'd Geased had retrieved it!

Now this looks more like the stats I'm accustomed to rolling. But to conclude - we'll throw in the optional Assistance for our last example: 3, 1, 5, 1 - or, retrieve, magic artifact, foes, time. This one'll be curious!

For a Magic User's Geas, perhaps a spell scroll with a rumored and heretofore impossible 7th level spell(!) has lain hidden under a temple to the Lord of Magic - guarded by a mass of star-studded shadows. The shadows are active at night - and the temple is invisible under the sunlight - however: in the transition, the hours of twilight when one circadian cycle gives way to the other - then: they are vulnerable! To assist in the party's success, the Magic User gives them a glowing pocket watch - suspended on a chain: when the pocket watch is activated, time is dilated around it: stretching a precious hour into four. Once its magic is spent - the watch will turn to sand: but perhaps the window will be wide enough....

Or for a Cleric's Quest, the Storm Hammer of the God of the Pounding Surf was stolen generations ago by minotaur blessed with unnatural long life. It and the blood cult surrounding it have held the hammer long enough! While the minotaur is a mighty foe - its long-life is said to be sustained by a green amulet it wears: to assist in their quest, the Cleric has obtained a blessed dart: one which, if it strikes the amulet, will dispel its power: removing the agelessness in time which has kept the blasphemous creature alive.

Angelicals Exposed to the Orc; Jean Honore Fragonard

And Them's My Two Coppers

Sound good? Use it! 

Sound incomplete? Expand it! Leave a comment or hit me up elsewhere if you do: I'd love to see (or to collaborate on?) a d8/8/8 or even d20/20/20 Quest and Geas generator!

In either case - thanks for reading: and delve on!


Public domain or open license artwork retrieved from OldBookIllustrations.com, the National Gallery of Art, and Pixabay and adapted for thematic use. Attribution in alt text.

Saturday, July 23, 2022

Roost in the Forgotten Church

Notre Dame de Paris; William Thomas Horton

Along the peninsula, positioned in a clearing amidst the jungle, stands a lofty structure - isolated, perhaps? Or more durable than a town that once stood beside it, but has since been reclaimed by the land - abandoned by its builders? Perhaps the answers lie inside - and perhaps treasures, abandoned likewise.

Whatever the case, be wary - because it's said in the night that a winged beast - skin of stone, visage of a demon - no normal man may kill patrols the old capstone: who could say what might become of the man who encounters it? 

Suitable for parties of 3rd level. 

Click HERE for a PDF version of this adventure!

Wandering Monsters

When a wandering monster is encountered in the Forgotten Church, 2d6 should be rolled against the following table to determine the monster encountered. 

If the party is within the towers, 3d6 should be rolled instead, keeping the higher two dice to sum the result.

Roll Result
2-3 2d4 Lizard Men (B38)
4 1d8 Giant Ferrets (B35)
5 1d8 Oil Beetles (B31)
6 1d6 Boar (B32)
7 1d4 Living Statues: Iron (B37)
8 1 Insect Swarm: Crawling (B37)
9 1 Insect Swarm: Flying (B37)
10 2d4 Giant Centipedes (B33)
11+ 1d6 Gargoyles (B35)

The Gargoyle King

At the start of the adventure, roll 1d20, having assigned numbers to each of the 16 rooms in the building. If the roll is 1 through 16, the Gargoyle King is at home and roosting in the room indicated by the roll - on a 17 or better, he is in flight about: absent from his cathedral home.

The Gargoyle King is as normal Gargoyle (B35), but is treated as having maximum hit points possible for him (32 hp) and benefits from a +1 bonus to damage on his attack rolls.

Gargoyle Dragon Fountain Figure; Pixabay user arjane

Regarding doors:

A little keyhole icon means the door is locked.
A little "S" through the door means the door is secret.
The other icon - which is supposed to look like a muscly arm - indicates the door is stuck and must be forced open.
 

Level 1

Scale: 10 ft

A - Cathedral

To either side, ruined wooden seating sits atop a discolored floor: threads and fibers implying a carpet once lay. To the south, an elevated section with a broken pulpit. Hidden, strewn about the wooden seating can be found 1,000 sp: underneath the pulpit is a secret drawer in which can be found 1,000 gp.

The ceiling is open to the second level.

B - Greeting Hall

Pots, broken, in gray topsoil line the north wall. A mosaic depicting an angel has been defaced by dereliction on the floor. To the south, two wooden benches. Three wild Boar (B32) root around in the folderol.

C - Library

Dusty bookshelves are lined with slowly rotting and faded literature - tome after tome, some still legible, devoted to a forgotten god. Two Boar (B32) have knocked anything waist height or below onto the floor and have been thoughtlessly trampling it.

D - Bloody Hallway

Against the east wall, opposite the door to room C, a stained glass mosaic with gold cames hangs as a painting might. The glass mosaic - undamaged - is worth 1,200 gp. The floor is brown, stained, and might be mistaken for mud: but closer inspection reveals it to be dried blood. Characters stepping into the stippled area at the T-junction may trigger a spear trap: wherein one of several pressure plates cause any character within the 10x10 foot space to be targeted by two-prong spears jutting out of concealed holes in the ceiling. These bidents deal 1d8 with a THAC0 of 18 and reset immediately.

E - Staff's Hall

Straw has been strewn about the floor - votive candle holders affixed to the north wall hang empty. Three Giant Ferrets (B35) have made a nest near the south-east alcove serving as a junction to cells G, H, and I.

Tailpiece with Books and Candle; Unknown Artist

F - Treasury

In three corners of the room stand three iron statues; in the center, a fourth. The fourth holds a chest containing 7,000 silver pieces, 800 gold pieces, and a cat's eye gemstone (500 gold pieces).

The statues are animate Iron Living Statues (B37) - guardians left behind by the old order. They will attack unauthorized hands trying to liberate their bounty.

G - Chemist's Room

A desk with an alembic adorns one corner. A frame with no bed, the other. Strewn about the floor are several vials - some empty, some filled with unidentified (but harmless) liquids, and one filled with a Potion of Flying

H - Acolyte's Room

An armor mannequin stands cockeyed in one corner of the room. An unused straw pallet lies on the floor among rodent droppings.

I - Hoarder's Room

The door into this room is trapped. A character stepping through without having disarmed the trap may activate a bladed pendulum - 2d6 damage, THAC0 16 - which resets itself automatically after each swing. Inside is a frame without a bed and a writing table with a silver compass in it (450 gp). Under the writing table, there is a loose tile in the floor - under which can be found a sextant (450 gp), a necklace - platinum, with a blue sapphire centerpiece, flanked by diamonds (1,500 gp), and a pouch containing 1,000 silver.

Level 2

Scale: 10 ft

A - Balcony

A railing lines the central atrium - open to the first level - it is, by and large, unbroken: although several of the columns supporting it have been knocked out or rotted. Lining this, also, is a kneeling bench - hard and pockmarked, whatever cushion once atop its rim having been totally consumed by insects. At interval - silver chalices are affixed to the railing - 6 on each, the east and west sides, and valued at 100 gp each. The wood around them has swollen: a stuck-doors check (or other ingenuity) is required to remove them. Silver being a soft metal, some manhandling won't damage them too much - at least, not so much as to be beyond reverse manhandling back into shape.

B - Hidden Foyer

Barrels line the north wall; crates, the west. Along the south are cob-webbed ladders. Four Giant Centipedes (B33) are crawling about the barrels near the north-west corner: three on the ceiling, one on the floor.

C - Bellman's Stair

A skeleton is crumpled in the northern part of the chamber, partially obscured by books - redundant copies of some of the tomes in the library - which have fallen on it from a storage rack. The books are worm-eaten and the stairs creak intensely.

Level 3

Scale: 10 ft

A - West Climb

Several sets of manacles rest in the north-west corner. Along the west wall, a tarp has been thrown over a cage - locked - inside which is a small idol made from a strange, foreign material. It is as stone - red in color - and carved to resemble a fat creature with an infernal smile, empty eye sockets, and one horn in its forehead. In its hands, it holds two eyes: one, mother of pearl with an emerald pupil; the other, onyx with golden-yellow tourmaline. They are worth 500 gp each.

Further, if the statue is removed, the black wooden box on which it sits, surprisingly flimsy, can be broken open: revealing 2,200 ep.

B - East Climb

The floor creaks and has several points at which one can see through cracks or holes to the floor below. Despite its appearance, it is sound. Three rusted iron rods lie on the floor against the north wall.

Level 4

Scale: 10 ft

A - West Belfry 

The floor of this room is filled with small ionic columns: one foot tall, each with an identical one foot square abacus atop the shaft - placed at even increments one foot from each other. They are not affixed to the ground and can be knocked over, re-arranged, or removed fairly easily.

Standing in the room quietly for a few moments will cause the party to begin to hear what sounds like a choir singing in a foreign tongue - it will be quiet at first, grow subtly in volume: but will remain below a speaking tone. If someone in the party speaks or otherwise makes noise, it instantly quiets. The effect will return after a few minutes of silence.

An apparatus for a bell can be seen in the tall cone over the indicated circle. Climbing into the cone reveals three amphora tucked away along the ledge at the cone's base: each contain ashes - but the first two contain 5,000 silver pieces each, as well; and the last contains 300 gold.

B - East Belfry

On a table to the south of the stair - which would require a character to climb over the railing or complete the climb and walk around to access, a square cut diamond can be seen. It's quality is suspect - but it's still worth 100 gp.

Inside a tall cone above the indicated circle is a great brass bell. Along an interior ledge - if a character were to climb within - can be found a locked chest with 800 gp in it: however living in the bell is a hoard of bugs - an Insect Swarm, crawling (B37) - which have made a nest within it using chewed and regurgitated wood and parchment.


Public domain and open license artwork retrieved from OldBookIllustration.com and Pixabay, respectively. Attribution provided in alt text.

Saturday, July 16, 2022

Butter on the Barrows! (A Review: DoctorDuckButter on YouTube)

Play-Cast Name: Old School Essentials -
Barrowmaze - The B Team

Where I Listened: DoctorDuckButter
Where It's Available: YouTube
System: B/X / Old School Essentials
Leather, with Shield

Thoughts and Review

DoctorDuckButter is a random YouTube user (well, not particularly random - in that I searched for him) which I came across while looking for new actual plays for Old School Essentials some time in the mid to early 2021. Specifically, the Barrowmaze game he ran - for primary group and for "B-Team" - came up on my radar in that timeframe and I looked into it - watching the first handful of videos in the series during my morning workout. Time came and went, I listened to more podcasts, got embroiled in family events - and left this review to simmer, sitting on the back burner for the better part of a year before diving in, drilling down, and getting to the point where I'd feel confident to speak to it in my actual-play review series.     Of DoctorDuckButter's Barrowmaze:
Regarding the playing of OSE Barrowmaze, DoctorDuckButter actually has two distinct playlists - first, Old School Essentials - Barrowmaze & Stonehell; and second, Old School Essentials - Barrowmaze - The B Team. By all appearances, they appear to be sequential - starring the same cast of players, but playing different player characters.

It is my belief that - watching this channel originally, it was the former that I had gotten hooked on; but subsequently, I have been watching the latter to fill out the details of this review.

As such, if you like what you see? Check out the other playlist too! Although the videos are different, older, they are the same campaign with the same referee - and such, likely exhibit a similar if not same viewing experience.
So - cobbled together from old bullet notes on what I liked or disliked about the series as well as new notes on the sessions I've watched in 2022, herein - my conclusions regarding DoctorDuckButter and his party's quest into the Barrowmaze.

What I Like

The first and most refreshing feature of this actual play series is how closely it resembles a real game. There are no stream-related shenanigans; there are virtually no tech hiccups interrupting the experience (for the viewer or the player); and there are no long introductions, product placements, or cult-of-personality promotions peripheral to the game. It's all game - all the time. Further, the players react and interact in a manner consistent with real players: when an unexpected monster appears, there is trepidation or fearful exclamation; when they break into the Barrowmaze for the first time, there is excitement mixed with terror! The host does not appear to be trying to get YouTube famous - only having hosted his videos, playing them online, because of circumstances leading to inability to play in person. DoctorDuckButter's game is a real game and you can tell while you're watching it. And because it's a real game, the focus is on the game: something that I appreciate tremendously.

Second, I like the game's focus on dungeoneering. On the part of the referee, he visibly tracks turns, stresses the importance of treasure via enforcement of the XP rules and highlighting of the shortness of combat XP,  and uses wandering monsters, random encounters, and light sources to tax the party as it moves through the maze. On the part of the party, they parlay with monsters when possible - on occasion making friends in the maze where a fight might have occurred with a new-school party - they bribe the monsters, flee from combats they can't win, make use of allies and hirelings, and use stealth when possible. The biggest props to the party: they have a mapper! Someone is mapping the dungeon! Even though they are on a VTT with maps and tokens, one of the players is mapping! And - because the Barrowmaze is as large as it is, with dozens of corridors and nooks and turns: the party needs the map, the party needs the marks made on the wall with chalk, in order to successfully navigate their way out in order to escape from the barrows and make it back to town in time for nightfall. 

Which is a separate point - never sleep in the barrows! Something the party learns firsthand attempting the act. Learning from experience - the improving of player skill - essential elements of an OSR game that can be gleaned, can be observed, in this actual play series.

Finally - I like the presentation of the dungeon. It isn't fancy - but it looks good enough and is functional: something that parallels what prospective players should expect of a game run on VTT: while some referees prefer paid art and fancy products, it's important to note that the purpose of the VTT is a tool to help promote immersion, to help produce the experience of delving the dungeon. You don't have to have a full polygon isometric interactive map in order to experience the game - in truth, you just need some players, some dice, and scratch paper.

What I Don't Like

If I were to complain about one thing in this actual play: it would be its infusion of different rules into the game. While good in the sense that it represents what you're likely to see in the wild, looking for a group: that is, a set of house rules and customizations to the game designed to alter the experience for the party to the taste of the table, it is bad at the same time from the perspective of someone who has not played B/X or OSE before and is looking to learn how to do so.

On the perspective of OSE - some elements from the Necrotic Gnome product line are used, but they are not cited: for example, the Snake Cult from Carcass Crawler #2 is used: a fun addition, but one that a viewer will not know if it's homebrewed, part of Barrowmaze, or an element of OSE's core product. Additionally, there are elements of which I'm not sure about the origins - they could be homebrew, they could be products from Necrotic Gnome or another OSR producer - or they could be rulings on the spot! In combat, it is evident that the group are 3e-refugees: the ranger using two weapons, some movement improvisations, and other subtle rulings or insertions parallel the more granular combat rules introduced in the 3rd edition ruleset will be evident to the discerning eye (or someone whose experiences are piqued by the mention of the procedure).     Further Watching
If you, like many of my readers, aren't here to learn how to play or what to expect in an OSR style game - this complaint not appealing to your sensibilities at all - OSE is not the only game that our host, the good Doctor, runs.

For those fans of the western weird, Deadlands - Savage Worlds may cater to your taste; and it looks like he even may have dipped his toes into the wargaming genre with Star Wars Miniatures Battles.

These extra playlists and their hours and hours of content are outside the scope of this review and as such, I will withhold comment to their accuracy and presentation: however, again, if you like what you've seen so far and are either willing to or interested in broadening your scope of exposure, DoctorDuckButter's channel has additional content, additional ways to wet your tongue, in the world of miniature and fantastic role-play.
This weighs heavily on me - more so than it probably should - but again: for the purposes of the review, it isn't necessarily a bad thing from the campaign perspective (it doesn't interrupt the core loop nor does it really drag combats out like 3/PF combats use to drag) - but it is in line with the aforementioned impediment to educational use.

So... in so many words - I really only have one complaint about the videos - and that is that the rules are easy to follow, but difficult to discern for use in learning the game.

What I'm Ambivalent About

This actual play would work really well as an audio podcast. While the video is useful to see the combats, to see the maze, and the occasional fun moment when the audience knows trouble is coming but the party does not - by and large, the screen sharing is what the ref is looking at at the time. This is very handy - seeing how he runs a game using PDFs, generators, a VTT, and digital dice all in a one-monitor setup: I do not possess the skill and proficiency in this art as he does and would flounder attempting to do what he pulls off mostly seamlessly. But - for what value this adds - I would definitely listen to this on my way to work. Knowing that podcast platforms (Anchor, at least) accepts video files now, which it can process and produce as "video podcasts" or parse the audio from, it would be a cool addition to the DDB media empire.

Further, for the aspiring Roll20 DM, there is a lot of instruction value in these videos as to how to manipulate, how to handle the Roll20 UI. The videos - however - are, for the Barrowmaze series, older - 2021 and before - and a such, this instructional value may wane with time as the Roll20 UI evolves and changes.

In Conclusion

To conclude - I've been binge watching this actual play for the last few weeks. I enjoy the story - I laugh with the players laughing, my heart races for the moments of tension, and I laugh again when bad things happen to their characters. Just like a friend would. The story is great, the module is solid, and the adventure is interesting - however, the confusion in the rules and the absence of hex crawling (there is some hex crawling: but it isn't hex crawling, if that makes sense - they are 50 yard hexes between barrows, not 5-6 mile hexes used for overland exploration) impact its usability to the OSR neophyte.

Rules? A challenge.

Tone and experience? Without question!

As such, I've rated the product Leather, with Shield. Value is definitely there, and it is worth the time of an actual-play enthusiast.

Thank you for reading; and delve on!

Saturday, July 9, 2022

Campaign Carnival 2022, Scenario 1: Chainmail Solo Play!

Just in time for Scenario 2 to be due - I was able to finish up the video for Campaign Carnival 2022, Scenario 1! Baron Amber's forces retreat from an ill-advised engagement - how many of them will make it through when Baron Blue in hot pursuit catches up with his assault cavalry?

Find out on the YouTube, or watch below - and join in in the comments to tell me what I did wrong!

No spoilers lessons learned? 

I talk too much!

But more so - this being my first Chainmail battle in at least a year, year and a half, having not been able to play since work on the Ringmail: Medieval Battles project kind of faltered - I've got a fire under my rear and an inspiration in my heart: probably from watching too many other folks play battle games on the tubes lately! So - more to come on that, the RMB game, and more to come in this playlist: hopefully better edited, and hopefully better picture quality.

Stay tuned - and delve on!

Saturday, July 2, 2022

Teeming Caverns

Scale: 10 ft.
Click HERE for a PDF version of this adventure!

Suitable for 2nd level.

A little keyhole icon means the door is locked.
A little "S" through the door means the door is secret.
The other icon - which is supposed to look like a muscly arm - indicates the door is stuck and must be forced open.

A - Watch Chambers

A1 - Guard House

Newer, used wooden furniture graces this room. One chair, however, has been smashed - the remains of two legs - apparently burned - have been cast to the south wall.

A2 - The Old Barracks

Bunks - unused - line the south wall. On the east wall, a weapon rack with 1d3 usable pole arms and a suit of rusted out chain mail armor. Searching the bunks will turn up a coinpurse with 200 sp and 300 gp still in it.

A Green Slime (B36) is lurking on the wall beyond the door; if smashed inwards, the door will crush the slime, sending sprinkles of it around the area. Any character involved in the forcing of the door must Save vs Paralysis (taking the better of two rolls) or be splattered by the slime.

B - Gnoll Mausoleum 

B1 - Foyer

Two statues - left and right, both defaced - stand in the alcove to the north. The floor transitions into tile. One Gnoll (B35) is serving as a lackadaisical sentry, guarding the room and keeping idle watch.

B2 - Bullying Cell

Two Neanderthal (B39) are bound and captive in this space - under interrogation from a group of 5 Gnolls (B35). The Gnolls want to extract information regarding the Human explorers in section C: not realizing that a Neanderthal and a Human are different species.

B3 - Holding

Straw is sparsely spread on the ground. A single tin sits against one wall. A pedestal - as though a bust once adorned it - is on the ground, toppled, near the west alcove.

B4 - Bunk

Several straw pallets have been arranged around the floor. Fleas can be seen visibly bouncing around the space. There are a couple wooden boxes - among which a net of 1,100 silver and 200 gold pieces can be found within.

B5 - Shrine

Aztec Goddess Coatlicue; Edouard Wattier

A statue, its construction different than the rest of the architecture, has been erected in the northern section of the room. The statue is of the god of Gnolls and is 8 feet in height. Of the statue:

  • Its eyes are made of two yellow diamonds (500 gp each)
  • On its left ear, it has a small ruby (10 gp) embedded in its ear, depicting an earring; on its right, an emerald (50 gp) in the same fashion.
  • In its navel, a cut citrine (100 gp) is embedded.
  • In its outstretched hands, a Sword +1 rests.

On the floor around it can be found 1,200 silver pieces - some of which have fused together. This is indicative of a trap laid on the magic sword. If a character attempts to take the sword, a lightning bolt strikes from the eyes of the statue - Save vs Spells or take 4d6 damage. Removing the eyes of the statue will disarm the trap.

B6 - Corridor Untraveled 

On the north and south walls, there are cubbies - 4 to the north, 4 to the south - each containing an urn. The urns contain 20 silver pieces each, buried under slips of paper with short notes written on them - faded and in an alien script.

Against the east wall near the secret door - but not blocking it - is a chest containing 400 gp: however the chest is trapped - if it is opened without disarming the mechanism, such as perhaps identifying a line to a gas container or perhaps noting an egress and clogging it when opening, a poison gas emerges: Save vs Death for any character within 10 feet.

C - Catacomb

C1 - North Crypt

A sarcophagus sits in the center of the room. If opened, it reveals a bearded, half-mummified skeleton in a red tabard with a sword across its breast and iron crown on its head. The sword and crown, both, are rusted: however if the sword is pulled, it will pull a mechanism hidden in the cadaver's rib cage and open the door to C2.

C2 - Ring Room

This room is lit by four torches - ever burning - but apparently made of stone and melded to the wall. Any light sources brought into the room find themselves replenished - resetting their "turn count" to 0, such that torches will have 6 full turns left and lanterns, 24, following their egress from the room. No turns are consumed by light sources if in this room.

In the center of the room is a pedestal on which sits a cushion, on which sits a Ring of Protection +1. Piled around the pedestal is a trove of 300 sp, 200 gp, a garnet (10gp), two rubies (10 gp each), and a black pearl (100 gp).

C3 - Rug Secret

At each right-angled corner of the room stands a brazier. The braziers are emblazoned with icons: a falcon, a cat, and a toad. In the center of the room is a thick, triangular, red rug - oriented such that its points indicate towards the braziers.

Under the rug is hidden an emblem of a sword. If the sword is pulled upwards, it will activate a mechanism to open the door to C2.

Four Veterans (B44) - having followed a treasure map regarding the Ring of Protection +1 in C2 - are fiddling with the braziers, lighting and extinguishing in combination, trying to figure out the secret.

The toad brazier is blocking the secret door to C5, causing it's "stuck" condition.

C4 - South Crypt

A crypt is sunken into the floor here, covered by a sheet of slick, gray stone. At its head, a statue with an axe stands, the head of the axe resting on the floor. If the party contains an aligned character - Chaotic or Lawful - the statue will follow them with its head: if the character is Lawful, it will talk to them: but only if prompted, the character engaging first. In regard to useful knowledge, it knows about the knight entombed here in whose likeness it was carved and it knows something of the layout of section C - however it is absent minded and prone to tangents.

C5 - Iron Arch

An iron-engraved stone arch runs across the north wall. In the center, a likewise metal plate is inlaid on the floor. The plate is magnetized - if a character with metal armor passes over it, a current builds up in the arch to the north - drawing said character towards it. Any characters in the room carrying ferrous metals must roll against their Strength score: 3d6, if they are only carrying some metal items - like a dagger or sword; 5d6 if they are clad in mail or plate armor - if the result is equal or under, they are able to successfully evade the magnetism. Otherwise, their equipment will stick to the arch. 

Characters on the south side of the room, further away from the arch when it activates, may roll 2d6 and 4d6 instead.

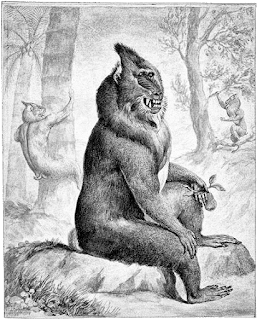
Mandrill - Sketch for the Museum Leverianum; Charles Reuben Ryley

C6 - Hall of Voices

As the characters enter this room, they can hear the Veterans in C8 in discussion. Those Veterans are not aware of the effect. If the party continues moving - the voices dissipate and the effect does not manifest again.

C7 - Chapel of Monkeys

Wooden benches are thrown about and damaged in this room. Along the south wall is a detailed mosaic of a saint, defaced. A troupe of 11 Rock Baboons (B41) have made their home there and will defend it. Along the altar are old offerings amounting to 200 sp and 300 gp.

C8 - Foyer

Along the walls portraits of saints in various states of decrepitude are hung by small shelves, some with votive candles collecting dust. Three Veterans (B44), allies of the searchers in C3, are standing watch - cagey waiting for the return of their friends, having come in through the secret door in C9, and covering the band's intended egress route.

C9 - The Mausoleum of the Burned

Urns are placed into alcoves all along the walls. There are ashes in them - and nothing of value. Under a particularly fat urn in the south wall can be found a mechanism to unlatch the secret door.

D - Prison

D1 - Mess

Tin and lead pales, some with chips and holes, are spread about the north part of the room. The corners and floor are covered in thick spider webs. A nondescript Gnoll-sized spider-silk bundle can be seen in the south east corner.

Three Black Widow (B43) spiders are hiding in the space - waiting for one of the creatures trapped in D2 or D3 to make a break.

D2 - North Cell

Four Gnolls (B35) are resting here - having barricaded the door against the spiders. They had been ambushed while in the D1 space by the Troglodytes currently in D3 - contention over the cave corridors - but had retreated when the spiders in appeared.

D3 - South Cell

Seven Troglodytes (B44) are resting and debating what to do next in this space. Having ambushed the Gnolls earlier, they had superior numbers, however had been unable to pursue the Gnolls into D2 without first dealing with the spiders in D1.

There is a 4-in-6 chance that the Troglodytes will be carrying a key to one of the locked doors in section E - determine randomly which one if the key is present.

D4 - East Cell

Two skeletons - one still manacled to the wall, the other a pile of bones on the floor, mournfully stare at the door. A tin collects dust by the door.

E - Trog Lair

E1 - Atrium

The ceiling of the room is tall, double that of the other rooms in the complex. In the center of the room is an oblong ovaloid mosaic depicting a crustacean. In the ceiling above the mosaic is a dome parallel to its shape - in the center of which is embossed a fish's skull. The room smells of Troglodyte.

The ovaloid mosaic is a trap. If a character steps into the mosaic, they will be sucked down - as quicksand - in 1+1d4 rounds: Save vs Paralysis to avoid. If a character sucked down is not rescued, they will suffocate.

E2 - Sanctum

Empty concrete amphora - chest high - line the north and south walls. Against the west concave wall, a curved shelf houses several scrolls. The scrolls contain the following magic spells:

  • Hold Monster
  • Contact Higher Plane
  • Web (x2)
  • Detect Magic (as Magic User)

One Hobgoblin (B43) dressed in black is searching the space for traps.

E3 - Buried Treasure

Rubble litters the floor - wedging the door and causing the "stuck" condition. On the northern side, most of the room is buried under sand and gravel having fallen in from the ceiling. From underneath the rubble, a tattered banner protrudes: buried. To the west, a similar banner - colored, but with no iconography - hangs from a stand knocked to one side but propped against the wall by the fallen earth.

On the east wall is a chest - locked, its bands styled in the same manner of the banners - containing 600 gold pieces and a thick amulet worth 400 gold pieces. Hidden beneath the rubble are two additional similar chests: one each containing 450 silver pieces: one additionally containing a jade broach (1,000 gp); the other containing two sets of earrings: one with hanging cats from them (1,100 gp), the other with hawks (1,100 gp).

E4 - Latrine

The stench of Troglodyte and Troglodyte refuse is overpowering.

E5 - Pantry

Rotting meat, some lentils, and several giant insect corpses have been stored here, lightly salted. Two Oil Beetles (B31) are rummaging about the mess.

E6 - Barracks

Straw pallets have been laid out around the room. The stink of Trogoldyte is potent in these cots. Four Troglodytes (B44) are gaming among themselves in the space between them. On these Troglodytes can be found 1,000 copper pieces - but in play at whatever game they are playing, 1,000 platinum.


Idol and Altar at Copan; Frederick Catherwood

Public domain artwork retrieved and adapted from OldBookIllustrations.com. Attribution in alt text.

Maze of Moaning

Scale: 10 ft. For a PDF version of this adventure, click HER...