Saturday, April 16, 2022

Brittonica Takes Dolmenwood! (3d6 Down The Line Actual Play Review)

Play-Cast Name: 3d6 Down The Line:
Dolmenwood - Old School Essentials (B/X) OSR Hexcrawl
Where I Listened: YouTube,
Dolmenwood Playlist
Where It's Available: Anchor and supported platforms, including: Amazon Music, Spotify, & Apple Podcasts
System: Old School Essentials
Leather

Thoughts and Review

Dolmenwood - Old School Essentials (B/X) OSR Hexcrawl, a playlist on the 3d6 Down The Line Update, 4/20:
Follow 3d6 Down The Line on Twitter!

@3d6DownTheLine

After the publication of this article, Jon found me! So I pass the savings on to you - for updates and intel on the goings on at 3d6 Down The Line, at least one avenue of social media is available.
YouTube channel refereed by Jonathan Britton - a talented referee and an active member of the Dolmenwood Facebook page, as well as other venues. 

It follows the misadventures of a party of randomly-generated misfits (see, the name of the show!) who arrive in Dolmenwood - the fairy-tale mythic campaign setting so far incrementally released by Necrotic Gnome via Patreon, but soon to be consolidated into a campaign book, and very rapidly become entangled in webs of fantastic and deadly intrigue.

What I Like

Jon's voice.

The first thing that I absolutely adored about this actual play is the low gravel pouring out like a stardust waterfall cascading over the moon: a smiling stream of tears from the man therein as the song of creation pulls his heart-strings, dissipating into the night sky such that merely a mist can quietly lite on the cheeks of snug sleepers like autumn's first snowflakes on a brightening broad-leaf hickory.

Also his presentation.

It's kind of unfair to give too many kudos to something biological in that regard - so instead, I'll likewise give him kudos to his presentation: wherein he guides the stream, his listeners and his players alike, with maps, hand-outs, and other media (presumably, some of which is visible to the viewer, but not to the player, as it contains relevant stats to a monster or location that the party is encountering. So - in addition to the voice that it's presented in, the ref - Jon Britton - has experience or expertise enough with the recording platform to provide incredible context and supporting material for the interested viewer, helping to ground them in the game and setting, Necrotic Gnome's Dolmenwood.

Speaking of Dolmenwood, we come to the next trump card in the 3d6 Down The Line's hand: its handling and exposition of the incredibly deep, detailed, and rich setting as under construction - revealed piecemeal in zines, Patreon posts, and sneak-peaks over the course of years by the Necrotic Gnome organization. Larger things - towns, regions, factions, and major players - are intermixed seamlessly with smaller things - different types of local beers, styles of clothing or mannerisms common to different townships - to produce a rich world: one that almost comes alive as the world might come alive in a well-shot film. The innovation of such a world, its development and publication, of course is at the hands of the writing: but 3d6 Down The Line puts those words, takes those concepts, and weaves them into a narrative, wafts them into the nostrils like a scented candle artfully lit and placed innocuously to cast its warm glow.

This ambiance includes both published products and preview or Patreon products: noting, if you were considering but on the fence about whether or not the Necrotic Gnome Patreon would be for you - 3d6 Down The Line is a great decision making aid on that regard. The actual play shows off the publications, themselves, gives a hint as to the contents therein, and shows off how those publications flow, how they contribute in a real game: information invaluable to the budget-constrained referee.

Wondering if Dolmenwood is right for you?

Jon Britton can help.

Lastly - while not the last of 3d6 Down The Line's net virtues, the last I intend to highlight - the first episode in the Dolmenwood playlist is a Session Zero.

But CWR, haven't you spoken on other platforms against session zero? Yes. Yes I have. However - that's in relation to its application to your home game: so while you - playing in a campaign run by me - should not expect a session zero, in the context of the campaign actual play, 3d6 Down The Line provides one, illustrating the utility of a session zero and what you, as an aspiring referee, should plan on if you are going to run one. The purpose of a session zero is - or, should be - the creation of characters, the discussion of house rules (rule zeroes), and the establishment of the setting and tone of the campaign. In his session zero, Jon actually has the video broken down into these various steps and segments! So not only does he illustrate the utility of bringing the party into the same page, but also he makes it easier for the viewer to navigate, finding the pieces that they are curious about.

Want to see abilities rolled? Go here.

Want to hear about the town and people the campaign will involve? Here, instead.

Additionally, it serves to illustrate the process of rolling stats, deciding on a character based on the stats and - the main reason I bring it up - it features players being convinced of the viability of a character with poor rolls on the character abilities. Spoiler alert - one of the characters rolls a 5 for his Constitution. Constitution. Admittedly, I would have a hard time playing cautiously with a 5 Con character - hoping for a quick death and a re-roll before I got too far behind the rest of the party on earned XP for my mulligan PC - but the character survives! The character moves on. The player opts to make him into a Fighter and will then go on to role play the character in a manner in line with his limitations: he uses more diplomacy, more guile, than a more robust character would - both as a point of mechanical necessity (it's hard to engage in fights when you have 2 fewer hit points per hit die than average) and also as a role-playing opportunity to develop the character's personality, machinations, and method: something that can serve as a lesson for fledgling refs and players alike, coming down off of games where ability scores are more important,

What I Don't Like

Ascending armor class? And you call yourself OSR! Bleh!

(Not really. They do use AAC, but I'm not one to make a scene about it. You do you.)

Really - I only have one complaint against the Dolmenwood hex crawl actual play as presented by 3d6 Down The Line in the linked media: and that has to do with the degree of role play and the resultant impact of that role play on the pacing of the action. From an accessibility perspective - the table is unabashedly (as they should be - playstyle doesn't dictate merit) big role-players: spending a great deal of time in town - on occasion out of it, role-playing between one another - having dozens of conversations with and building complex relationships with dozens of NPCs littering the campaign setting. A night in the tavern can be as important to the narrative that emerges as a battle with the denizens of the deep forest might be. Random encounters - wandering monsters in the wilderness - are an opportunity as much to talk as they are to fight: which, though typical of OSR style gaming (see: reaction rolls), can - when taken to the extreme - preclude the adventure itself. Speaking not lowly of intelligence gathering before a mission - which is a great idea! I love that this AP does that - it takes four whole sessions (so, almost 7 hours of watching) before the first combat sequence: and that combat, though fast, furious, and exciting (as OSR combats at low level can and tend to be), is then followed by more sessions and more episodes of role play.

As a consequence - while this Dolmenwood playlist does an exquisite job illustrating the surroundings, the setting, and telling a story developing the characters (some situations serious, most situations erring to the side of humorous), the long stretches of role play prevent it from efficiently showcasing mechanics. It has a hex map - and it does showcase hex travel - but the travel is less impactful than the people they meet on the road. It does have dungeons - but the time spent in inns, taverns, and courts dwarfs the time spent around the namesake of the game that Old School Essentials seeks to emulate.

To that end - if you are not put off by role play (and typically I am not put off by role play) - this isn't a drag on the experience of watching the stream: however, if you are trying to learn the rules, specifically, or if you are trying to get a bead on what a game might run like were you to try to run it for your friends - the experience illustrated by this party doesn't provide a well-rounded expose of what that experience can (and likely may!) entail.

For Further Listening

There are - on the 3d6 Down The Line YouTube channel - two additional playlists:


Technically, the Blades in the Dark "playlist" is several playlists: each detailing one "episode" of the series, containing videos that make up the episode. Additionally, the channel has several videos that are not organized into a playlist - which appear to chronicle D&D 5th Edition Adventurer's League. 

I have not watched these playlists, so I cannot speak to them, personally: but some references are made to these adventures by the players during the Dolmenwood adventure, which makes me think that the party - or at least some of it - is consistent. With that in mind - if you like the Dolmenwood playlist for its non-Dolmenwood merits (entertainment, narrative, immersion, etc.) - then I would anticipate you would likewise like these.

In Conclusion

In conclusion, 3d6 Down The Line is a brilliant and immersive expose of setting and atmosphere, eloquent in its presentation and evocative in its depictions: even when the players bring the beer and pretzels. It is slower than a lot of actual plays - encumbered by the weight of detail - but for a viewer interested in that detail, it becomes akin to Melville: in that one would consider it less a shortcoming and more a style - a selling point to a particular buyer. It does display the rules of the game - though due to the pacing, the rules fade to the background: something that is fine when used by a Dolmenwood enthusiast or a connoisseur of fantasy YouTube channels, but can become a hindrance for someone who is actively trying to learn how to play the game. Under that rationale, I rate 3d6 Down The Line's Dolmenwood - Old School Essentials (B/X) OSR Hexcrawl (that's a mouthful!) Leather.

It does what it sets out to do. It tells a good story. And as such, it's worth the watch time for someone interested in the story being told and invested in the adventure - without letting the rules get into the way of the viewer's experience.

Delve on, gentlemen - and best of luck in Prigwort and beyond!


Logos and imagery for 3d6 Down The Line (formerly Brittonica) are property of the 3d6 Down The Line organization, as utilized on the 3d6 Down The Line YouTube channel. ClericsWearRingmail does not lay claim to any of them or to any of the content linked to by them: including images in this critical review for illustrative purposes and clarity under US Code, Title 17, Section 107.

Saturday, April 9, 2022

The Under-Warren

Scale: 10 ft.
Click HERE for a PDF version of this adventure!

A maze of catacombs and masonry hallways - teeming with creatures (and their troves!) seeking shelter from the cursed sunlight! Adventure awaits those courageous enough to descend!

A little keyhole icon means the door is locked.
A little "S" through the door means the door is secret.
The other icon - which is supposed to look like a muscly arm - indicates the door is stuck and must be forced open.

Suitable for 1st to 3rd level characters.

Gargoyle Dragon Fountain Figure; Pixabay user arjane

A - Entry

Stairs lead down into an octagonal space - large double doors facing the cardinal directions: statuary embedded into each of the walls between them.

The faces of these grotesques appear to follow you as to move, but on inspection, are fully mundane.

B - South Wing

B1 - Theater

To the north, a raised platform - curves with the wall, which is draped with heavy curtains. In the central and southern half of the room, benches in various states of disrepair face the platform. Along the south wall are three alcoves containing stained glass backed by lead sheets: no light illuminates the glass from the far side.

The entrance to C2 is a hole in the wall hidden by the curtains.

The entrance to B3 is hidden behind the glass artwork in the furthest alcove: which can be removed by popping a handful of clamps designed to hold the glass in place.

B2 - Lecture Hall

In the south-east section of the square portion of the room is a raised area, maybe six inches off the ground, with a stain on the floor - worn, scratched, and discolored - in the shape of a lectern's base. In the stained area is a loose tile - under which can be found a recess containing:

  • 2 round emeralds (100 gp each)
  • A large, square-cut sapphire (500 gp)
  • A flawless diamond (1,000 gp)

Behind, in the arching wall to the south-east, a further raised section houses a dozen dead plants and a few amphora. 

Roosting in the amphora is a single Stirge (B43).

B3 - West Crypt

On the walls of this room are nooks sized to hold a cadaver in repose. In the center of the room is a stone sarcophagus. The sarcophagus is empty. On the north wall, a faded image appears graven on a lead sheet - which is truthfully a secret pass to B1. The secret way cannot be opened from this side, but can be forced on 1-in-6: which will break the mechanism and prevent replacing the portal.

Five Lizard Men (B38) are chuckling with each other in the room: having dumped a few skeletons out of the walls and repurposed the lidded sarcophagus as a table. Between them, they have 2,000 gold pieces.

B4 - East Crypt 

The walls of this room contain cadavers of various age - though all decayed. They have nothing of value - any articles buried with them having rusted or decayed.

B5 - Shadowed Fane

Against the wall to the south, directly opposite to the door, a hemispheric planter bed containing ashy soil rises from the floor. Above the planter hangs a heraldic shield.

On the angled walls to the east and west of the door are sconces with lanterns welded to them - inside the western lantern is a marble on which Continual Light has been cast. Of the planter, a shadow has been cast against the wall opposite the light source - in which 2 Shadows (B41) lurk.

The shield hanging from the wall is actually magical, but appears dingy and old to any Neutral or Chaotic character. When used by a Lawful character, it is a +3 Shield; when used by a Neutral character, a +1 Shield.

If the characters dig into the ashy soil, they will find a Potion of Treasure Finding and 2 rubies carved to resemble skulls (500 gp each).

B6 - Scriptorum

Bookshelves line the east wall of the chamber, two escritoires are propped against both of the northern corners, and a basket with map tubes in it sits in the south-west corner. The bookshelves contain nothing of value - their contents having been lost to rot - but among the map tubes, three spell scrolls can be found, inscribed as follows:

  • First Scroll: Invisibility, Ventriloquism, Infravision, Transmute Rock to Mud, Charm Monster
  • Second Scroll: Detect Invisible, Phantasmal Force, Light, Hold Monster, Ventriloquism
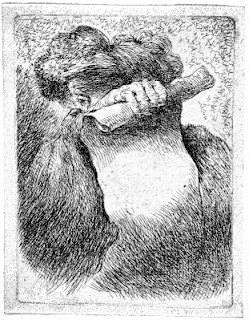
    Man With a Scroll; Giovanni Benedetto Castiglione
  • Third Scroll (Clerical): Sticks to Snakes, Bless, Light (x2), Protection from Evil 10’ Radius

Beneath the desk to the west is a trapdoor to B7.

Inside the desk to the east can be found a sack of 2,000 electrum pieces.

B7 - Bee Cave

On the underside of the trapdoor entrance, a nest of Killer Bees (B37) is anchored. There are three nests total - between them, 8 bees. Opening the trap door will damage the nest, angering the bees.

Beyond the bees in the darkness are two locked chests - one containing 4,000 electrum pieces, the other 5,000 gold pieces - and a skeletal corpse: larger than a human, clad in a strange, abrasive robe, and bearing an odd skull, bearing multiple spurs - almost small horns - that pattern symmetrically up the face. Inside the chest cavity of the skeleton is a four-chambered box:

  • One chamber contains five black pearls (10 gp each)
  • One chamber contains five alexandrites (50 gp each)
  • One chamber contains five gem-quality lazulites (100 gp each)
  • One chamber contains a wet, gouged eye of brown iris.

The eye will not decay; if mystically implanted into an empty socket, it will grant a Witch Sight that sees through the illusions of the fey; but will also drive its host totally and hopelessly insane.

C - North Wing

C1 - The Regent's Skull

The room is thick with cobwebs. To the south, a lonely skull bedecked by a wooden crown sits on the floor.

C2 - Tunnel

Cowering in this natural rock tunnel are two Mediums (B39). One, his spell is spent; the other has memorized Floating Disc. Between them, they have 100 electrum pieces. They had come into the dungeon with a party - but were roughed up by the Lizard Men who have since retreated to B3. Having escaped the fray, the two are arguing about how to likewise escape the labyrinth before their light source goes out.

C3 - Auditorium

Ringing the curved north-west wall are bleachers - six rows - rising eight feet into the air at their apex. Under the bleachers is a hole in the wall leading to C2, concealed - but accessible to the determined.

C4 - Medusa's Lair

Curtains, heavy and dark, resembling those in C3 have been used to soften the south and west walls. On the east wall hang several long tapestries depicting plants. Along the north wall are statuary - amazing in their simile to life. On a divan in the south-west corner rests a Medusa (B39) - 2-in-6 chance she is sleeping. Around her are rare herbs and incenses, worth 3,000 gold pieces; and 4 gold candle holders - five feet in height - worth 100 gold pieces each. Her wardrobe - misfitting to most - is rare silks and satins, worth a further 3,000 gold pieces. She wears an amulet with a smooth circular talisman on it - she is unaware of what it does.

Medusa; Walter Crane

The secret door to C6 is hidden behind a tapestry and activated by a handhold with four buttons: pressing the first, third, and fourth will open the latch. The door - and its function - is known to the Medusa.

C5 - Observatory

Ringing the space in parallel to the walls is a soft, continuous bench. The ceiling is vaulted - coming together in a square 20 feet above the floor. Inlaid in the ceiling is a star-pattern of the winter sky - constellations outlined in citrines (worth 100 gold pieces, total, if pried from the ceiling) and miscellaneous stars in quartz (a further 80 gold pieces). 

C6 - Training Room

Four rotating pillars are positioned equidistant from one another in this room. From them protrude several short rods. The pillars will spin freely on hidden spindles. The rods are filled with a toxic powder. Characters who spin a pillar - if they spin them too quickly - cause the powder to release: forcing all characters in the room (or any character entering the room for the next turn) to Save vs Death.

The hazard does not reset itself - once all four are spent, the hazard recedes.

C7 - Ape Den

Four White Apes (B30) have made a mess of this room: furnishing it with detritus. Among said detritus is a mostly undamaged urn - inside which can be found a ring worth 70 gp.

The secret door to the east is a sliding panel in the stone, activated by a handle hidden in the mortar along its top seam. The secret door to the south is a false wall that pushes inward, opening like a double door - the termination of the resulting hallway operates the same way from the hallway side. The apes are aware of the south door - but not the eastern one.

C8 - Quarry Hall

Rubble lines the floor in this space. The floor and walls are the same as the rest of the dungeon - it is not unfinished nor collapsed - but loose, irregular stone has been strewn around the room.

The secret door to the west is activated by a pull handle on the east wall - directly across from it, but hidden behind a loose brick.

C9 - Dragon's Coffin

The east and west walls of the room are lined with nooks sized for cadavers - but are filled with votives and dried funerary herbs. In the center of the room to the south is a slab, flanked by brass candle holders and perched on a stone box. The slab will slide off - but if it does, it releases a flammable gas. If an open flame is in use as a light source, this gas will ignite - forcing a Save vs Dragon's Breath to avoid immolation: failing the save results in 3d8 damage and may ignite flammable gear; passing halves the effect.

A generous referee might hint at the trap with an odd odor emanating from the slab as the party starts to fiddle with it, or noting that torches burn brighter and more intensely in this room.

D - East Wing

D1 - Dancing Candles

Five candles, equidistant from one another, float - slowly circling counter-clockwise - in the center of the room along an invisible path roughly 10 feet in diameter. A character who steps into the center can see five holes in the walls that appear to be moving in parallel to the doors. Inside each hole is a small idol made from electrum. Party members who can reach the walls - including characters not in the circle, who would not be able to see them - can remove the idols: which are worth 60 gp each. If an idol is removed, its corresponding candle is snuffed out and falls to the floor. 

The secret door to the south is a standard door concealed behind an illusory wall. Some fumbling is necessary to find the handle - but not too much.

D2 - Ochre Hall

This wide hallway has a red mosaic tile stripe - 15 feet wide - running from east to west. On the walls heading west-bound, torches (mostly unlit) are pinned at 10 foot intervals on wall mounts. They can be removed and are standard torches. 

The corridor to the north-east, the torches continue until the door to D6.

The corridor to the south-east, the torches continue until the door to D5.

An Ochre Jelly (B40) is leaning against one wall - eating one of the torches.

D3 - Statuary Hall

A red mosaic tile stripe - 10 feet wide - runs east to west across the southern portion of this room. Statues - staggeringly life-like - line the south wall. The secret door to the west is opened by turning the last statue on that side on a pivot, causing it to face the location of the door.

Floating through the air are 4 Killer Bees (B37).

D4 - Hidden Treasure

In the northern section of the room, mundane items appear to be stored. Brooms, mops, ceramic pots, and ratty linens. In the protuberance to the east, a pile of gems and jewels can be seen.

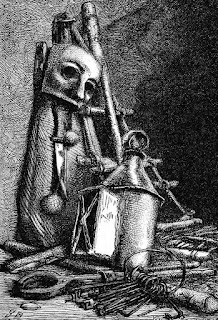
Tools of the Trade; Gustave Brion

The gems and jewels are an illusion - concealing a vertical pipe with several trip-lines running to the floor like tent lines. A character interacting with the illusory treasure has a chance of tripping one of the lines - which results in a cylindrical stone piston dropping from the ceiling, extending spearheads in transit. Save vs Paralysis or the character is crushed to death.

A character which investigates the northern section can may find a loose tile on one side, under which is a cache containing 300 silver pieces, 100 gold pieces, a garnet worth 50 gp, and an obsidian carving worth 100 gp to a collector.

D5 - Homage Chamber

The walls to this space contain alcoves, one to a side on the six sides to the east and west, shaped like half a bullet inlaid into the wall, such that one might stand in it. On the north wall is a relief - circle within an octagon within a triangle: point facing upwards. In the center of the room is an ovaloid, concave depression; north of which is an elevated octagon: maybe two inches from the floor.

The room is decidedly cooler than the surrounding rooms - and if a character stands in one of the alcoves, a distant song can be heard, male tenor voices: their words just too distant for understanding. If a character stands on the octagon, they suffer a sudden and severe flashback - where white-robed figures stand in all the alcoves and a bloody body rapidly expires in the indentation on the floor. Details are impossible to make out - as the vision is no more than a split second in duration - but the tone should be visceral.

The secret door to the north can be activated by placing the talisman worn by the Medusa in C4 into the embossed circle in the north wall and turning it.

D6 - Blue Atrium

On the floor is a circular, blue mosaic, with a red ring 1/3 of the way in to its diameter. Against the east wall is a stone trough, empty. Four Lizard Men (B38) are investigating, searching the south wall as though seeking something. There is a secret door to the south - it is activated by placing the talisman worn by the Medusa in C4 into the center of the circle and pressing down. The second secret door - to the north - is activated by a pull-handle, hidden behind a loose brick in the wall slightly to the west of the actual portal.

Outside the door to the west, torches mounted on wall sconces line the wall at 10 foot increments in a southward direction.

D7 - Reflection Chamber

A shallow pool of mostly clean water sits against the south wall - around ten feet across to five feet from the wall. Along the north wall is a curved bench with cushioned seating. The secret door to the south can be unlocked by a lever hidden in the pool near to the door, itself. Thrown into the pool can be seen silver pieces - 900 in total.

The seats on the cushions are fixed, however can be ripped off the frame (treat as a Stuck Door). There are five such cushions to haul up: on the fourth one from the door, stitched to the underside is a pouch containing jewelry:

  • A signet ring with the head of a ram (value 800 gp)
  • Two sets of plated earrings (800 gp each)
  • A single large amulet, inset with a ruby and encrusted with citrines, the chain of which is made of square gold chain links (value 1,500 gp) 

A Ram's Head; Pauduan

T - Lone Traps

T1) A square of wan light is illuminated on the floor taking up most of the 10 by 10 space by the door. Any character or item which enters the space fully finds themselves confined within it - a wall of force preventing their egress. Items or characters partially entered may feel a tugging sensation - like moving through liquid - but will not be prevented from egress. Notably, the air is very stale in the space - as the barrier is sealed: any character trapped in the space will start to suffocate after 1 dungeon Turn, dying after 2. A Darkness spell - reversed of Light - will allow free passage into and out of the space, likewise refreshing the air in it. Other magic or player ingenuity (such as, say, putting a pipe half-in to allow for breathing) will function (or not) at the discretion of the referee.

T2) What appears to be a door leading North is a concealed spike trap. A referee may telegraph the effect with blood spatter on the walls or floor near to it. The door opens outwards (towards the south) and appears stuck, albeit only slightly: opening on a 4-in-6 rather than 2. If successfully forced, any characters involved in the forcing (or any in the front rank, alternatively) are subjected to an attack as several pointed spears jolt out of a shallow ingress on the far side. The attack is at THAC0 17 for 1d8 damage.

T3) A door - locked - opens outwards, towards the west. The floor near to the door is pitted and uneven. If opened, however, there is no room behind it: instead, a vat of corrosive liquid pours out into the corridor. Any character within 15 feet of the door suffers 2d8 points of damage from the combination of skin exposure and inhalation of fumes: a Save vs Breath halves the effect. Additionally, any character who fails their save loses any footgear they are wearing to the substance - at the discretion of the referee, magical footwear may be allowed a save of their own to avoid destruction.

T4) Torches, unlit, are hanging in sconces at 10 foot increments in the hall leading to this space. The torches end when the hall turns northward. In the center of the wall across from the turning point is the bronze head of a goat, its mouth open. If a character puts a torch into the mouth (or crowbar, really - anything of approximately 2 inch or less diameter that is firm enough to serve as a lever) the head will turn. If turned upside down - such that the mouth points upwards - a click is heard and the trap is disarmed.

A pit trap has been dug into the floor in the 10 by 10 space to the south of the door to D5. If the door to D5 is opened without deactivating the trap, the pit will open, dumping anyone inside into a pit of spikes: 2d6 for the fall, plus 1d8 further for the spikes. A generous referee may allow a Save vs Paralysis to avoid.


Public domain artwork retrieved from OldBookIllustrations.com, the National Gallery of Art, and ReusableArt.com and adapted for thematic use. Attribution in alt text.

Saturday, April 2, 2022

Table Generator

The Editions of Caxton and Wynkyn de Worde; Cecil Aldin

One of the key things levied at me in terms of both this blog's utility and the utility of the OSR blogosphere in general is the preponderance of resources - table generators in particular.

So, though I'm not sure I understand: I'm here to help and like to contribute. Presented as follows, a procedural table generation mechanism. Delve on, readers!

1. Roll 1D20 for Type

The type of table informs its purpose and features.

1d20 Result 1d20 Result
1 Accent
11 Drum
2
Altar 12 End
3
Billiards 13 Foyer
4
Butterfly 14 Hutch
5 Card 15 Kitchen
6
Coffee 16 Nightstand
7
Conference 17 Ottoman
8 Console 18 Patio (or Picnic)
9
Dining 19 Pub
10 Drink (or Swivel)
20
Workbench

2. Roll 1D4 for Shape

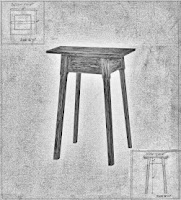
Table; George Fairbanks

The shape of a table refers to the flat surface on which items can be placed.

1d4 Result
1 Polygonal
2
Rectangular
3
Round
4
Special

A "special" shaped table has a surface that is not standard, but instead adapted to the purpose of the table - perhaps it is horseshoe shaped, to allow a presenter in the center; perhaps it is zig-zag shaped, allowing multiple seats to face opposing directions, but not each other. Referee discretion.

3. Roll 1D6 for Style

Blowing Out a Candle; Gilbert C.
The style of the table refers to the finish and decorative elements of the table.

1d6 Result
1
Chic
2
Demilune
3
Industrial
4
Modern
5
Nordic
6
Trestle

4. Roll 1D3/10 for Material

The material is the primary material from which the table is made. At the referee's option, a second roll can be made to determine an accent material.

  1d3
  1 2 3
1d10 1  Ash (wood)
Juniper (wood) Porcelain
2  Beech (wood) Laminate Quartzite (stone)
3  Birch (wood) Larch (wood) Rosewood (wood)
4  Brass (metal)
Limestone (stone)
Silver (or Gold)
5  Cedar (wood) Mahogany (wood) Slate (stone)
6  Cherry (wood) Maple (wood) Soapstone (stone)
7  Fir (wood) Marble (stone)
Spruce (wood)
8  Glass Oak (wood) Teak (wood)
9  Granite (stone)
Onyx (stone
Walnut (wood)
10  Iron (metal)
Pine (wood) Yew (wood)

Table; Frank Wenger

5. Roll 2xD4 for Seating

Roll 1D4 and multiply the result by 2. The resulting number is the number of people who can use the table at once. A table which logically should not have seating around it instead can be assumed to be standing-room.

To account for larger tables, the die should explode - that is, if a 4 is rolled, roll again and sum the result, until such time as the result of the die fall is not a natural 4.


Public domain artwork retrieved from the National Gallery of Art or OldBookIllustrations.com and adapted for thematic use. Attribution in alt text. 

April Fool's. ;-)

Saturday, March 26, 2022

N-Spiration: Hawk the Slayer

Rewind to the 2000s. I'm in college, the OSR is (unbeknownst yet to me) just beginning to take shape, and the world is a mildly younger place - one in which Netflix still sends you DVDs in the mail instead of streaming its own original content. The fortunate we - that is, my house-mates and I: one knew how to cook, one had a Netflix account, and I had a working vehicle; by our powers combined, I'm told, forming a functioning adult - were to receive one such DVD to watch around the old idiot box together. Admittedly, we might have ordered the Mystery Science Theater 3000 version, but the film about which I'm talking - the sword and sorcery "classic," Hawk the Slayer.

N-Spiration: Hawn the Slayer

About the Film

Originally intended as a historical fiction, 1980's Hawk the Slayer is the brain child of Terry Marcel and Harry Robertson - who, after learning of their shared affinity for the Sword & Sorcery genre, added the title character, Hawk's, magical sword - and from there, the story evolved into an inescapably fantasy experience. Be it the Elf, "Giant", or Dwarf who accompany Hawk on his mission, the witch that he uses to re-unite them and who assists the party in their mission, or the central conflict - a brother's envy over a mystic imbued sword - this movie is quintessentially a D&D experience: as a party of adventurers use their might and their wits to navigate through a semi-episodic series of events, culminating in a cohesive narrative and cinematic climax.

For those interested in seeing Hawk the Slayer, it's available to stream online:

It's likewise available on DVD or VHS for those interested enough to search it out.

Why Hawk?

First and foremost, to be clear, Hawk the Slayer is not what one would call a "good" movie. This might come as somewhat of a surprise considering the casting and participation of Jack Palance, perennially acclaimed and recipient of decades of cinematic awards and accolades. However - for those with a taste for the hokey - Hawk the Slayer delivers a fun experience with its low-budget camera "techniques" (reversing footage of a thrown object to simulate telekinesis; at least one entire fight sequence shot in slow motion; cutting back and re-playing firing sequences to present rapid-fire archery; ...), its 70's classic soundboard (an Elfish accent reminiscent of 2-XL; sorcery signaled by synthesizers; ...), and its somewhat cardboard-cutout characters, and character motivations. The film is rated PG despite a body count, according to IMDb, of 116 - making it a fairly good fit for a younger audience: one too young to start asking too many questions or drawing too many conclusions based on better produced or better written franchises.

So, if it's a bad movie, why are you recommending I watch it? I didn't say it was a bad movie - only a movie that falls into what I lovingly refer to as the Mystery Science Theater Category. Its a film that comes off as unintentionally funny and makes a good inebriated romp with your friends and, on top of that, may serve to inspire encounters and scenes for a beer-and-pretzels game.

To speak to the merits of the film for the budding OSR player or referee, Hawk the Slayer has two main elements going for it - the first of which being party dynamics. The core group supporting Hawk in his quest consists of two ranged fighters - the bow-master Elf and the crossbowman (with a rapid fire crossbow: but we're beyond the point where I poke fun at the film's B-movie qualities) - and two melee fighters: Hawk, himself, and Gort, the Giant. The Dwarf, Baldin, fills the role of quintessential Thief - being aware of his own stature, he takes advantage where he can - hiding, ducking, flanking, and I believe engaging both at range and in melee. This is important, as it recognizes his core competency is outside the brawl. Further, a sixth party member - a sorceress (read, Magic User) - helps outside of combat by teleporting party members, by divining the location of sought foes or other elements, and similar magic. But don't M-Us throw fireballs in real D&D? Yes - they do - but the sorceress is important for a couple reasons: first, she doesn't fight in combat! The Magic User knows her limits and avoids battle. Second, not all magic users have the flashy spells - in procedurally stocked dungeons, there is no guarantee you will find the flashy spells you're looking for, and more so, it highlights that other spells: read, the divination in particular - can be more useful. If your party knows what to expect when going into an adventure - if they have scouted the location safely via a scrying pool - they are going to encounter a lot more success, know to bring the right equipment, and anticipate challenges that they can then plan to overcome. Player. Skill.

Finally and furthermore (and, warning, a spoiler is to follow: if you have not seen the movie and have been inspired to see the movie due to this glowing review, skip to the next heading) Hawk the Slayer offers an interesting perspective relevant to some modern OSR experiences: life without a Cleric. While the sorceress is helpful and essential - as discussed above - there is no divine magic, to my knowledge, in the film. There is an Abbess and nuns, holy women, but they are either all 1st level or equivalent limitation because there is no divine magic - no miracles - in the film. The residents of the abbey are helpful (and a hindrance) in their own regards, but nothing to the extent of the "Call healing from the heavens!" that we've come to expect of the Cleric archetype. In the final battle - when the Elf is injured - he afterward must stay with them, bed-rest, in order to heal while other survivors go on to further adventure. (Strict time records, anyone?) 

And why I say this is relevant to the contemporary OSR is twofold: in the blogosphere/podcast ecosystem, there has been some talk about the removal of Clerics - the Lamentations second edition playtest/preview famously removed Clerics as they did not fit the intended esthetic of the game; and secondly - what happens if you just don't roll a good Wisdom between the four of you at the table? You obviously can play a low Wisdom Cleric: old school editions of the game don't preclude spellcasting (though they reward a high prime requisite), one of the key elements of old school play is to think on your feet. While some party compositions can make encounters of different types easier or harder, the biggest impact they have is how you approach the problem. A group that's heavy on Fighters will have a different approach to a dungeon than one that's heavy on Thieves or Magic Users: the balanced party, though helpful, is not mandatory like it is in more modern games: and Hawk the Slayer illustrates this by showing how a party comprised of Fighting Men and Rangers would approach the problem: making use of what he has: a lesson aspiring OSR players would be apt to learn.

For Further Consumption

Not much, sadly.

In 1980, following the film's release, the director - Terry Marcel - was excited enough to be planning a sequel, Hawk the Destroyer, however - as far as I am aware - the sequel never materialized. Further, in 2015, another product, Hawk the Hunter, was attempted on Kickstarter, but met with failure. The Mystery Science Theater version that I alluded to was made in 2014 in the guise of RiffTrax (so, same voices, but different IP) - which is well worth the investment; but, in that half the leads have died, it may be a challenge for the creators to stoke the old flame on celluloid.

That said - as of this year (2022) - Judge Dredd Megazine in its January through April editions, contains a sequel story to Hawk the Slayer in comic form. I have not picked up a copy - physical or virtual - of the issues available to date: as such, I can't comment to their quality or applicability to the gaming mind. If you, dead reader, were to be interested in them - however - I wouldn't fault you for looking them up - and I wouldn't discourage you from letting me know how they read to help me and other readers in our determinations, as well!

In Conclusion

Having revisited the film, researched some on the side, and given detailed consideration - the Garimeter reading for Hawk the Slayer as it pertains to inspire your OSR campaign is 2.

Hawk is sword and sorcery to the bone and hits multiple tropes and expectations within the genre. Additionally, it's set in a faux medieval milieu that would make a fair match for many traditional home brew and published settings, alike. However, the quality of the over-all production - the writing, the cinematography, the acting: the film viewed holistically - is firmly likewise a cult film, a B-movie, and as such, is not for everyone. I have watched it - multiple times - and I have enjoyed it: so, if you, like me, enjoy both old school fantasy adventure and B-tier cinematic experiences, this film is for you.

Delve on, readers!


Hawk the Slayer and all imagery thereof is property of ITC Entertainment and is included in this article for review purposes under US Code Title 17, Chapter 107.

Advanced Dungeons & Dragons and all imagery related to Advanced Dungeons & Dragons is property of Wizards of the Coast and is likewise referenced and used under US Code Title 17, Chapter 107 as a combination of review and parody.

The slide-in of Gary... I got from a meme.

Saturday, March 19, 2022

House of the Hex Hammer

Scale: 10 ft.
Click HERE for a PDF version of this adventure!

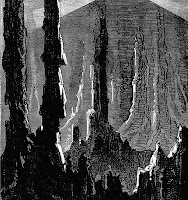
A Long Fusiform Object; Jules Ferat

1 - Entry

A natural cave mouth gives way to hewn stone; a calculated sea of stalagmites disguising the entryway from the outside, but failing to provide protection from one spelunking betwixt them. A stale smell - the smell of natural re-use of an artificial context, an ignorance to purpose - greets whomever enters.

2 - Pirates Pentangle

In the culvert to the south of this room, a skeleton sits atop a pile of silver - 1,100 pieces total. Atop his lap, he has a trapped lockbox (poison needle, Save vs Death), containing a further 500 gold pieces.

Five Giant Shrew (B42) mill about the space.

3 - Riven Room

Six rivulets are cut into the floor, running south-west to north-east. They are difficult to move across quickly - but a character moving carefully will have no issue. Nearer to the door, the rivulets are stained black.

4 - North Hall

An armored skeleton - its equipment of foreign, advanced make - is propped against the north wall at this point. Its armor is as Chain, but weighs as Leather; its sword is mundane gains +1 to hit, but not to damage. Additionally, he carries a key - this will open the doors to either room 9 or room 11, determined randomly.

5 - Tophet

Six pillars of flame blow downward from and into matching cylinders 10 feet into the room from each of the points of the hexagonal wall. In the center of the room, a south-pointing triangle bears burn marks in the center; a studious eye will note a human shaped disturbance in the center; where the scorches are less intense. Hidden under some ash in this portion of the room is a gold-plated amulet worth 300 gold pieces.

The flame pillars will not ignite anything placed within them, but will instead cause what is placed in them to melt like wax, regardless of its consistency or make.

Inlaid in each of the sconces is a thick carnelian worth 10 gp. If removed, the flame will turn to a strange white-blue color. In this new state, the flames will no longer melt what is placed under them - but instead will lay a curse on whatever is placed in them on a 2-in-6.

6 - Guarded Horde

Three small chests, each locked, line the walls. In them can be found 500 silver, 500 silver, and 200 gold plus 100 silver. Just beyond the door is a depression in the floor in which resides a Grey Ooze (B36). The ooze is difficult to see, as it appears part of the stone floor: mechanics of which are at the discretion of the referee as to how to spot it, lest a character misstep.

7 - Statue

In the alcove to the north-west is a statue - a gargoyle (inanimate) - sitting amid a set of long-leaf ferns: fiery red and orange in their coloration. The statue overflows, a viscous, algae-choked water leaks from it, protruding halfway through the room on the northern side. The room is quite humid.

8 - Sauna

A spindly fixture hangs from the ceiling in the center of the room, dangling into a pool of water. The spindle is hot to the touch and constantly causes the water to steam - though it never seems to draw empty.

The room is uncomfortable to be in while in armor - but any character who spends at least 3 turns in it is subjected to the effect of a Cure Disease spell, same as might be cast by a Cleric of appropriate level.

9 - Slime Room

Behind the locked doors lies a pile of gold - stretching across the arc of the north-west wall. The gold is false, however - a thin and fragile veneer over a fragile container. A character handling this false gold has a chance to break it - exposing them to the Green Slime (B36) which is contained within. Due to its limited quantity, however, the timetable under which a victim might themselves turn to slime is doubled.

10 - Victims Past

Against the south wall of this dead-end hangs a skeletal corpse, held together primarily by its clothing and chained to the corners - up, down, east, west - of the wall. It has nothing of value and show signs of burns.

11 - Reliquary

Atop a pedestal is a perfect emerald the size of a fist - it is worth 500 gold pieces. Piled at the feet of the pedestal are 300 silver and 200 gold pieces.


12 - Sanctuary Hall

The Hall of Heidelberg Castle; Georg Primavesti and Peter Speeth - and Chandelier; Florence Huston

In the center of this wide hall is a steel candelabra - characterized by hanging razors which tinkle in the breeze if a door is opened, equalizing the pressure and humidity between this room and another. Any character which attempts to open the door to room 13 without deactivating a mechanism - which is accomplished by placing at least 50 pounds of weight on a touch-plate directly under the candelabra - will trigger a trap.

If triggered, the candelabra starts spinning violently, discharging razors in all directions. 2d3 characters within the room, but not under the candelabra, are randomly targeted - THAC0 18 - for 1d6+1 damage on hit.

13 - Hammer Home

On the east and west corners of the hexagonal space, each, are two large statues, sitting, with gems for eyes. The east statue's eyes are transparent opal; the west, iolite. From their eyes extend yellow and purple beams, respectively, which illuminate most of the floor: overlapping into a sick brown diamond in the center of the room. Two or three pillars - human-shaped - stand with looks of horror about them in the illuminated space.


  • A lawful character which enters into the yellow light, or a chaotic character which enters into the purple, must Save vs Paralysis or be turned to salt.
     
  • A neutral character which enters into either light must Save vs Spells or be turned ethereal - unable to enter daylight on fear of disintegrating, but otherwise retaining their faculties.
     
  • A character of any alignment entering into the brown space must Save vs Death or suffer accelerated decay - as a corpse - being devoted and turned to mud, then ash, over the course of 1d6 rounds.

Hovering in the brown light is a warhammer: its face an equilateral hexagon. The warhammer is magical - +1, +3 vs Spell Users of any variety - and may, 3 times daily, be called to cast the spell Move Earth (X18). If pried free, each of the eyes - regardless of color - is worth 250 gp.

Hammer Sledgehammer Mallet Tool; Steve Buissinne

Hall Traps

T1) At this point in the hall is a pit trap, 30 feet deep, 10 by 10 feet across. Any character stepping over it has a chance to trigger it - and any character falling in suffers 3d6 damage.

T2) Along the bend in this hall, circular structures - wreath like - of black twigs form a series of hoops - almost a tunnel - leading southward. It is a tight fit - only one may pass at a time. Any character passing through the tunnel has a chance to brush against the twigs - and any character which does so accidentally or intentionally must Save vs Poison (re-rolling the first failure if wearing plate). Immediately - either way - the touch site suffers a burning, tingling sensation: on failure, the character will fall unconscious after 1d4 rounds. An unconscious character will stop breathing for 1d4 turns: resulting in suffocation - but can be kept alive by CPR or other equivalent therapy or appropriate healing magic.


Public domain and open license images retrieved from Pixabay, OldBookIllustrations.com, and the National Gallery of Art and adapted for thematic use. Attributions in alt text.

Sunday, February 27, 2022

Appendix-NIMH

Awash with the like of Blippi, Veggie Tales, and Super Truck (to name a few items that have blared on our television in the last 24 hours), I had - on a night not too long ago - had enough of it and steeled myself to find a program, a show or film, that would keep the boys' interest but would also not feel like a punishment as it related to my own. Thinking back - then - to films that held my attention as a child, films that I remembered for their quality and for their critical acclaim: quality, first, as if a toddler me would like it, so likewise might a toddler they; but critically, second, because if reviewers liked it - then surely, they were adults (like I pretend to be) when they wrote their reviews. Thereafter - scanning through free-to-me streaming options, bypassing several gems that I would have had to pay for - I found myself pleasantly surprised to find a version, free-with-ads on the Tubi app, of Don Bluth's 1982 classic: The Secret of NIMH.

N-Spiration: The Secret of NIMH

The Secret of NIMH theatrical poster sourced from BlackGate.com

About the Film

The Secret of NIMH, released on July 16, 1982, based on the book, Mrs. Frisby and the Rats of NIMH, and starring a wide cast of characters including Elizabeth Hartman as Mrs. Brisby (renamed to avoid a lawsuit over the Frisbee disc toy owned by Wham-O Inc.), Dom DeLuise providing air support, Shannen Doherty and Wil Wheaton playing siblings, Peter Strauss, and John Carradine, follows the story of a mouse mother attempting to save her family from both illness and man. Specifically, one man - the farmer - who doesn't truthfully know of the plight going on beneath his field: but that's neither here nor there.

Apart from its financial disappointments - MGM having released it in 90% fewer theaters than the financiers had expected - and its critical acclaim (harboring 93% on Rotten Tomatoes, as of this writing, and an 85% audience score with over 5,000 rating; and with a double-positive rating from Siskel and Ebert following its release and its win of Best Animated Film at the 10th annual Saturn Awards in 1982) - The Secret of NIMH is likely most known for the absolutely and unmistakably phenomenal art and animation on the film - and the prodigious budget and effort required to get it there.

The goal of the studio in the production of The Secret of NIMH was to reproduce the golden era of Disney animation - though Disney had passed on producing the film. The primary protagonist - Mrs. Brisby - reportedly had 46 different color palettes, representing different lighting situations called for in the film; in addition, backlit animation with color gels produce unearthly glows and multiple passes on the camera creating translucent effects - lending an ethereal quality to many of the scenes. All in all - the movie draws you in and tells a complex story within a framework that a child will understand.

Riveted, indisputably!

Mine did, at least.

Why NIMH?

This commentary may contain spoilers. Swim at your own risk.

Why should I, as an OSR referee, watch The Secret of NIMH? Two reasons: swords and sorcery. This film contains every element of an OSR game - ranging across level bands and across class niches. The rats themselves live in a society reminiscent of Camelot - fighting with swords, knives, and even once with Gary's favorite: a pole arm! Not enough sorcery in your sword and sorcery? Bam - the leader of the rats is a freaking wizard.

Regarding the sorcery aspect - most of the mystical elements present in the film manifest themselves through the use of magic items or talismans: some of which can be identified as scientific; others clearly having no secular origin. The way that the magic is used - in this sense - is very reminiscent of magic in Mausritter: a charming, not-quite-OSR game I have not had the opportunity to play enough of but the authors of which, I would be surprised if they had not seen this movie and taken some inspiration.

Further - to expand on themes in addition to elements - the film opens on a wilderness crawl. The primary protagonist has to leave home, brave the dangers of the wild, to make it to a wizened sage - Mr. Ages - in search of relief from a sickness taken to her son. The physician prescribes a medical treatment: something that's important in the context to maintain the groundedness of the film. While none can claim that D&D, as a game, as ever truly been low magic, as magic is accessible essentially to every adventuring party - it's application is limited: a Cleric, in B/X, gains no spells until second level: and doesn't gain the ability to remove diseases until 5th. Is Mr. Ages a low level Cleric? Of course not - but the point is, like many settings and setting design goals set out by OSR referees, the world bears verisimilitude - believability: historical resemblance is not compromised by indiscriminate use of magic to solve problems. Mr. Ages - and Mrs. Brisby - are both entirely human (or... mouse... as may be) and the world they live in is full of dangers and problems that they must solve or endure through wit or through perseverance. 

In this, the characters become more relatable - while at the same time making a nod to the fantastic. When returning with the medicine, Mrs. Brisby is pursued by a house cat. It's a perfectly standard experience on a rural homestead - but when presented from the perspective of the mouse, the film does a brilliant job of making the house cat into a terrifying foe. The creatures name, even, is "Dragon" - ironic humor for the farmer; an apt title for the mice; and a touch of the fantastic for us - the viewers.

Why have you come?

On two occasions worth citing, The Secret of NIMH explores a rendition of the dungeon crawl: once - again - seeing the guidance of a sage, this time in the form of the Great Owl; and then later, in attempt to drug the cat, Dragon, to facilitate movements of the rats. The former entailing a wandering monster encounter and the latter entailing a trap, imprisonment, and perilous escape, both sequences embody experiences that fantasy adventuring parties encounter: experiences which a referee - novice or seasoned - may draw inspiration.

For Further Consumption

You mentioned early on in the review that the film is based on a book of similar title and story. Is the book worth reading? I honestly don't know - I have not read it. I can vouch that it has a 4.15 rating on Goodreads - as of this writing. But I can also vouch that the book does not contain the same mystical elements - as writer and producer Don Bluth added the mystical elements intentionally: one, to create a greater air of mystery; and two, to add a layer of spirituality and depth to the story that wasn't there in the version more geared towards an exclusively younger audience. Knowing what you know, I can guide only so far regarding the novelization.

There is a sequel, I think? And maybe a remake in the works? No. The Secret of NIMH 2: Timmy to the Rescue did not happen: much like Mad Max: Thunderdome did not happen - definitely not agonizingly spewing effluvium on the memory of the original. Didn't happen. 

Of the remake - I am aware of a television series in the work by Fox and a live action / CGI film in the works by original producer MGM: but we'll have to see what happens with either of those particular cash grabs expansions of the NIMH ecosystem. The Secret of NIMH was a passion project - a labor of love: as evidenced by the executive producers taking out mortgages on their own homes to fund finalization of the product: it will be a challenge for corporate direction to produce the same soul, the same art as pours freely from an empowered and impassioned creator or creative team.

In Conclusion

In my first N-Spiration post, I had a kind of tongue-in-cheek scale, rating the film on a scale against itself, implying that the scale should be based on that film due to its brilliance. Between then and now, however, I've had some time to think it over and I've come up with what I'd say is a better scale: one that more aptly reflects the objective of the series. And using that new scale, I rate The Secret of NIMH a solid 1. (It's OSR, remember? Lower numbers are better sometimes.) 

The Secret of NIMH, while not a traditional fantasy, hits all the bases to inspire a referee to run their own thing, to provide a challenge and let the players turn that challenge into an adventure. The combination of thematic elements, mysticism, and adventure - stacked alongside wilderness travel, "dungeon" delving, and problem solving (sometimes with wits, sometimes with swords, and other times with magic) plant this movie thoroughly in the camp of old school fantasy adventure gaming.

If you have not seen it; I recommend seeing it.

If you have not seen it in a while, I recommend seeing it again.

Delve on, readers - thank you for reading!


The Secret of NIMH and all imagery or clips taken therefrom or from promotional material therefor is property of Metro-Goldwyn-Mayer and is used for review purposes under US Code Title 17, Chapter 107.
Advanced Dungeons & Dragons and all imagery related to Advanced Dungeons & Dragons is property of Wizards of the Coast and is likewise referenced and used under US Code Title 17, Chapter 107 as a combination of review and parody.

The picture of my son is property of me - obviously - and the slide in of Grandpappa Gary... I got it from a meme.
No clue beyond that much.

Sunday, February 20, 2022

Vault of the Stag PDF!

Quick update for this week - I've added a PDF version to my Vault of the Stag adventure from a couple weeks back. The original post has been edited to add the link - but for folks who'd seen it once and may not be sitting on the page, F5ing for the alternative medium: I wanted to announce it here in case it was something to which you were looking forward.

Delve on, everyone!

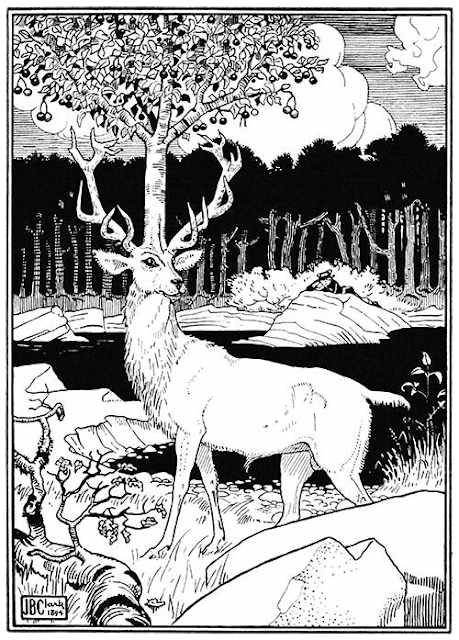
Noble Stag; Joseph Benwell Clark


Public domain image above retrieved from OldBookIllustrations.com and lightly cropped for use.

Secluded Cloister

For a PDF version of this adventure, click HERE Regardi...